SMS Campaigns documentation
It is possible to send out a bulk SMS campaign to a large number of recipients.
The SMS campaign functionality is available in the dashboard of the developer portal. Go to the Dashboard. Log in and click the 'SMS Campaigns' item in the main menu.
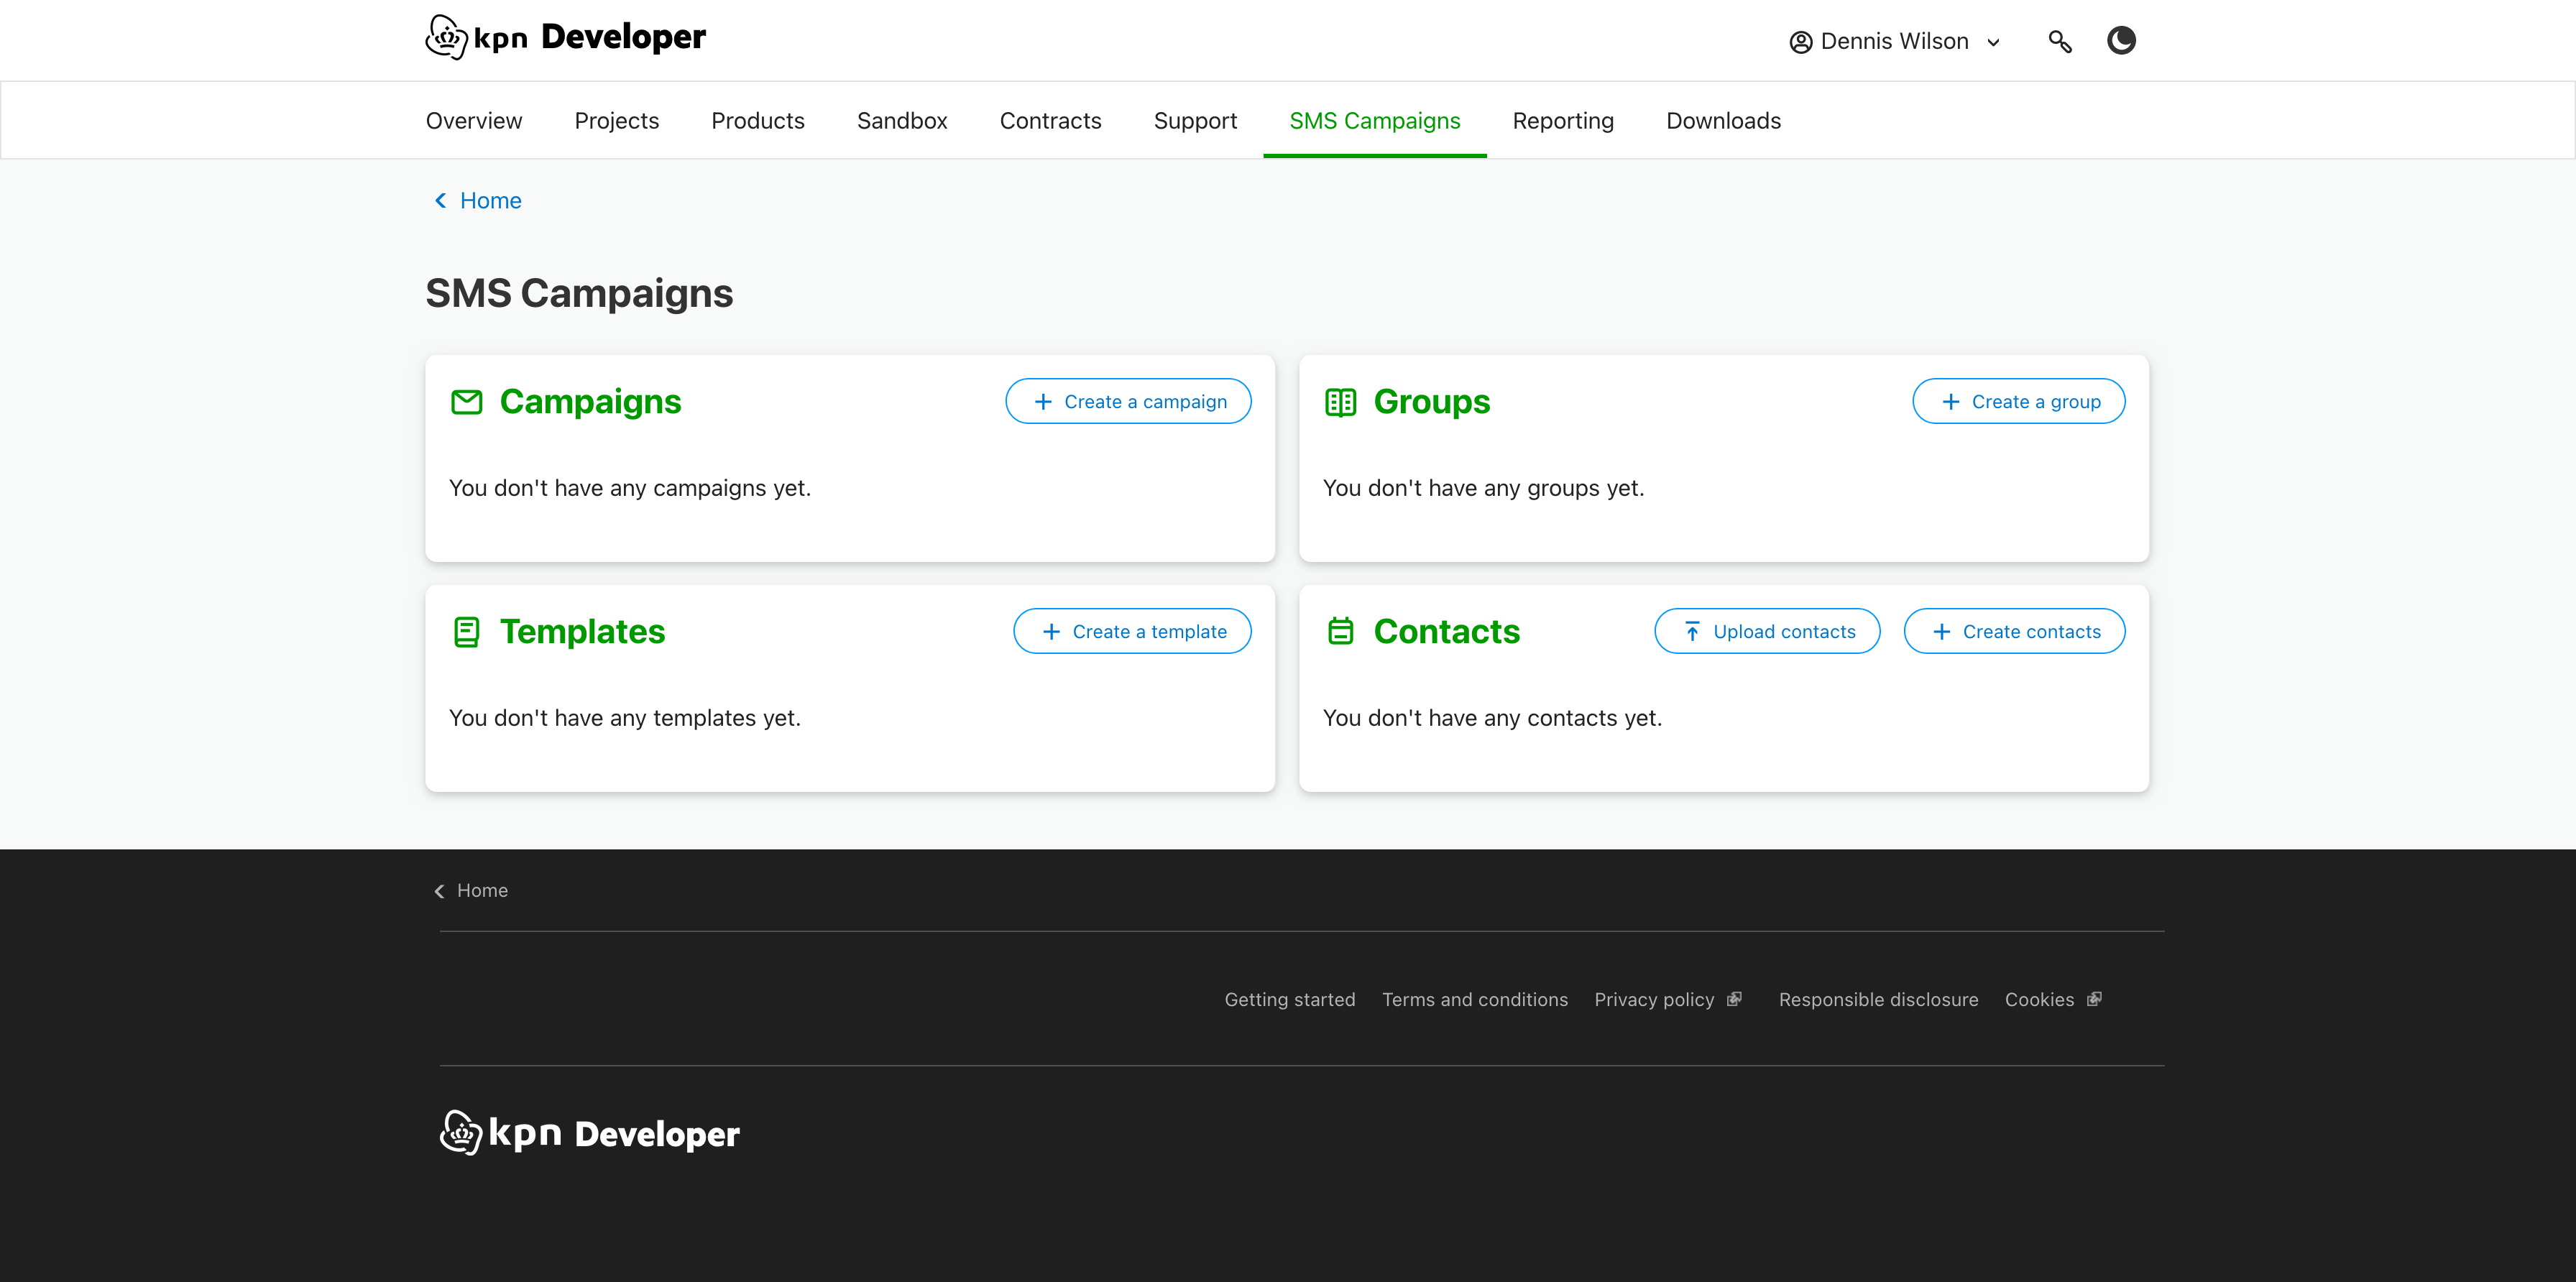
On the overview page, you will find four widgets: campaigns, groups, contacts and templates.
1. Create a campaign with manually inputted data
1.1 Create campaign
- Click the 'Create a campaign' button in the campaigns widget or in the campaign overview.
- Give the campaign a name.
- In 'Step 1: Import data' select 'Manually add data'
- A datagrid with rows and columns now appears. The first column is named 'Phonenumber'. Add the phonenumbers of your contacts in the fields in this column.
- If you need to input more than 10 contacts, click the 'Add 10 rows' button.
- Select a scheduling option in 'Step 2: Schedule sending'. Selecting 'Send now' will send messages as soon as you activated the campaign. Selecting date & time will show a calendar where you can select the date & time in the future that the messages will be sent.
- Click the 'Preview' button. The campaign is submitted and you information is checked.

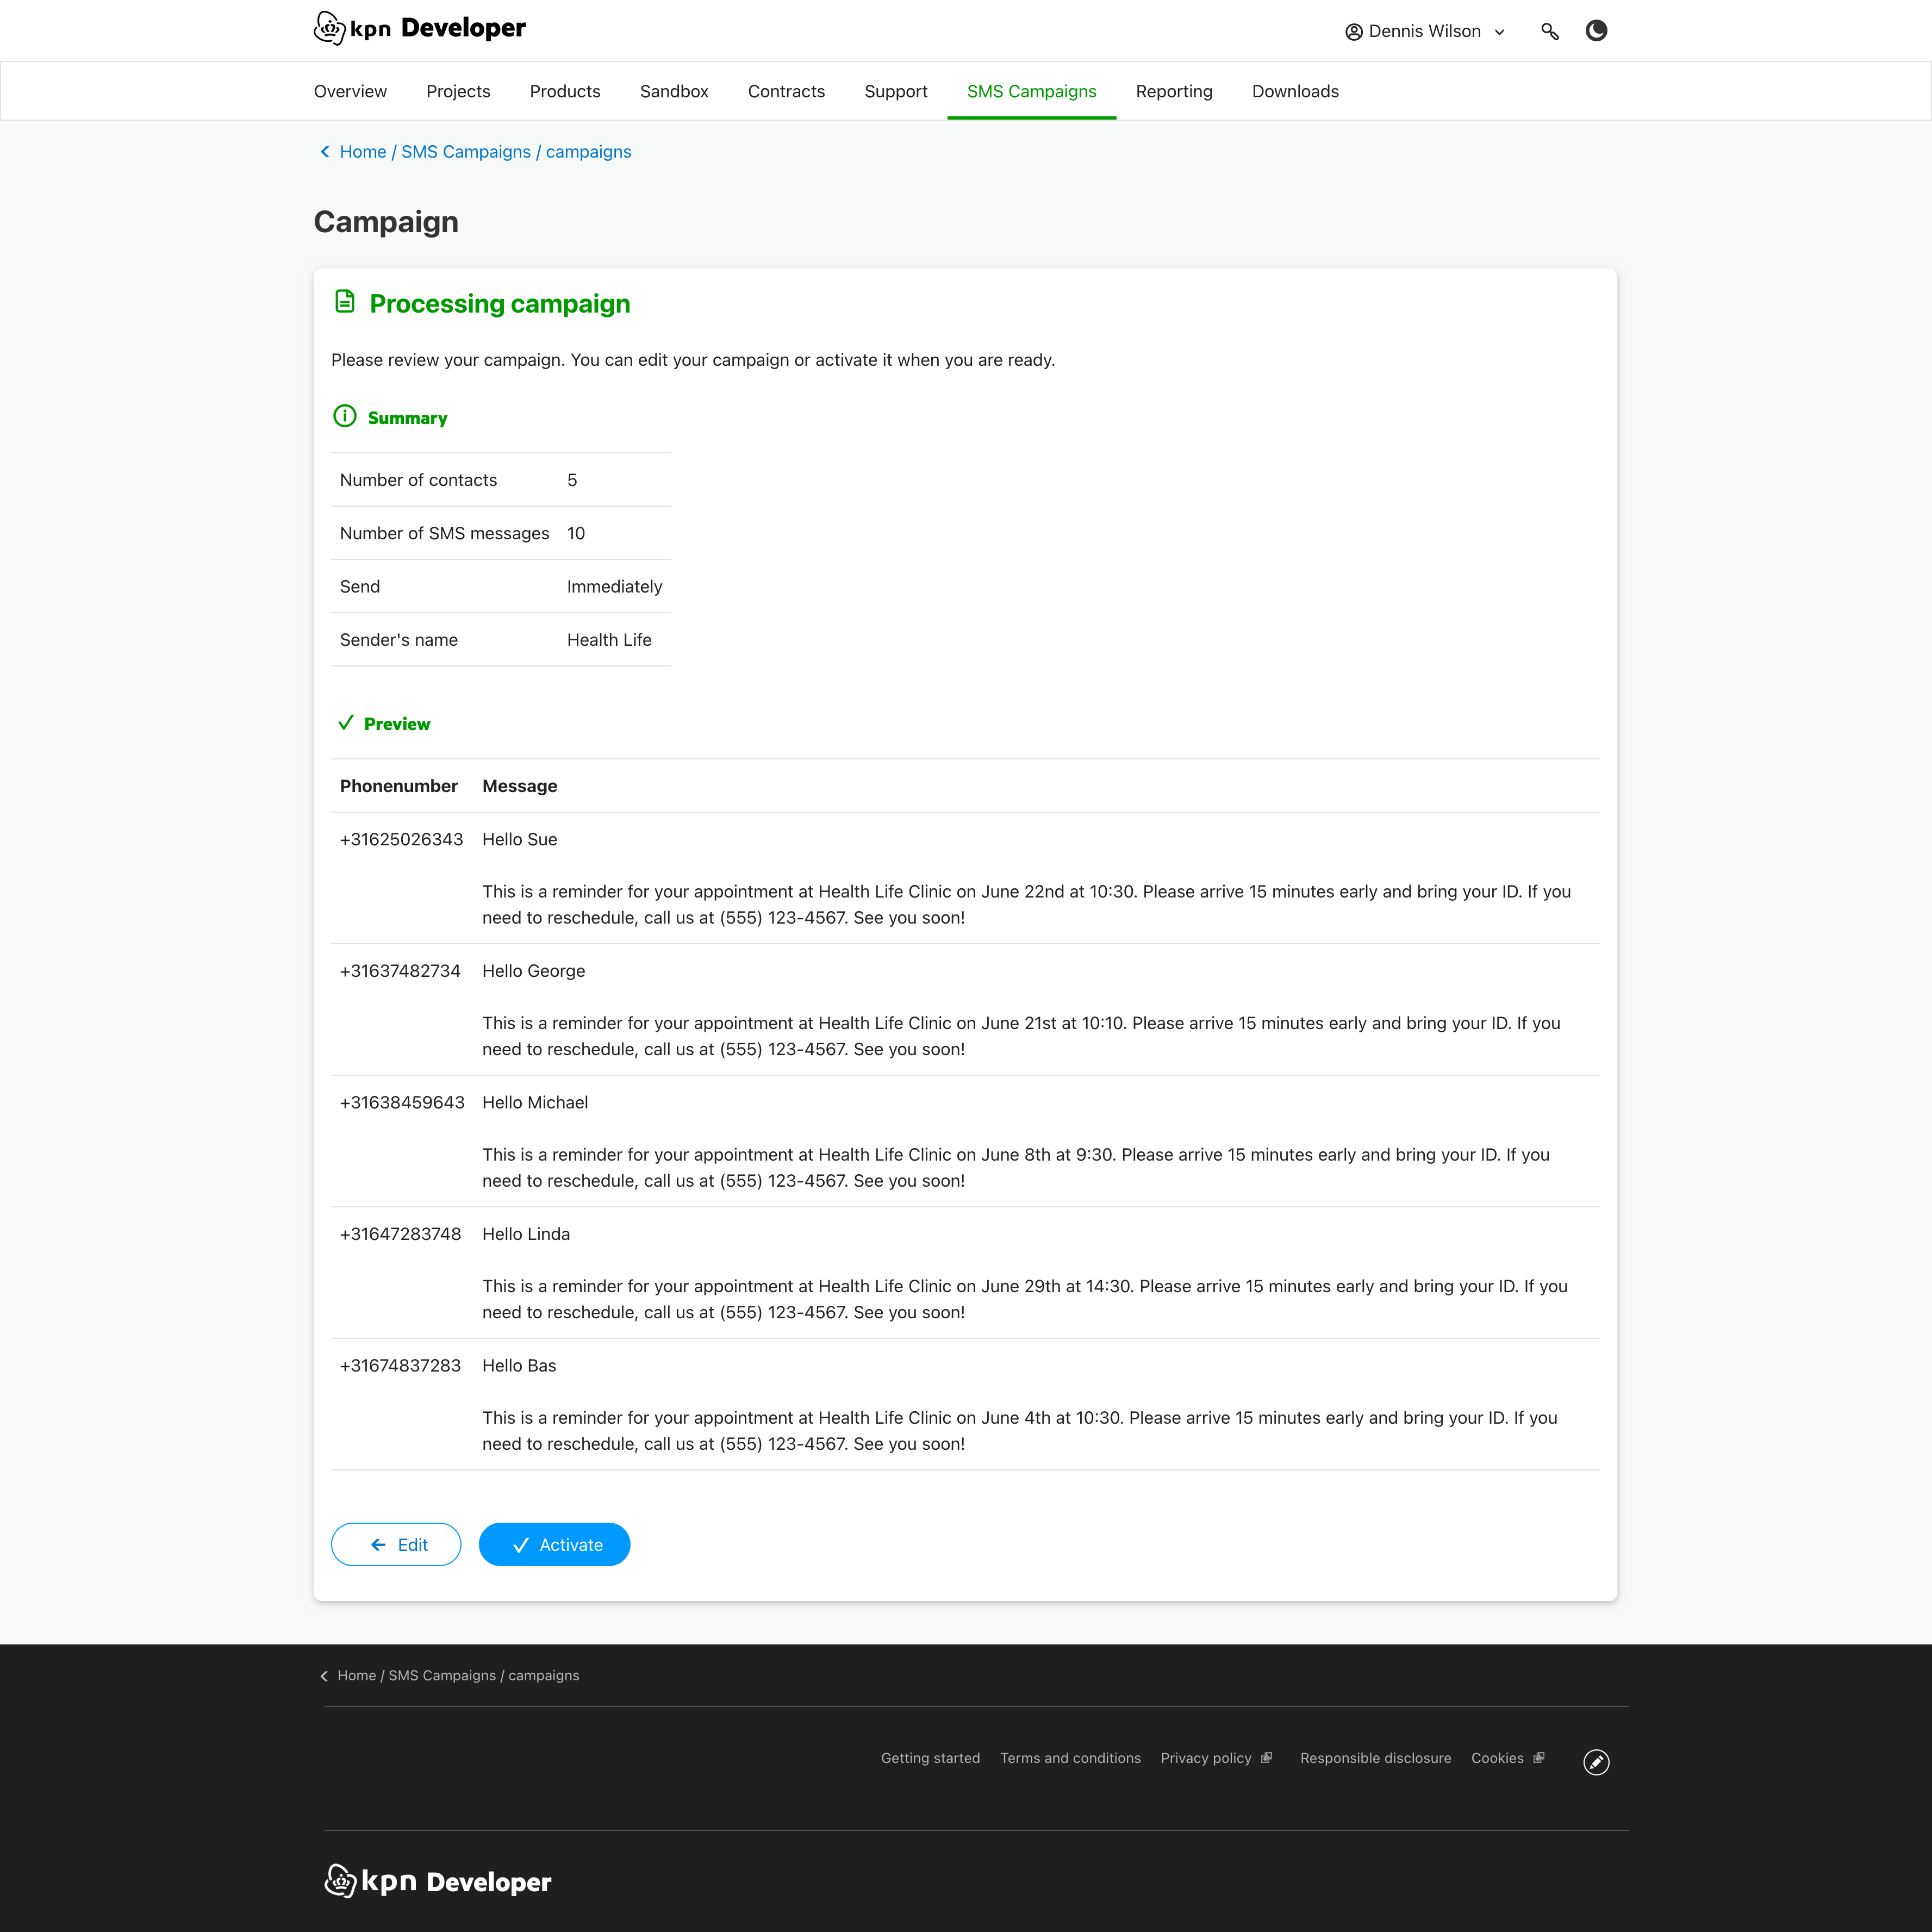
1.2 Preview
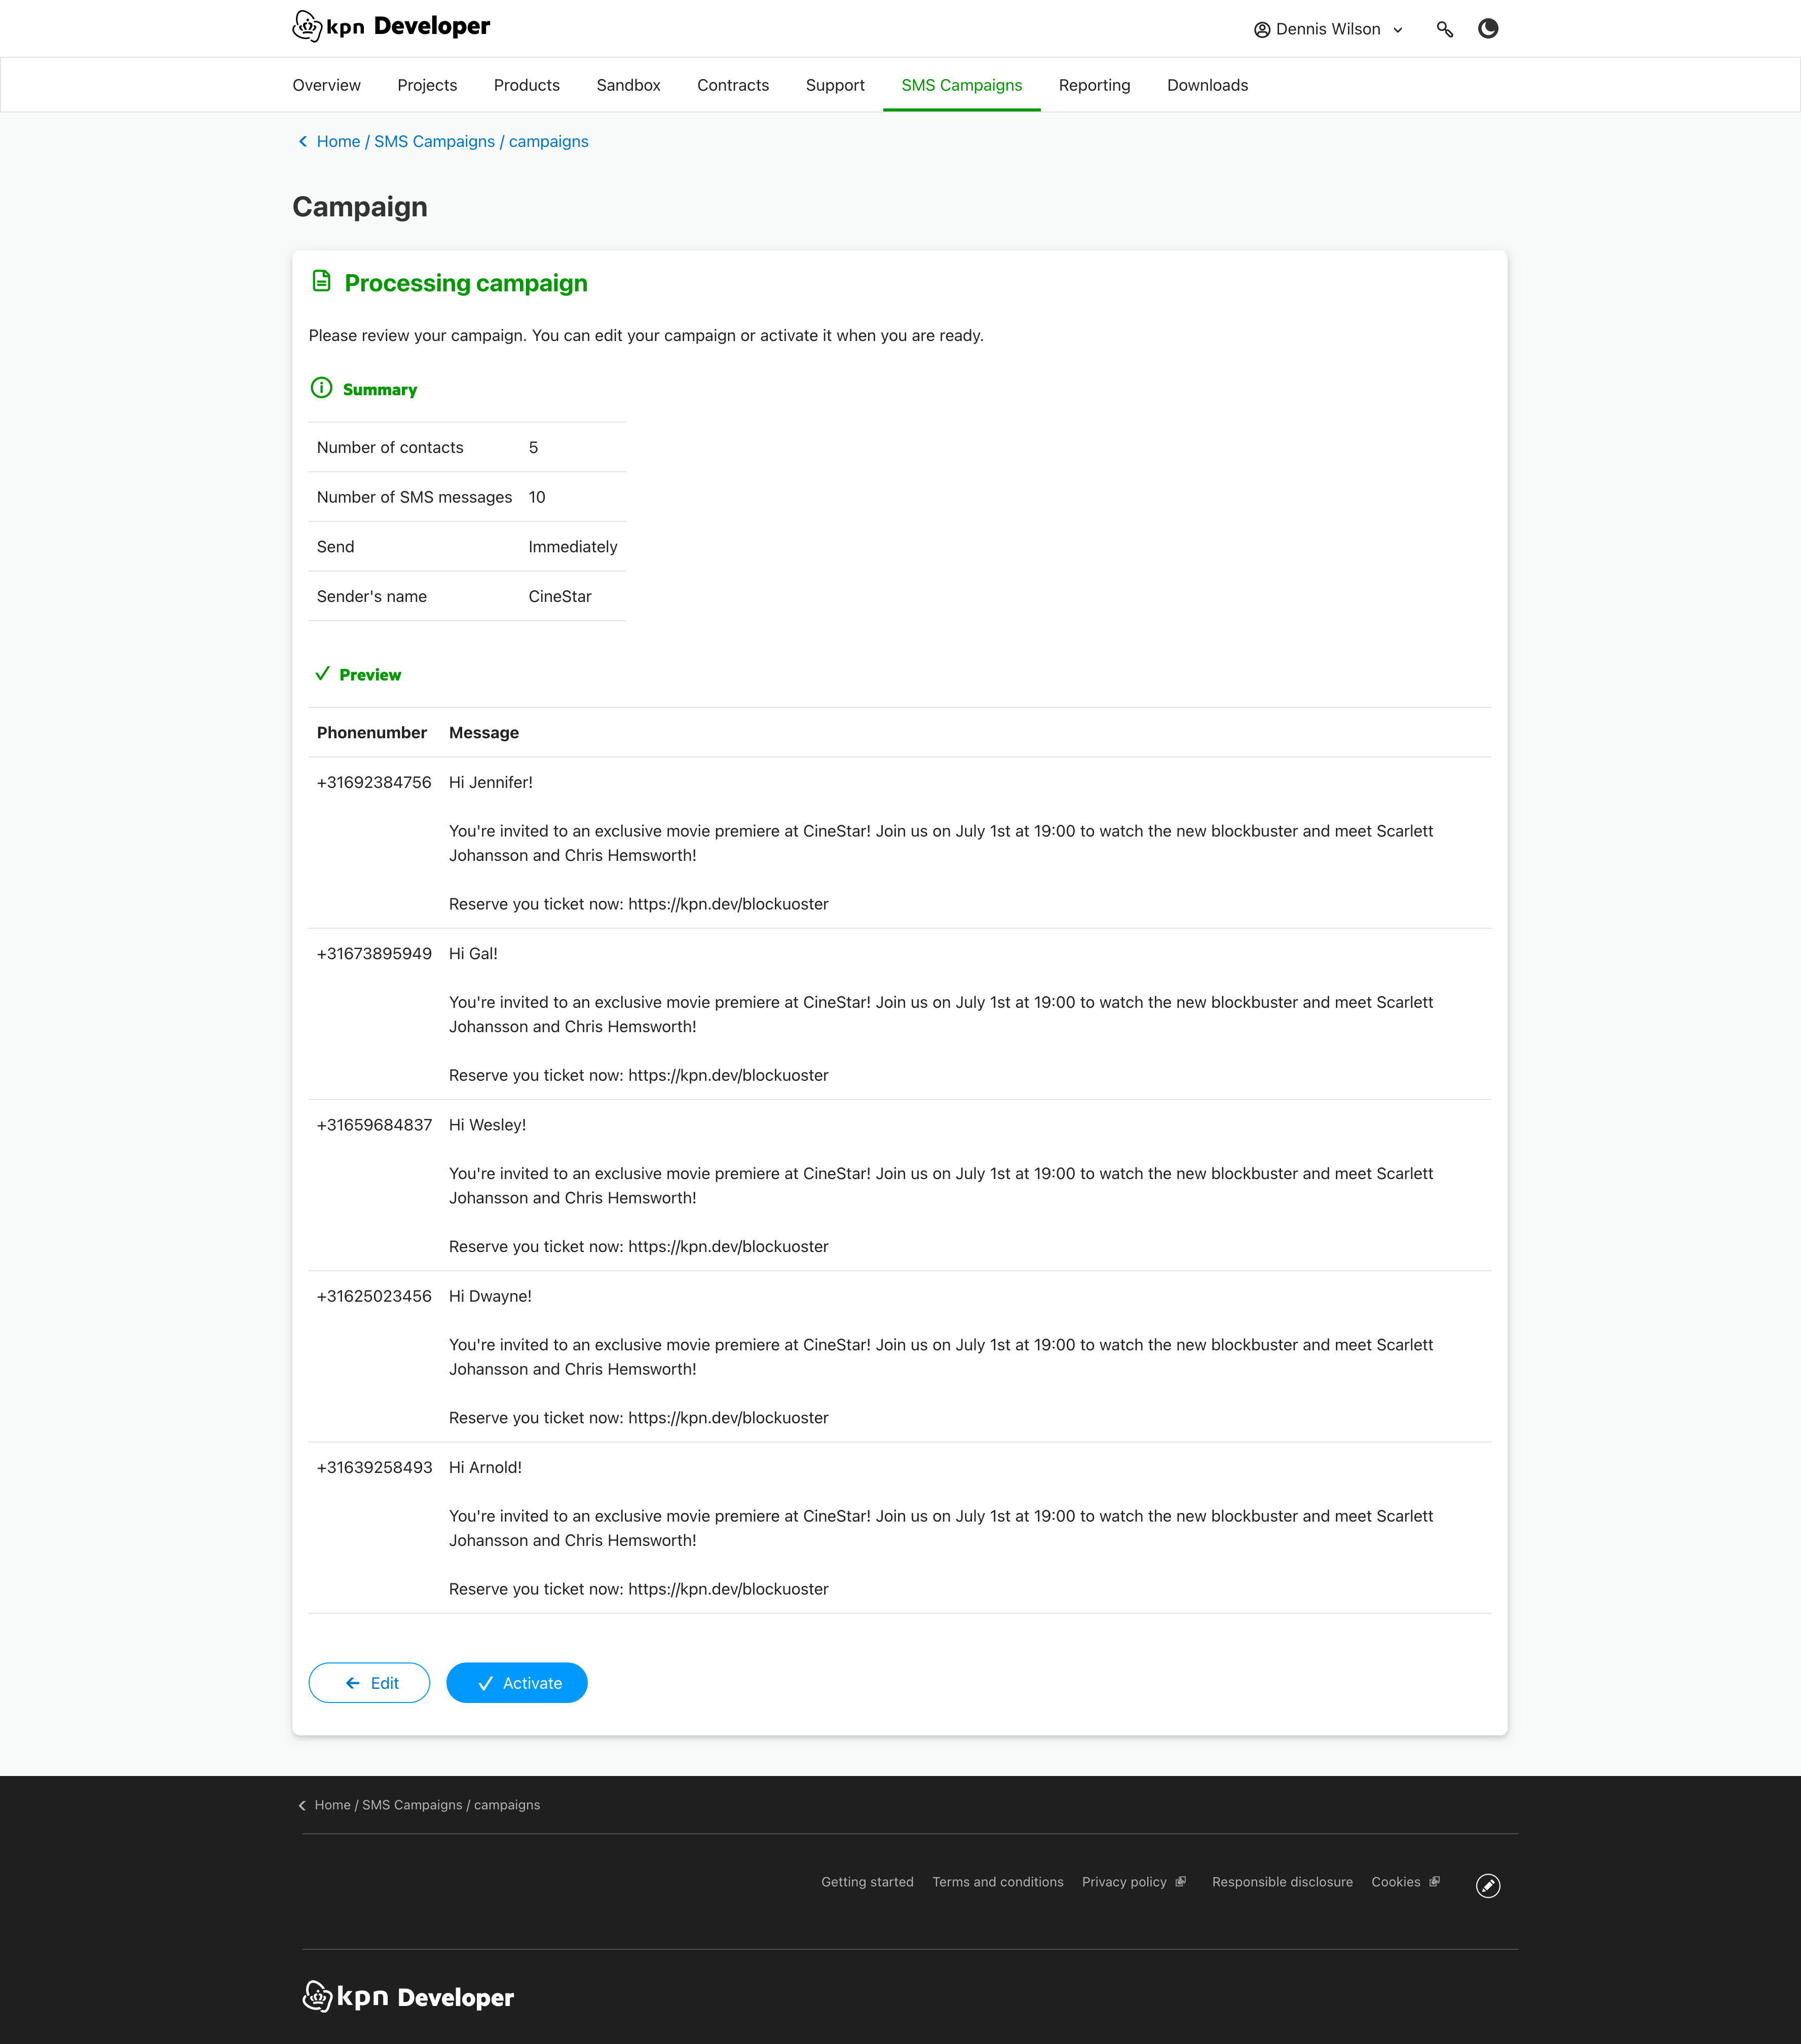
The preview shows the number of contacts you have entered and how many SMS messages are going to be sent.
Depending on the amount of characters in your messages, multiple SMS messages might to be used to transport the information to the contact. The contact will see the entire message on their device.
The schedule information and the submitted contact are shown. A preview will be shown of all the messages that are going to be sent.
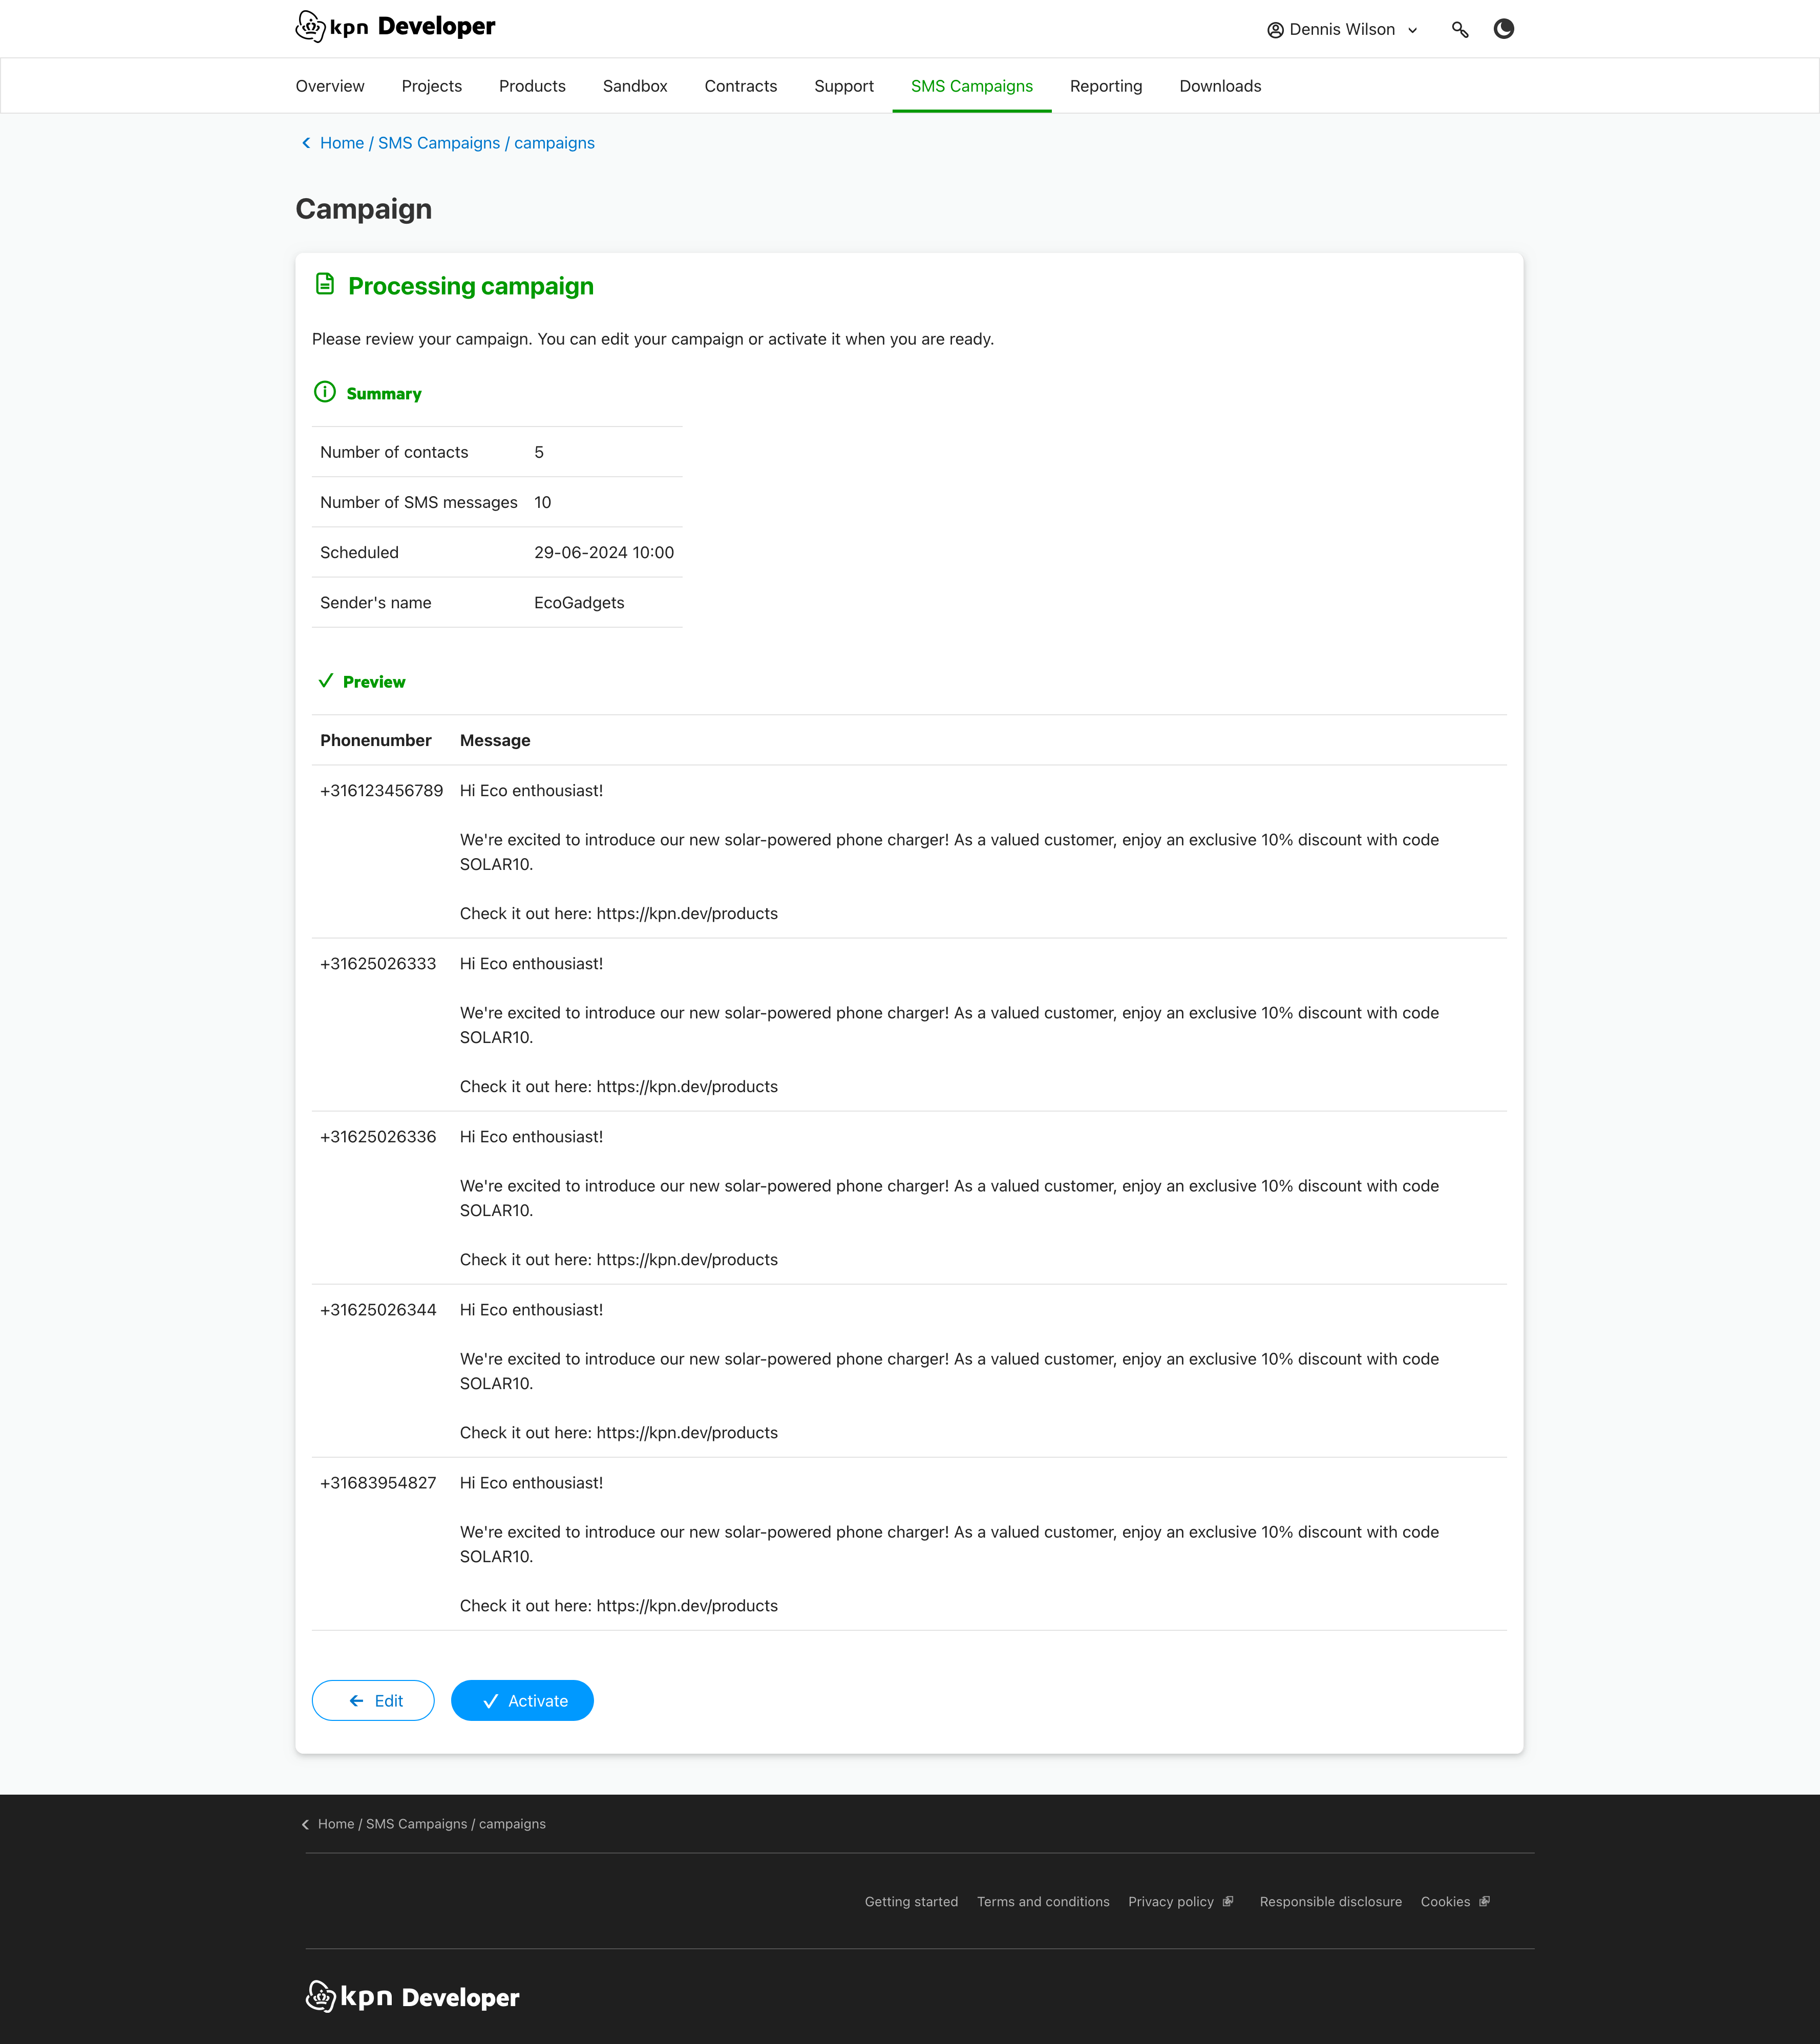
1.3 Activate
If you want to change some information press the 'Edit' button. If the campaign is ready press the 'Activate' button.
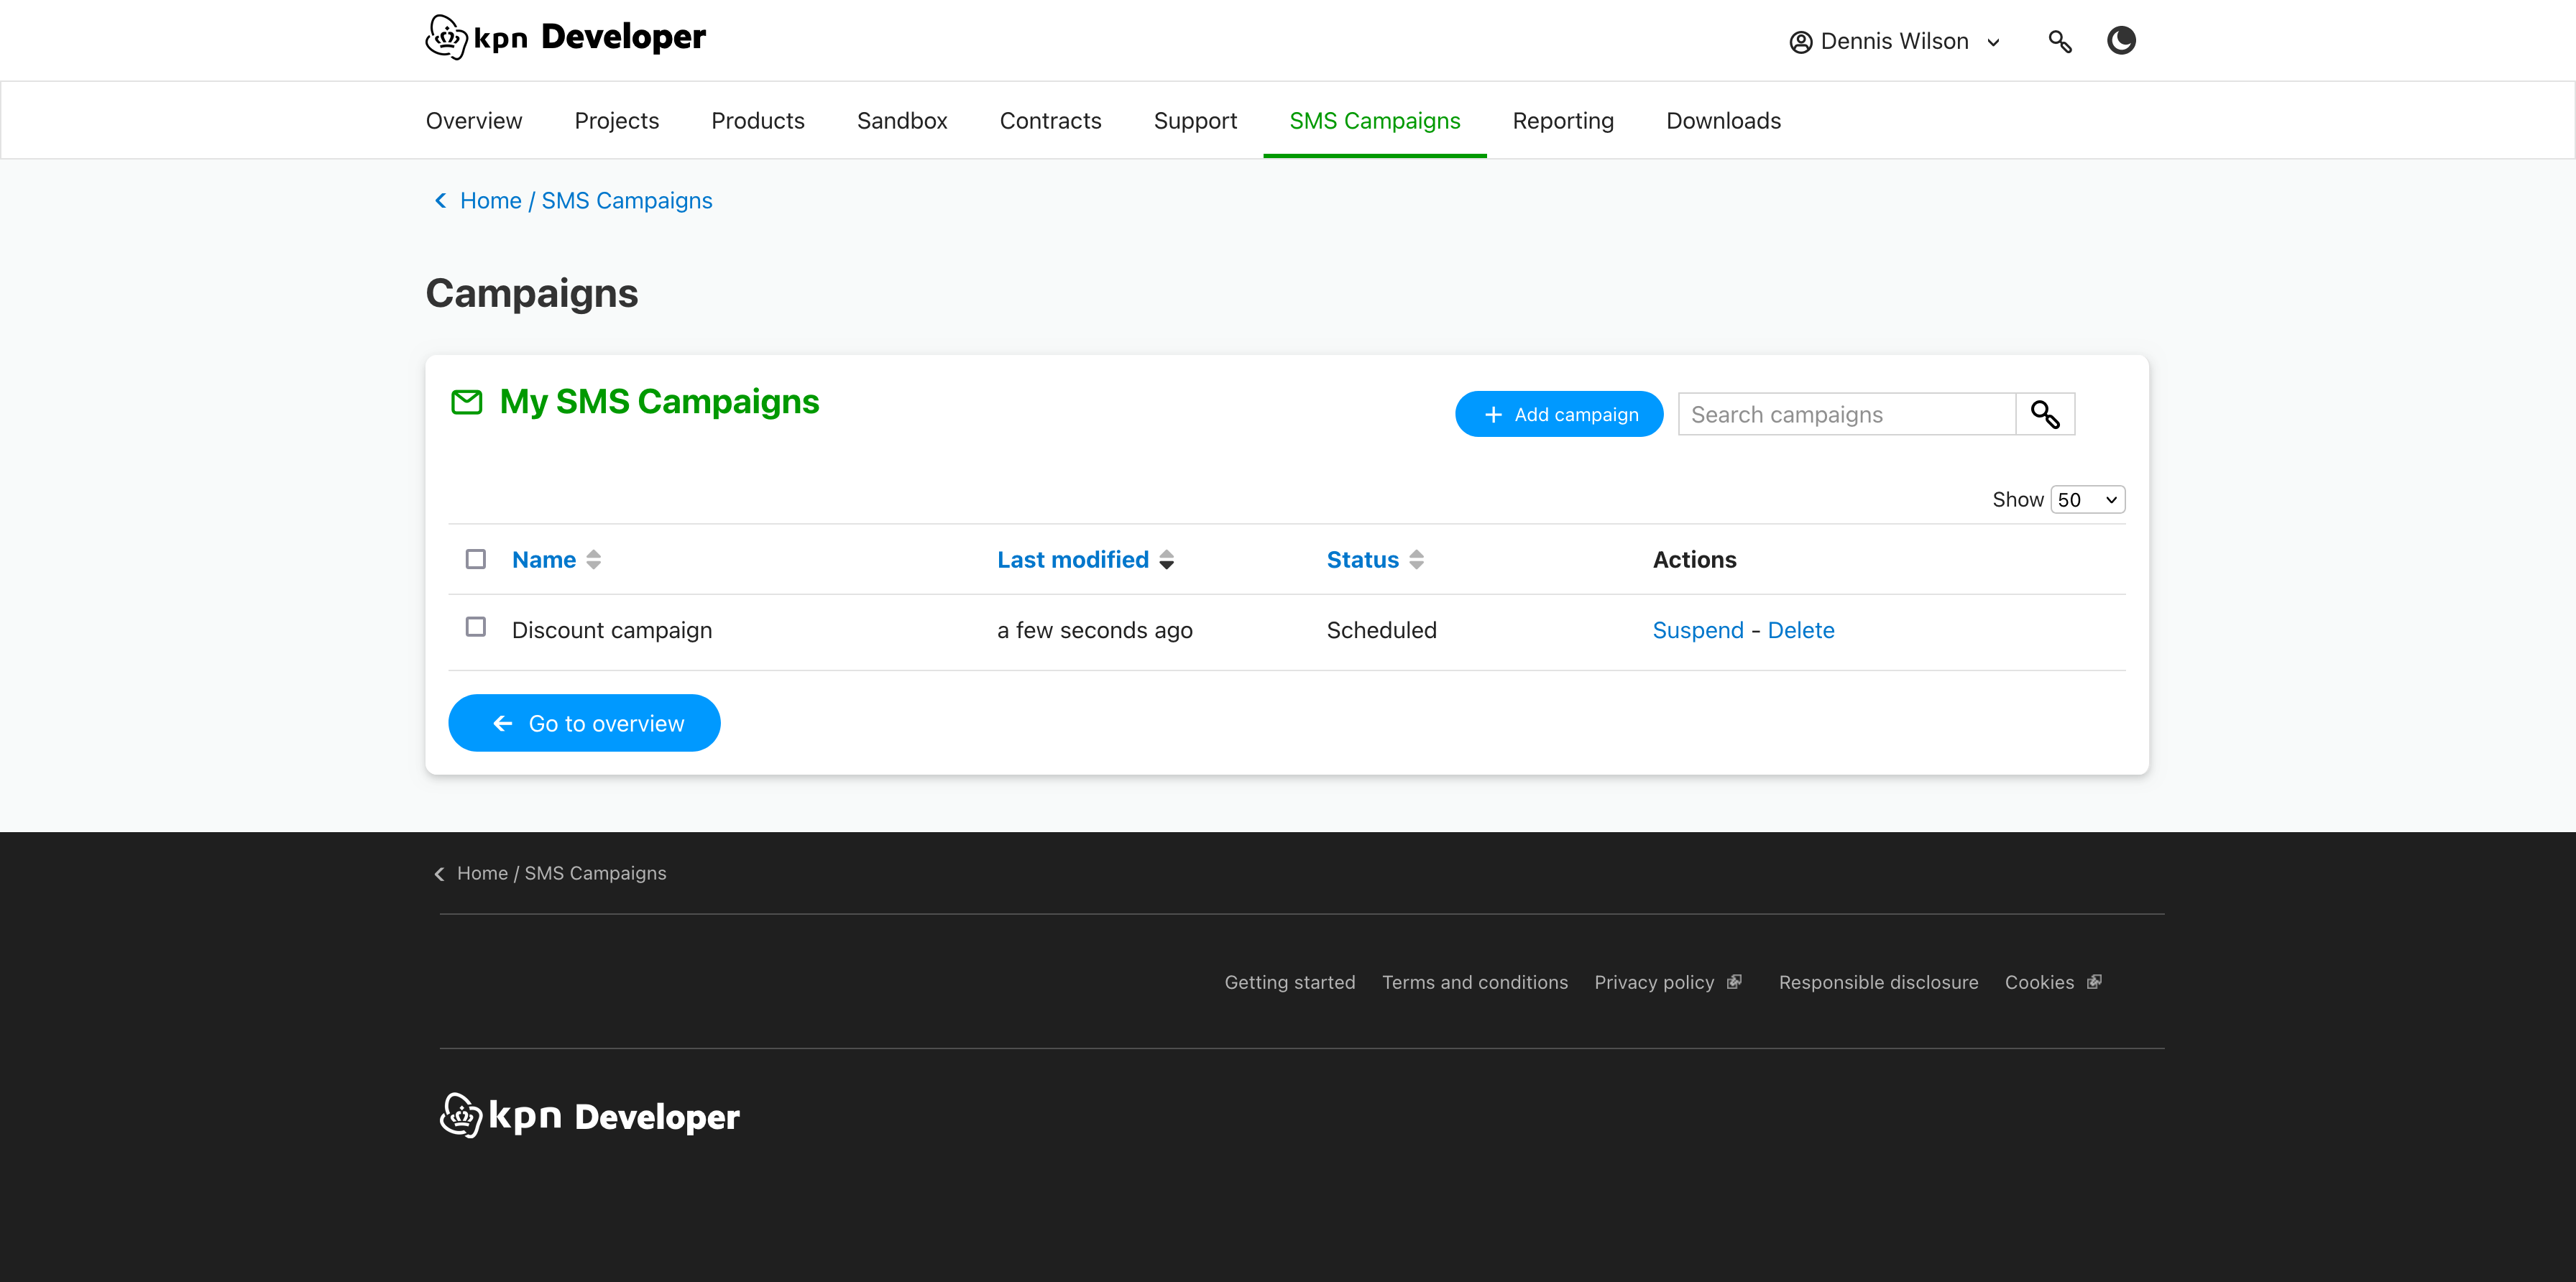
You will now return to the campaign overview page where your new campaign is listed. The SMSes will be sent shortly when you selected 'Send now' or they are sent when the scheduled date & time has arrived.
1.4 Report
Once the SMS messages have been sent, you can click the 'Report' link in the campaign overview to see the results. We show the message count for four statuses.
Failed: The "Failed" status indicates that the message was not successfully sent to the recipient. This could be due to a variety of reasons such as incorrect phone numbers, network issues, or the recipient's phone being turned off or out of service. When a message fails, it means that it never reached the intended recipient's device.
Delivered: The "Delivered" status confirms that the message has successfully reached the recipient's mobile device. It means that the message has passed through all the necessary network channels and has been received by the recipient's phone. This status is a strong indicator that the intended recipient has the opportunity to read the message.
Processing: The "Processing" status indicates that the message is currently in the queue and is being prepared for delivery. This stage involves the message being routed through the SMS gateway and network providers. If the recipient's number is not reachable, the SMS provider will attempt to deliver the message multiple times. Some messages may remain in this state for an extended period as the provider continues to try reaching the recipient. If all attempts fail after the final attempt, the message will then be counted as "Failed." This status shows that the system is actively working to send the message, but it hasn't been dispatched yet.
Sent: The "Sent" status means that the message has been successfully dispatched from the sender's end and is en route to the recipient's mobile device. However, it does not guarantee that the message has been delivered. It only confirms that the message has left the sender's system and is now in the hands of the network provider for final delivery.
2. Create a campaign with personalized messages
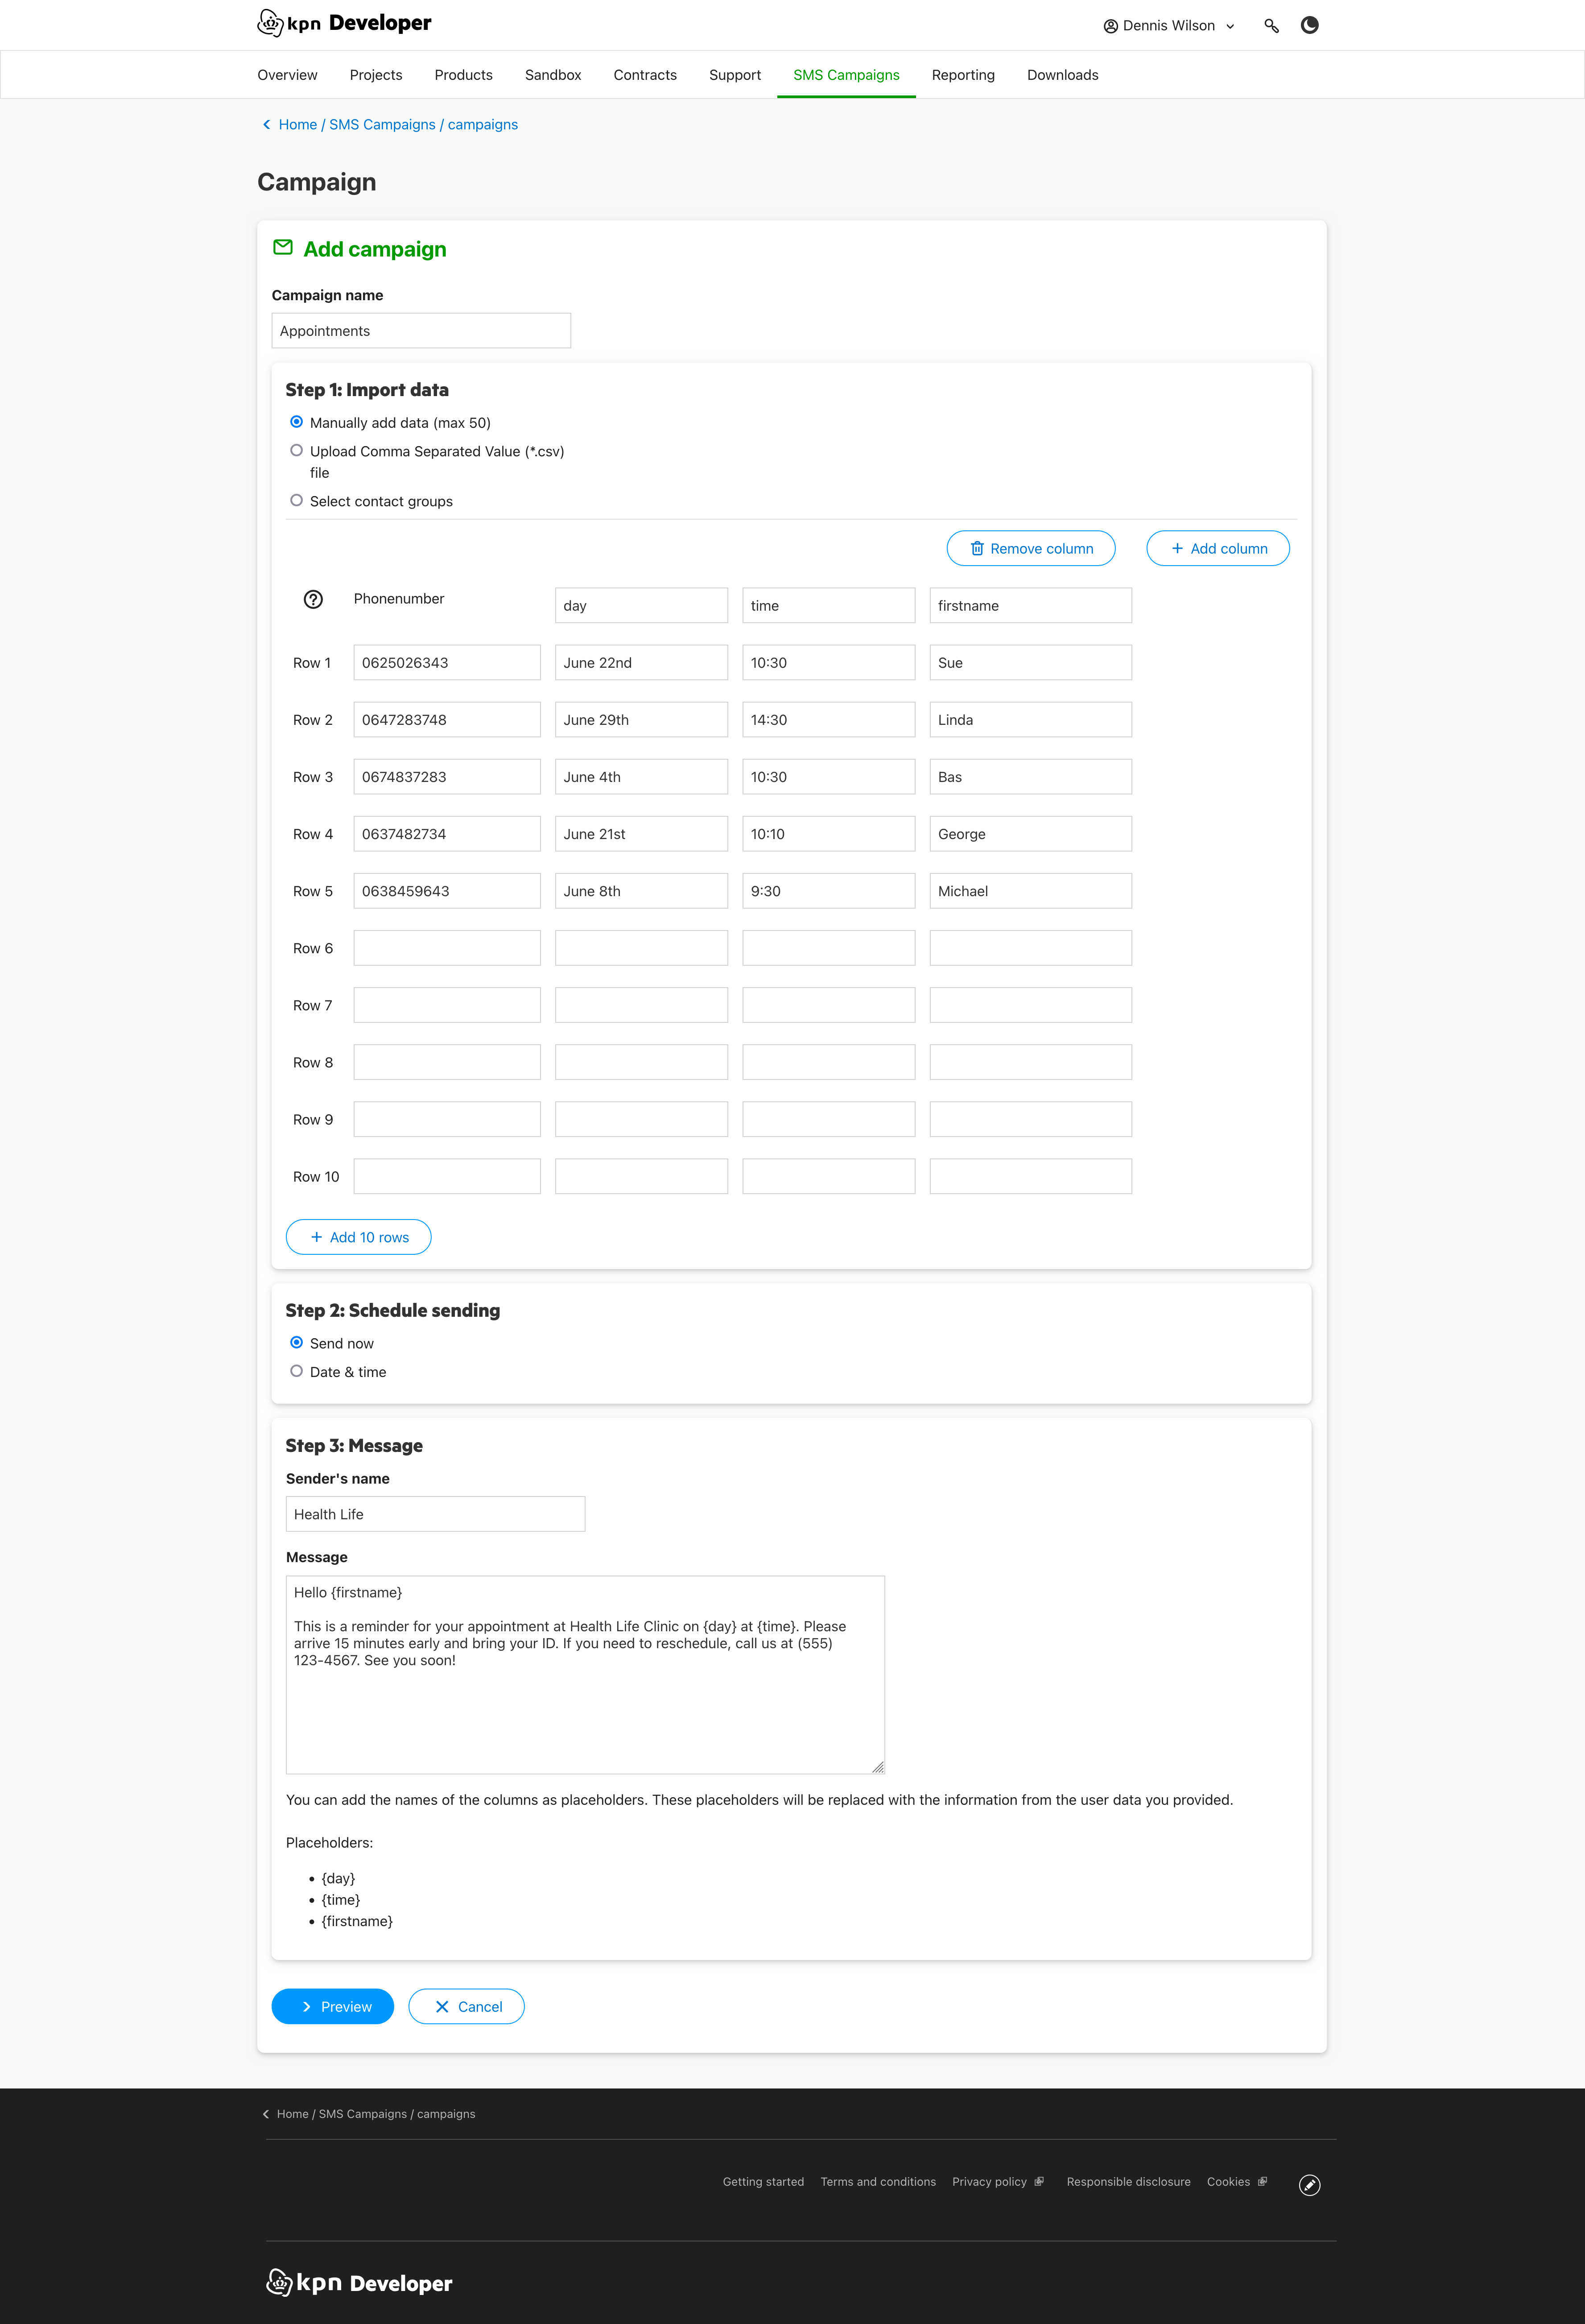
2.1 Create a campaign
In order to send personalized messages to each contact, you can use placeholders.
- Click the 'Create a campaign' button in the campaigns widget or in the campaign overview.
- Give the campaign a name.
- In 'Step 1: Import data' select 'Manually add data'
- Add the phonenumbers of your contacts to the 'phonenumber' column.
- Add a column name to the first field in the next column. Add personalized information to that column. Add information to the next columns to add more personalized information.
- Fill in the sender's name and the schedule option.
- Now use the column name as placeholder in your message. Add the column name to your message where the personalized value should appear and put a { in front and a } behind the columnname, like {this}. When sending the messages, the placeholder is replaced with the value of each row. The available placeholders are listed below the message field.
2.2 Preview
- Click 'Preview' to preview your campaign. In the preview you can see the personalized messages that will be sent.
- If you want to change some information press the 'Edit' button. If the campaign is ready press the 'Activate' button.
- You will now return to the campaign overview page where your new campaign is listed. The SMS-es will be sent shortly when you selected 'Send now' or they are send when the scheduled date & time has arrived.
3. Create a campaign with a contacts file
Instead of manually adding the contact information, you can upload a file containing that data.
3.1 Contacts file
A campaign file needs to be in the Comma Separated Value (csv) format.
- The first line of the file contain the column headers. Use 'phonenumber' for the column containing the phonenumbers. Add additional column names if needed. Separate values with a comma.
- The next lines contains the values. Separate each value with a comma and make sure the values are in the right order.
CSV example
firstname,lastname,phonenumber
Sylvester,Stallone,06123456789
Arnold,Swarzenegger,0639258493
Dwayne,Johnson,0625023456
Vin,Diesel,0659382272
Wesley,Snipes,0659684837
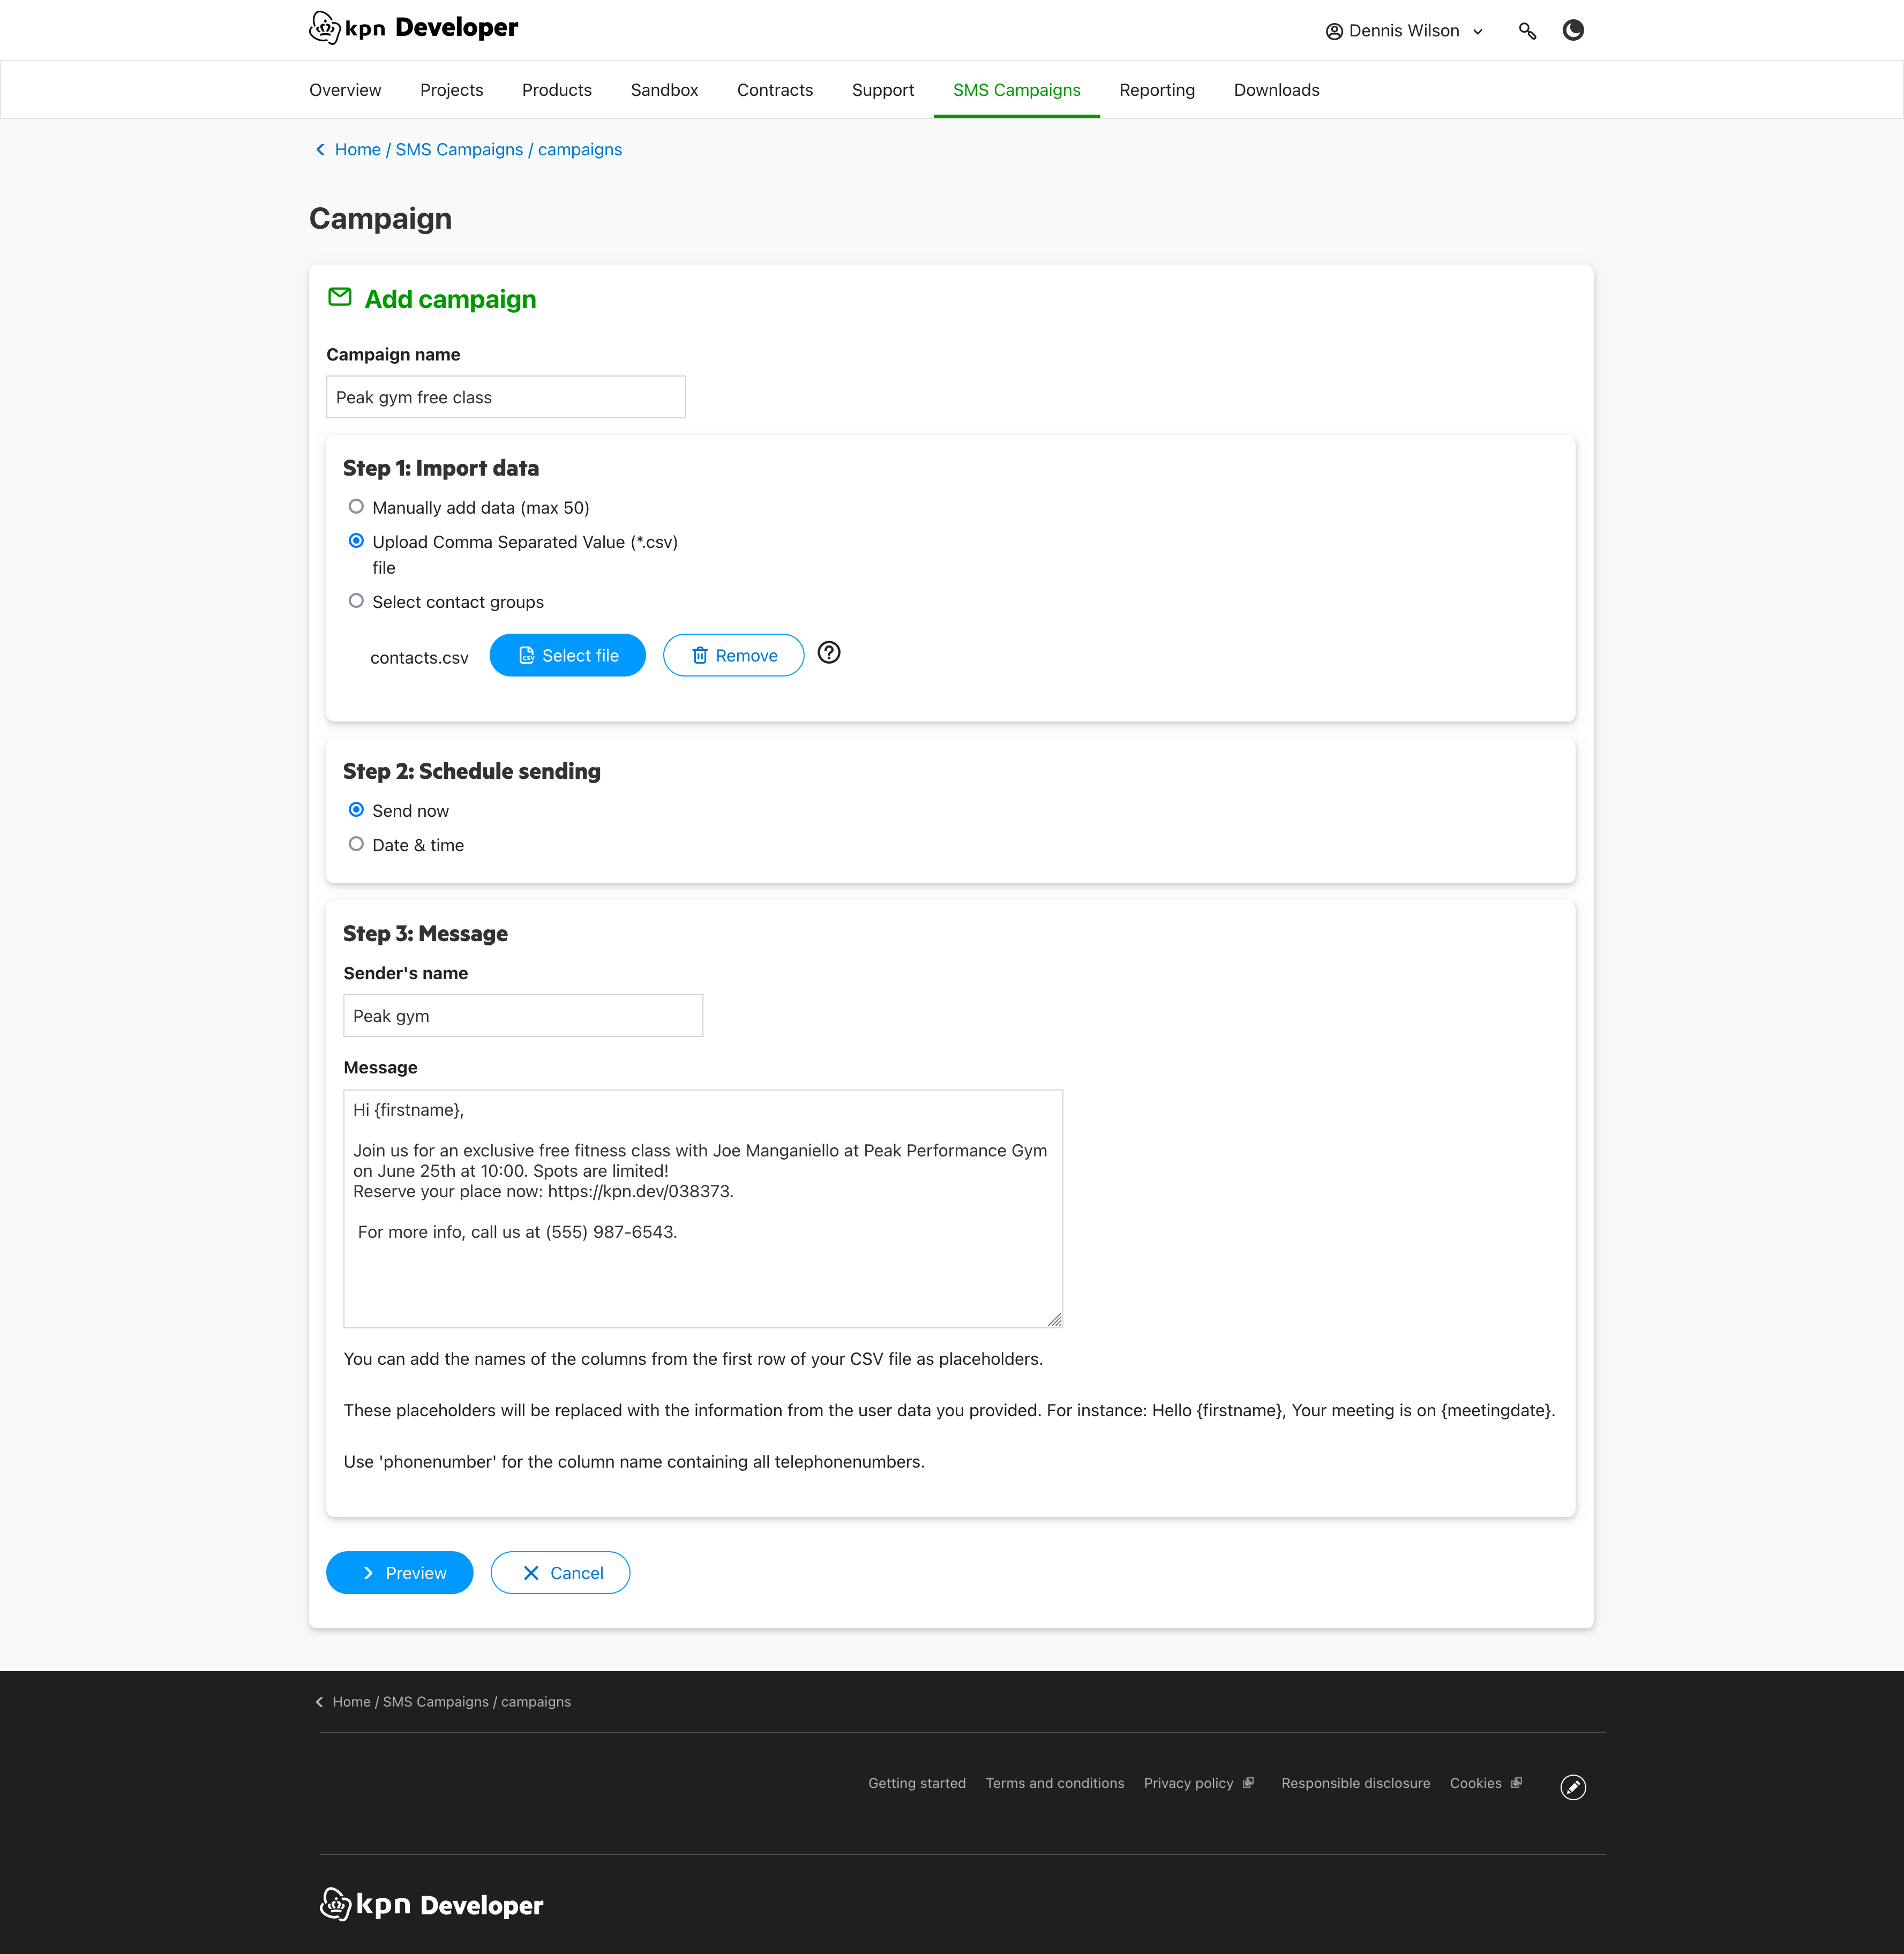
3.2 Create a campaign
- Click the 'Create a campaign' button in the campaigns widget or in the campaign overview.
- Give the campaign a name.
- In 'Step 1: Import data' select 'Upload Comma Separated Value (*.csv) file'
- Click the 'Select file' button and select a *.csv file from your device.
- Fill in the sender's name and the schedule option.
- Now use the column name as placeholder in your message. Add the columnname to your message where the personalized value should appear and put a { in front and a } behind the columnname like {this}. When sending the messages, the placeholder is replaced with the value of each row. The available placeholders are listed below the message field.
- Click the 'Preview' button. The campaign is submitted and your information is checked.
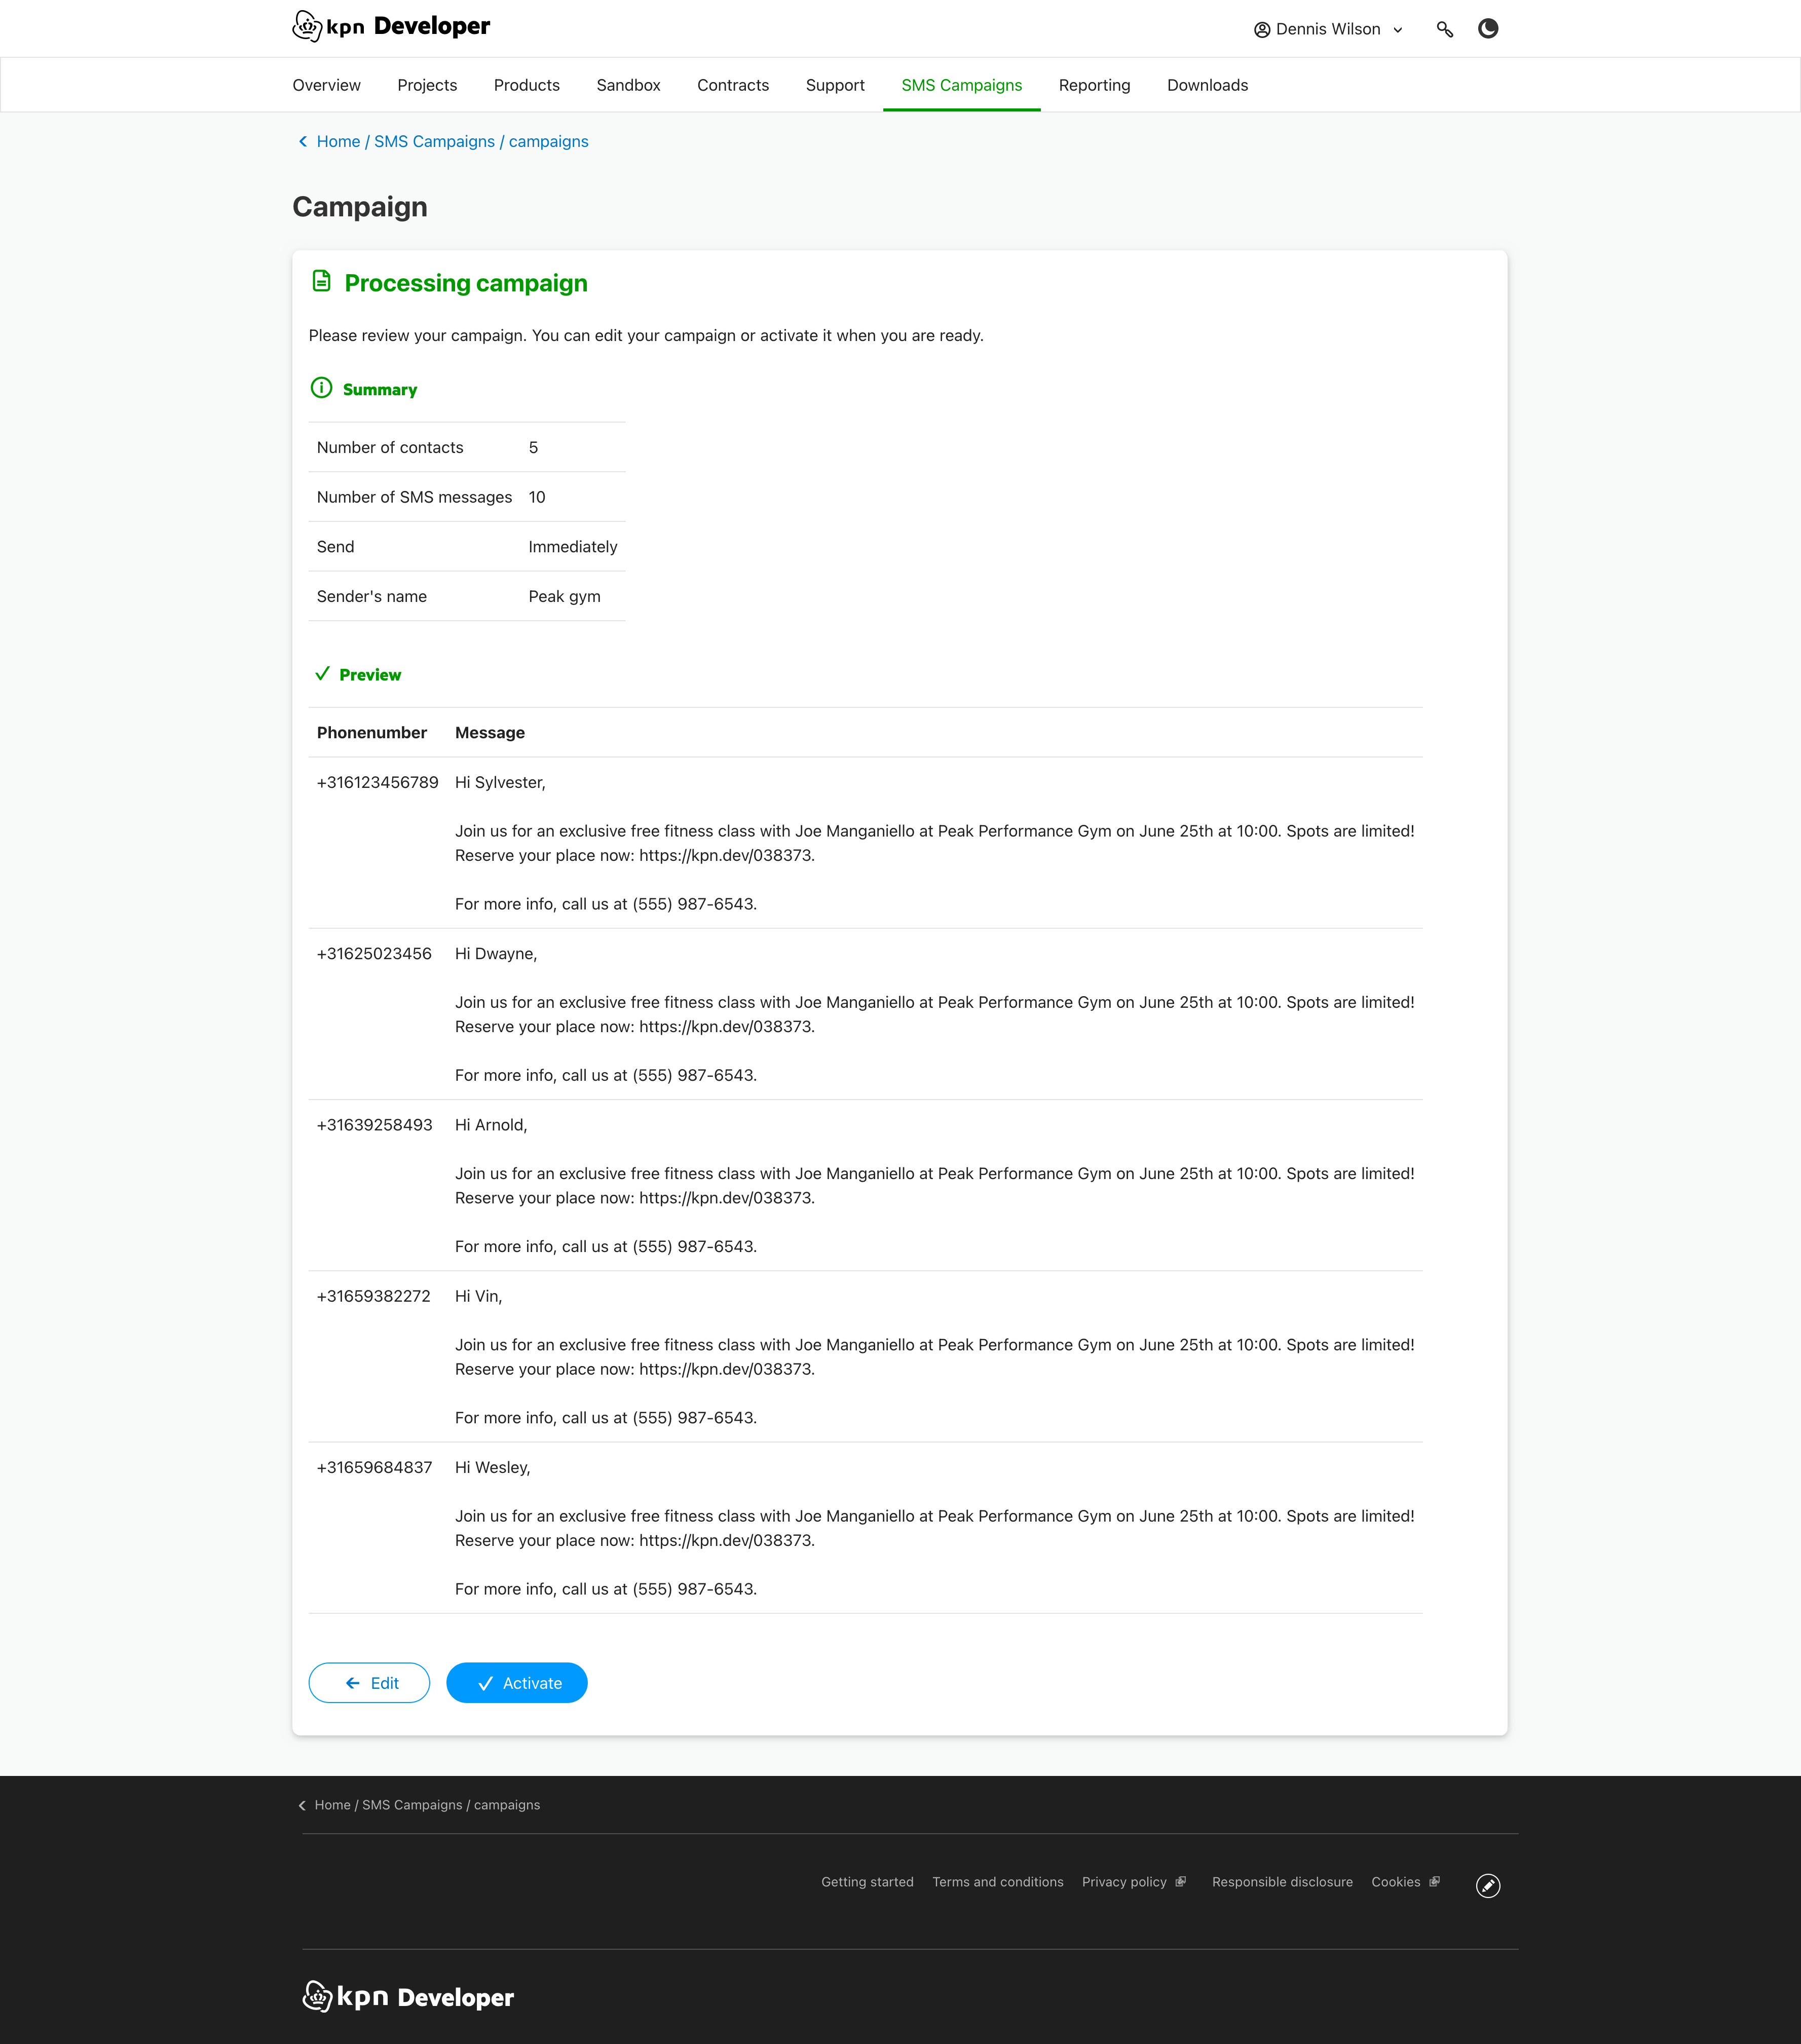
3.3 Preview
- Click 'Preview' to preview your campaign. In the preview you can see the personalized messages that will be send.
- If you want to change some information press the 'Edit' button. If the campaign is ready press the 'Activate' button.
- You will now return to the campaign overview page where your new campaign is listed. The SMS-es will be sent shortly when you selected 'Send now' or they are send when the scheduled date & time has arrived.
4. Uploading contacts
Instead of manually adding or uploading contact information each time you create a campaign, you can create contacts and groups that you can use to create your campaigns. You can add contacts by uploading a csv file.
4.1. CSV file
A contacts file need to be in the Comma Separated Value (csv) format.
- The first line of the file contain the column headers. Use 'phonenumber' for the column containing the phonenumbers, use 'firstname' for the column containing the firstname and use 'lastname' for the column containing the lastname. Separate values with a comma.
- The next lines contain the values. Separate each value with a comma and make sure the values are in the right order.
CSV example
firstname,lastname,phonenumber
Sylvester,Stallone,06123456789
Arnold,Swarzenegger,0639258493
Dwayne,Johnson,0625023456
Vin,Diesel,0659382272
Wesley,Snipes,0659684837
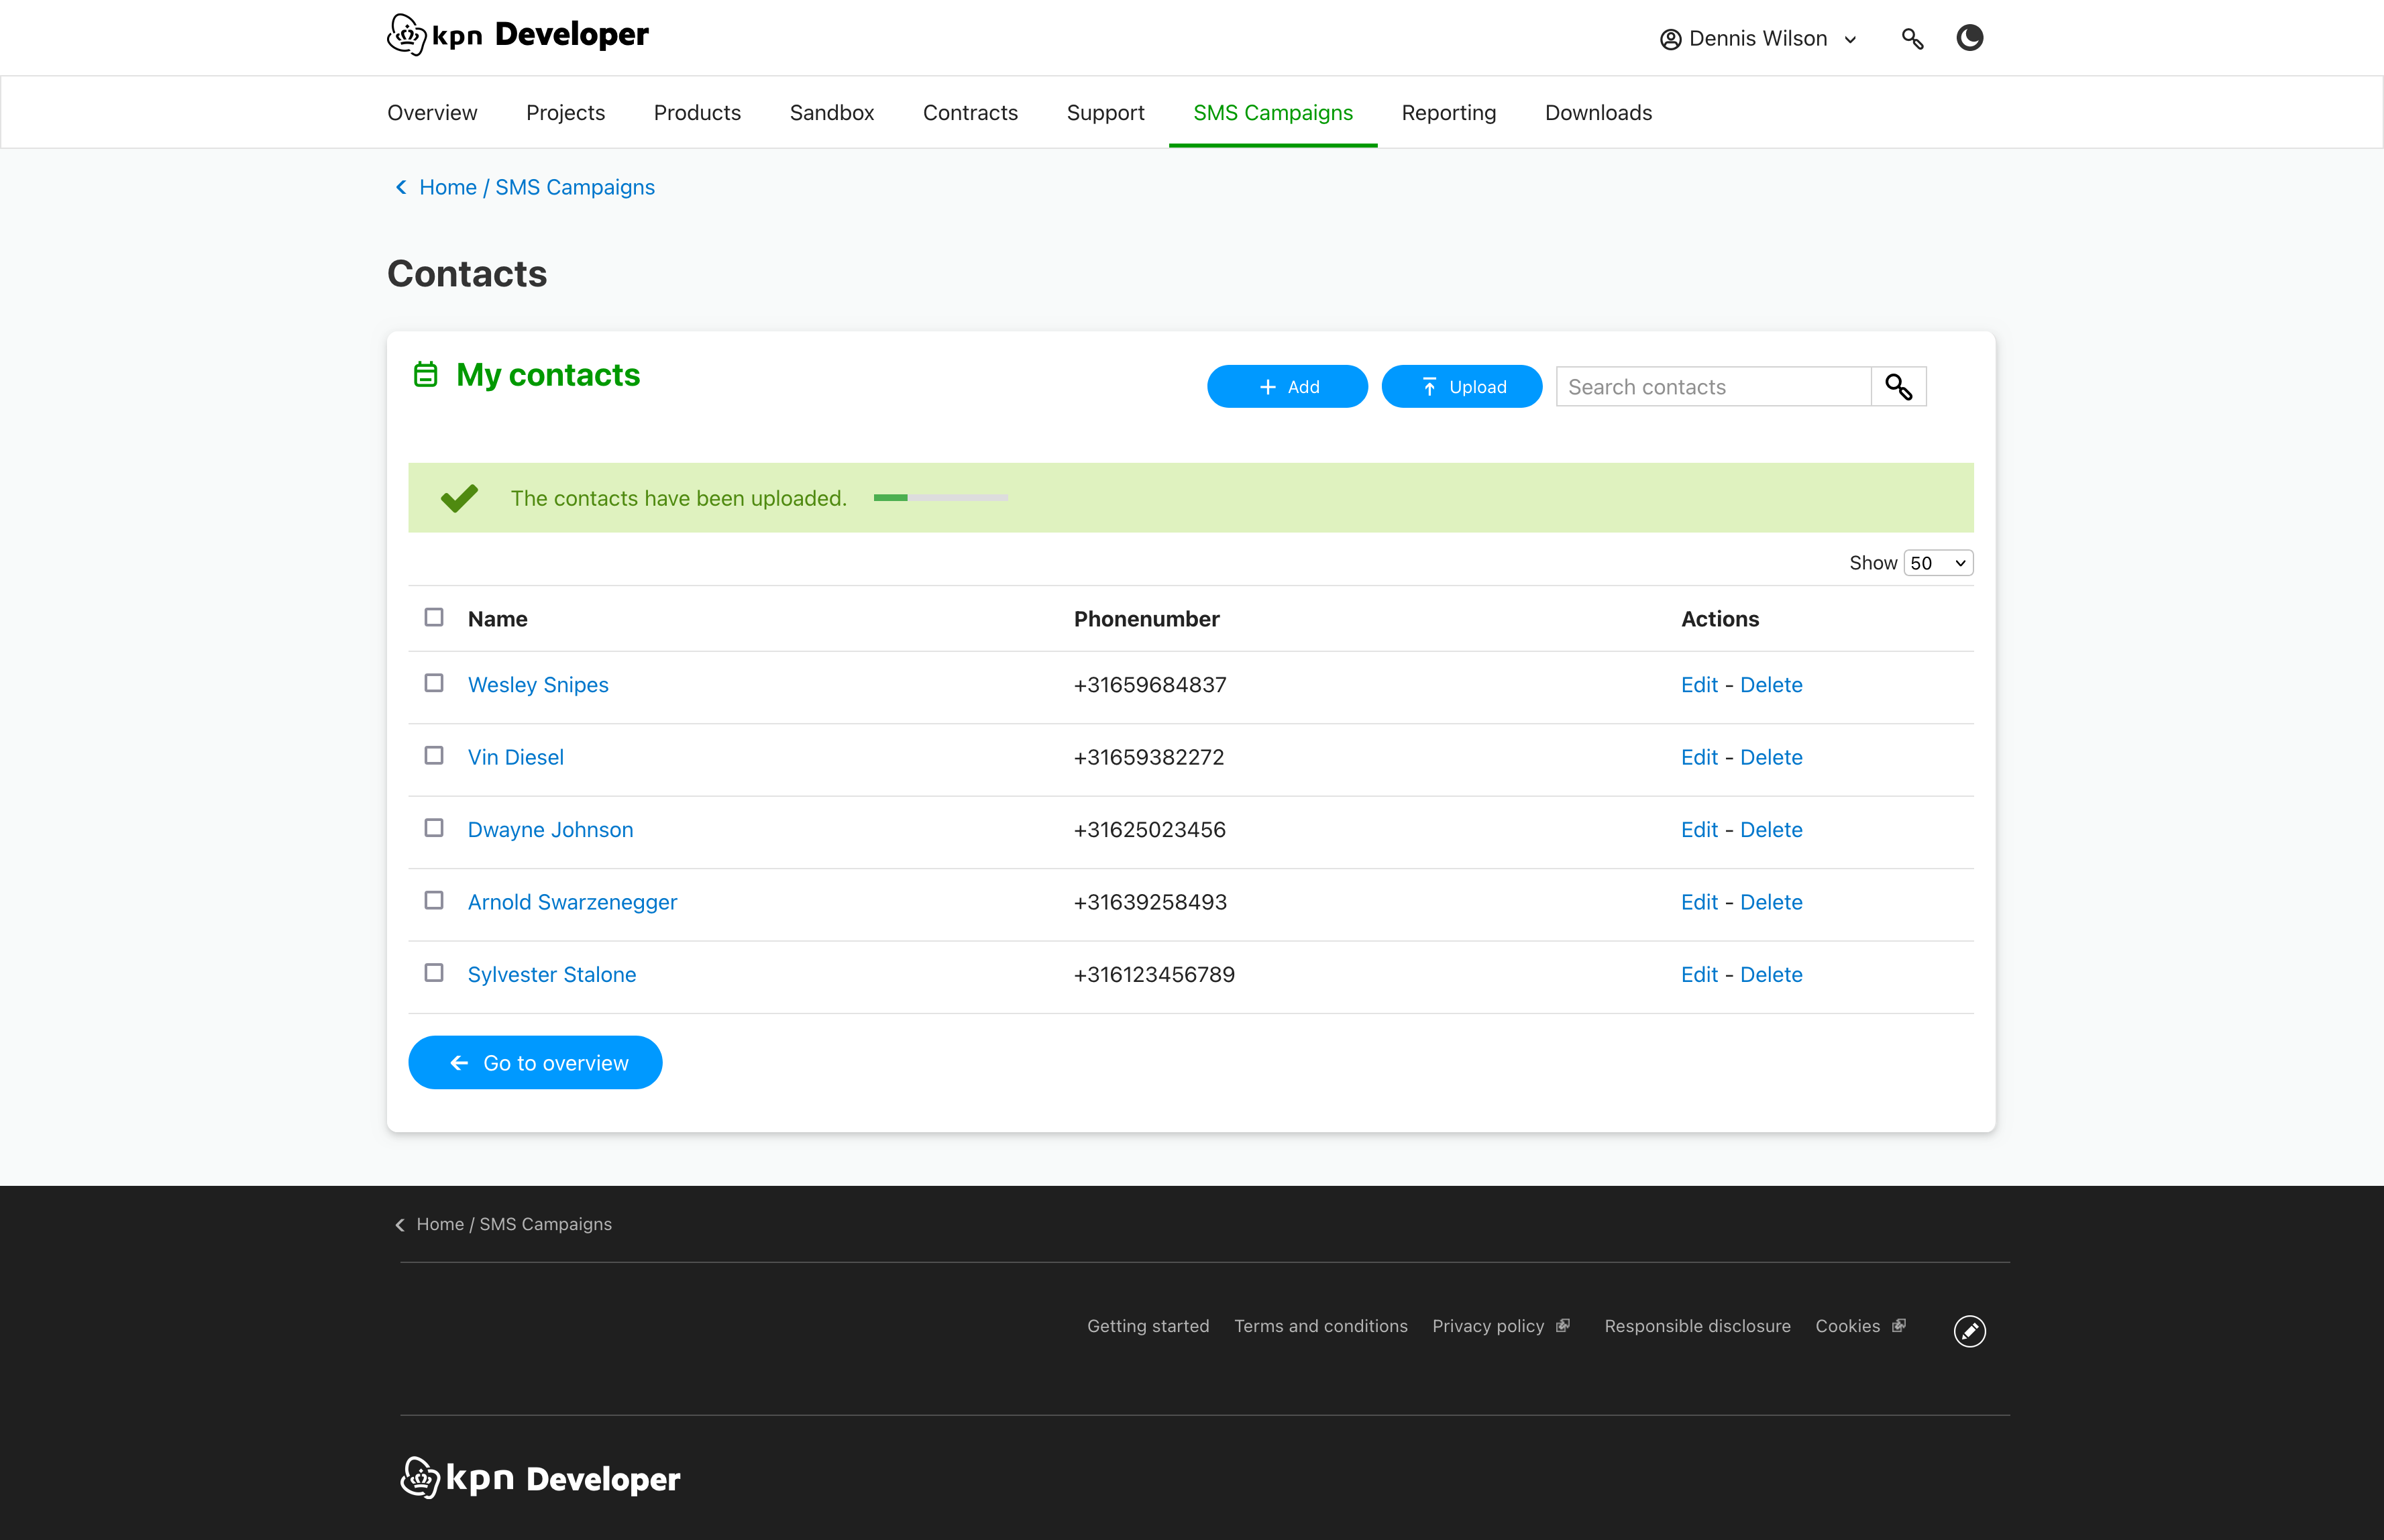
4.2. Upload contacts file
- Click the 'Upload contacts' button in the contacts widget or the 'Upload' button in the contacts overview.
- Click the 'Select file' button and select a *.csv file from your device.
- Click the 'Upload contacts' button.
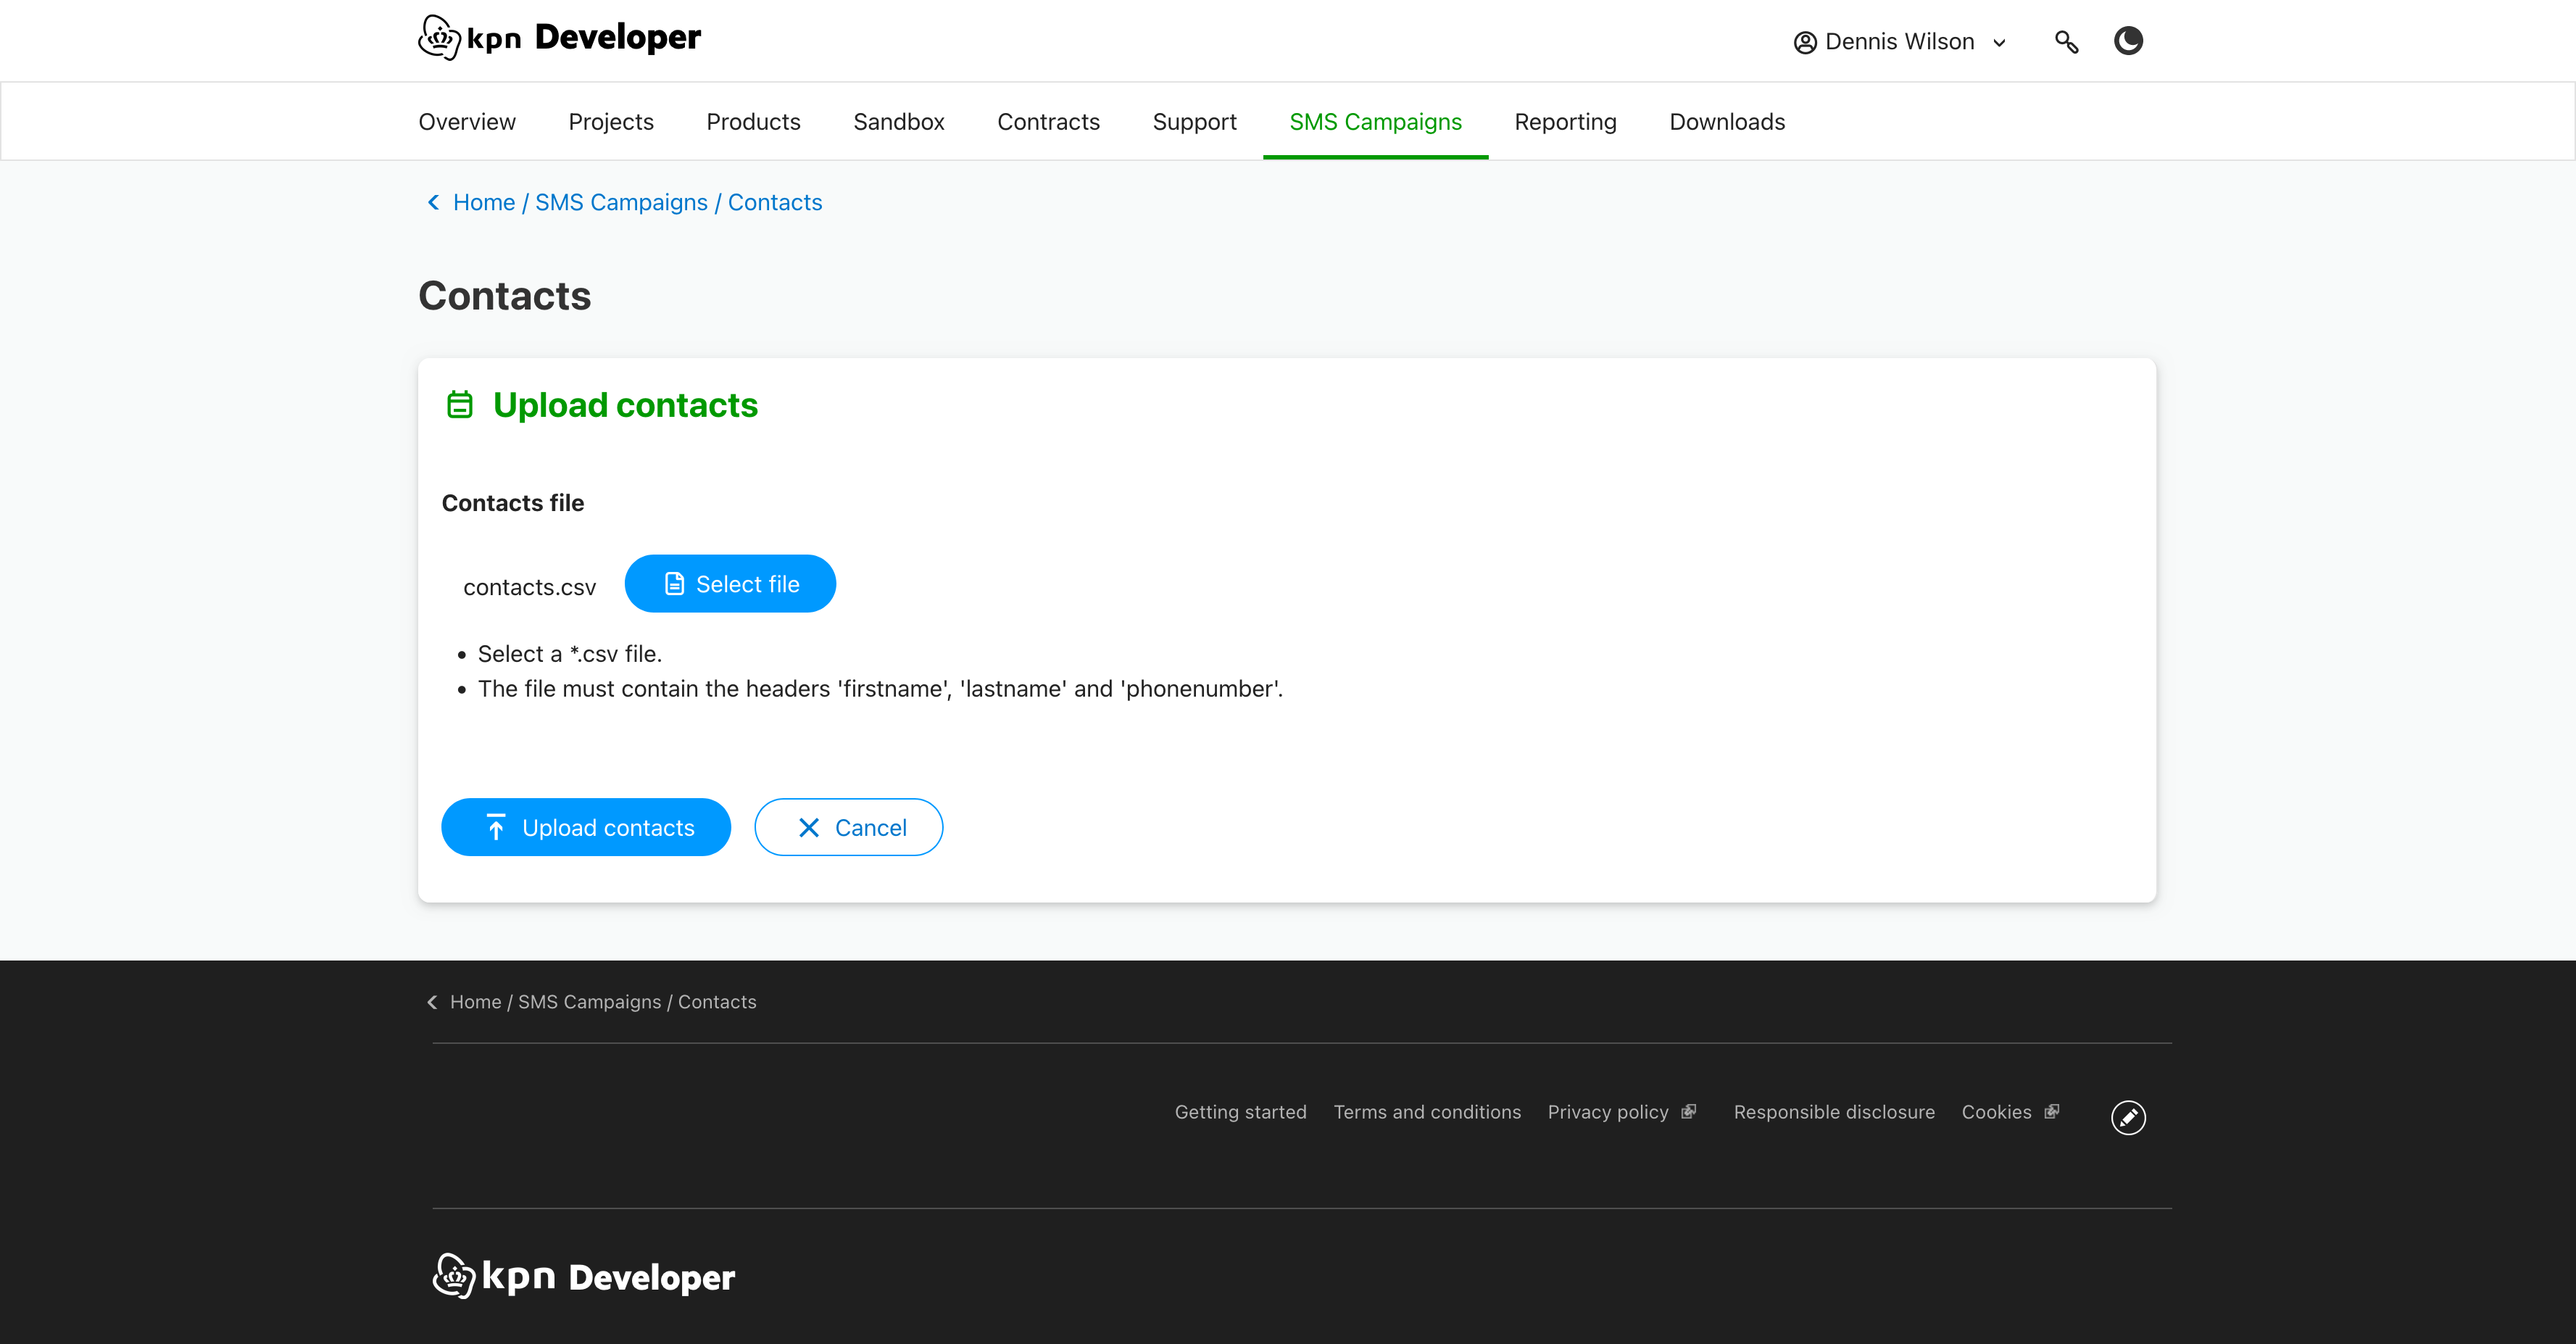
The contacts are uploaded. You are sent to the contacts overview where your new contacts are listed.
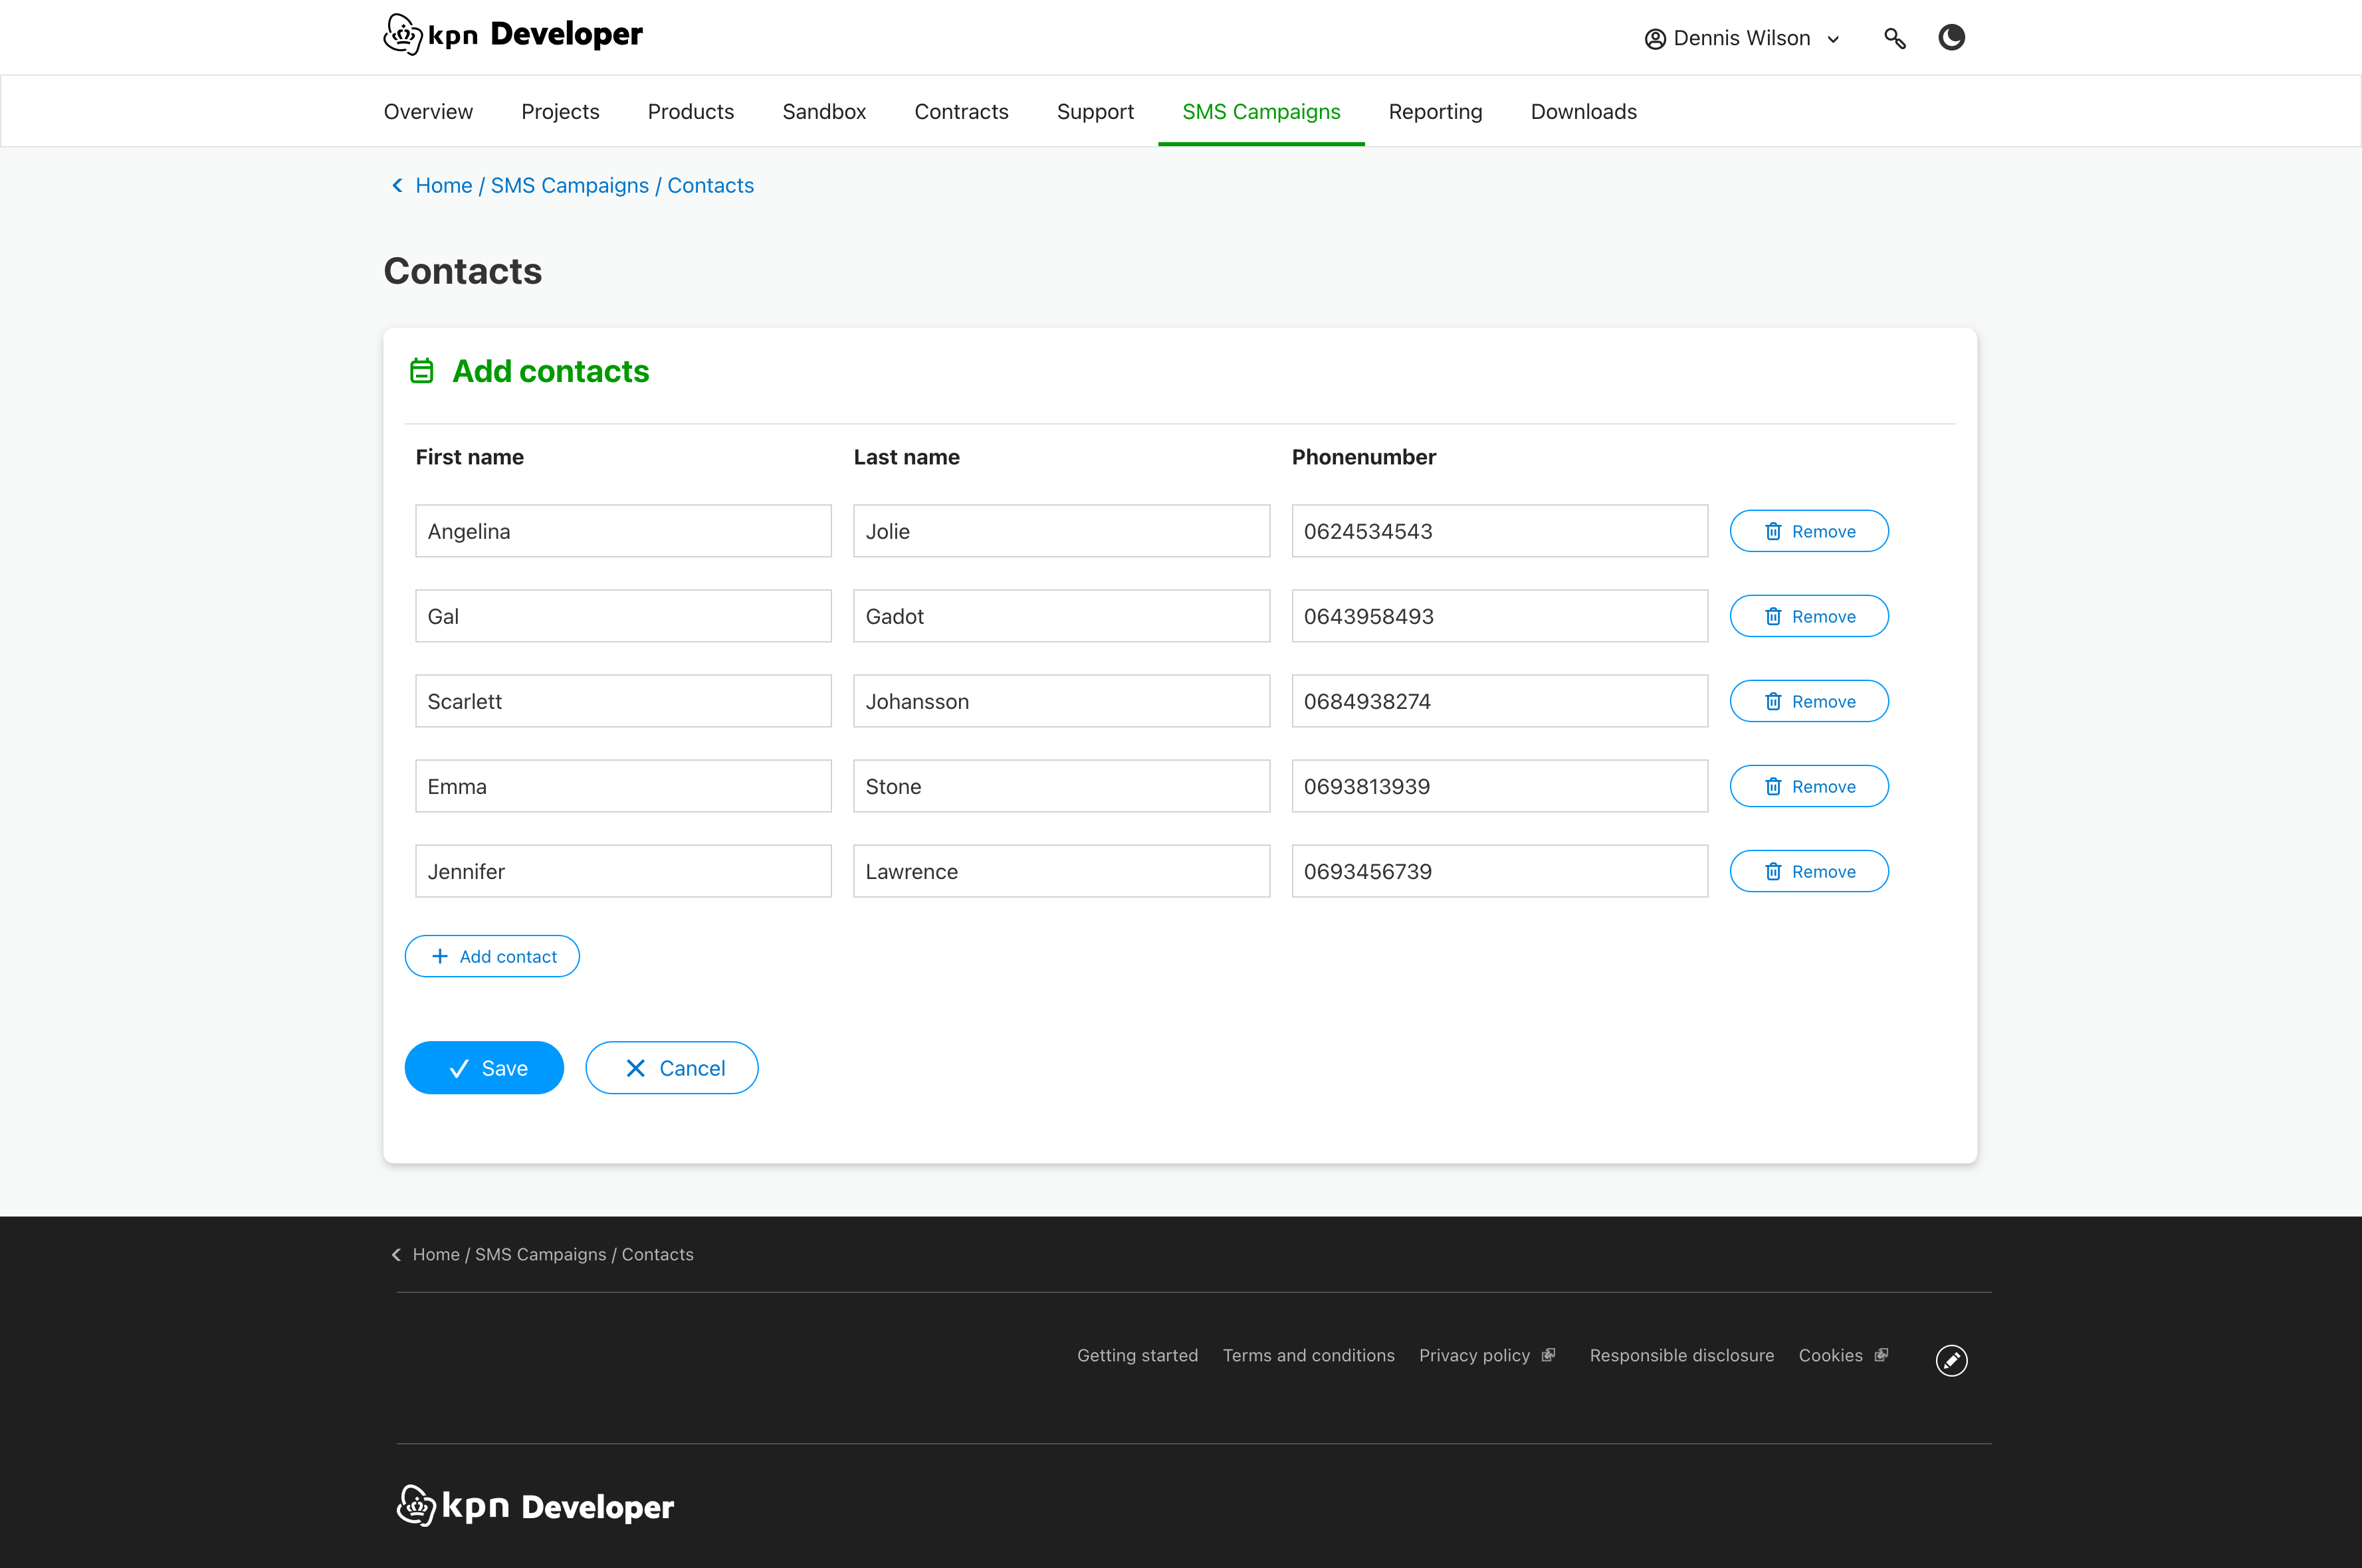
5. Manually add contacts
You can create contacts manually instead of uploading them.
- Click the 'Create contacts' button in the contacts widget or the 'Add' button in the contacts overview.
- Add the first name, last name and phonenumber of the contact.
- Press the 'Add contact' button to enter more contacts.
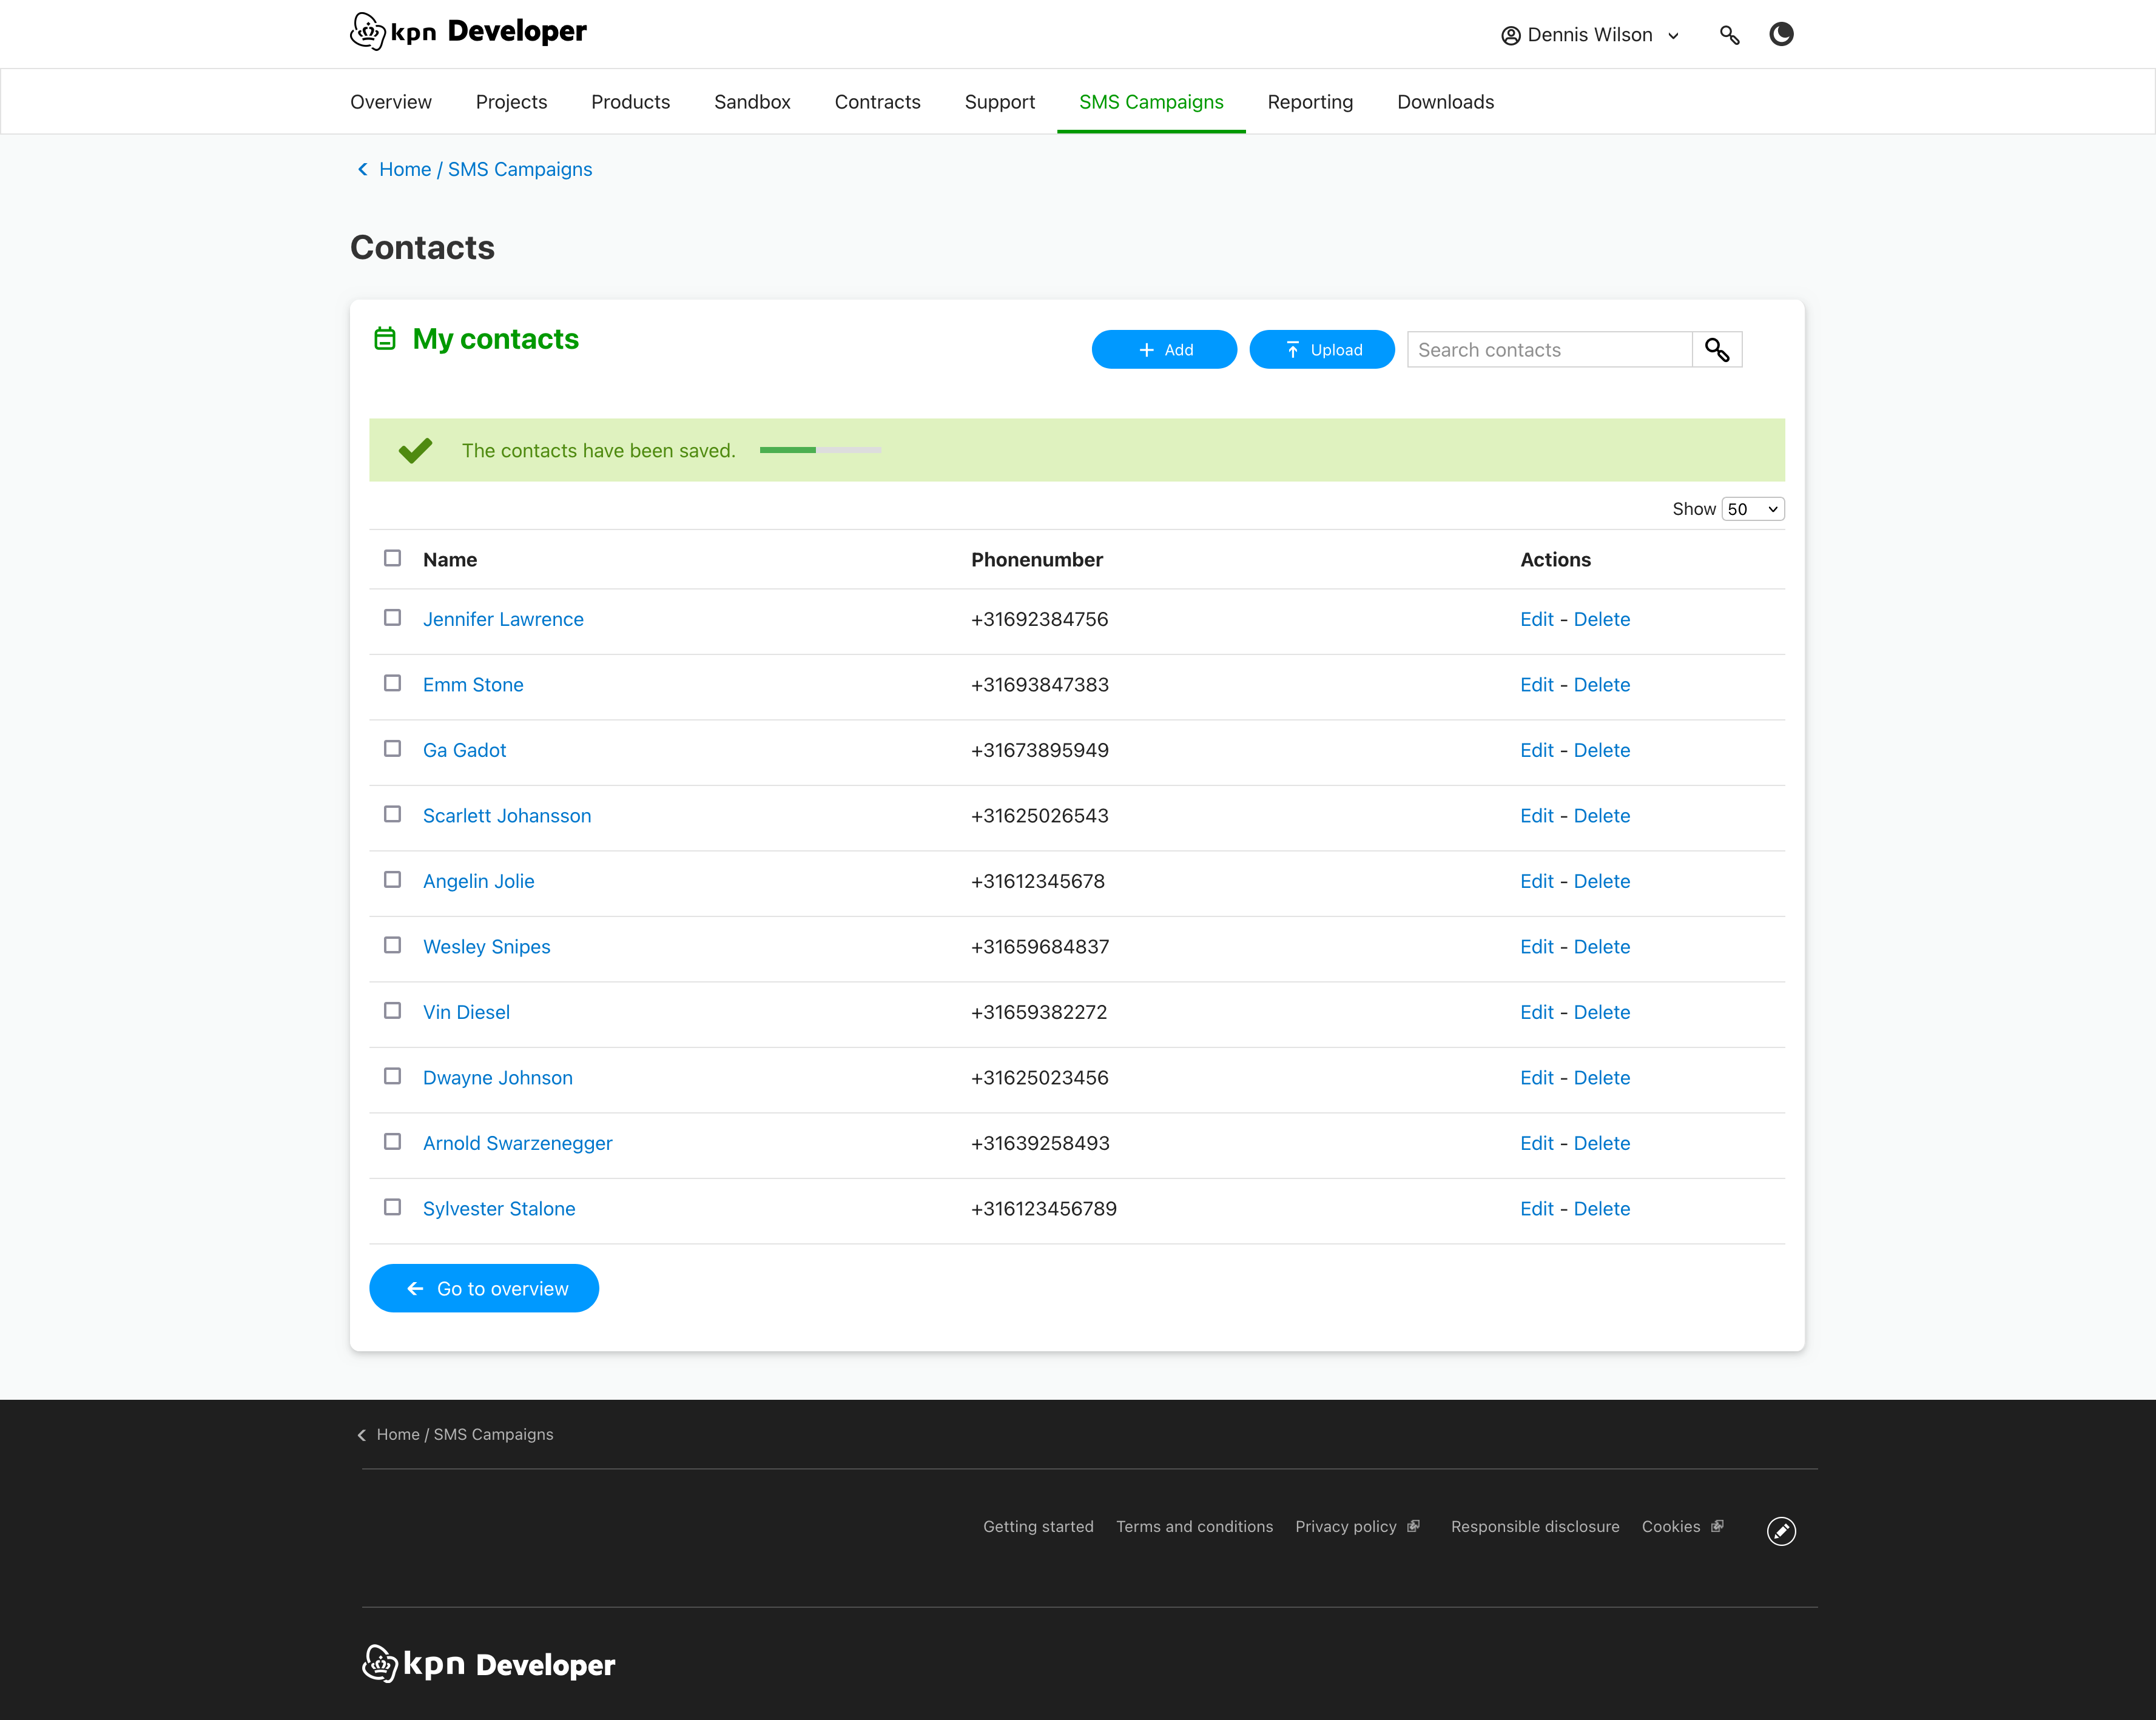
- Press 'Save' to save the new contacts.
You are sent to the contacts overview where your new contacts are listed.
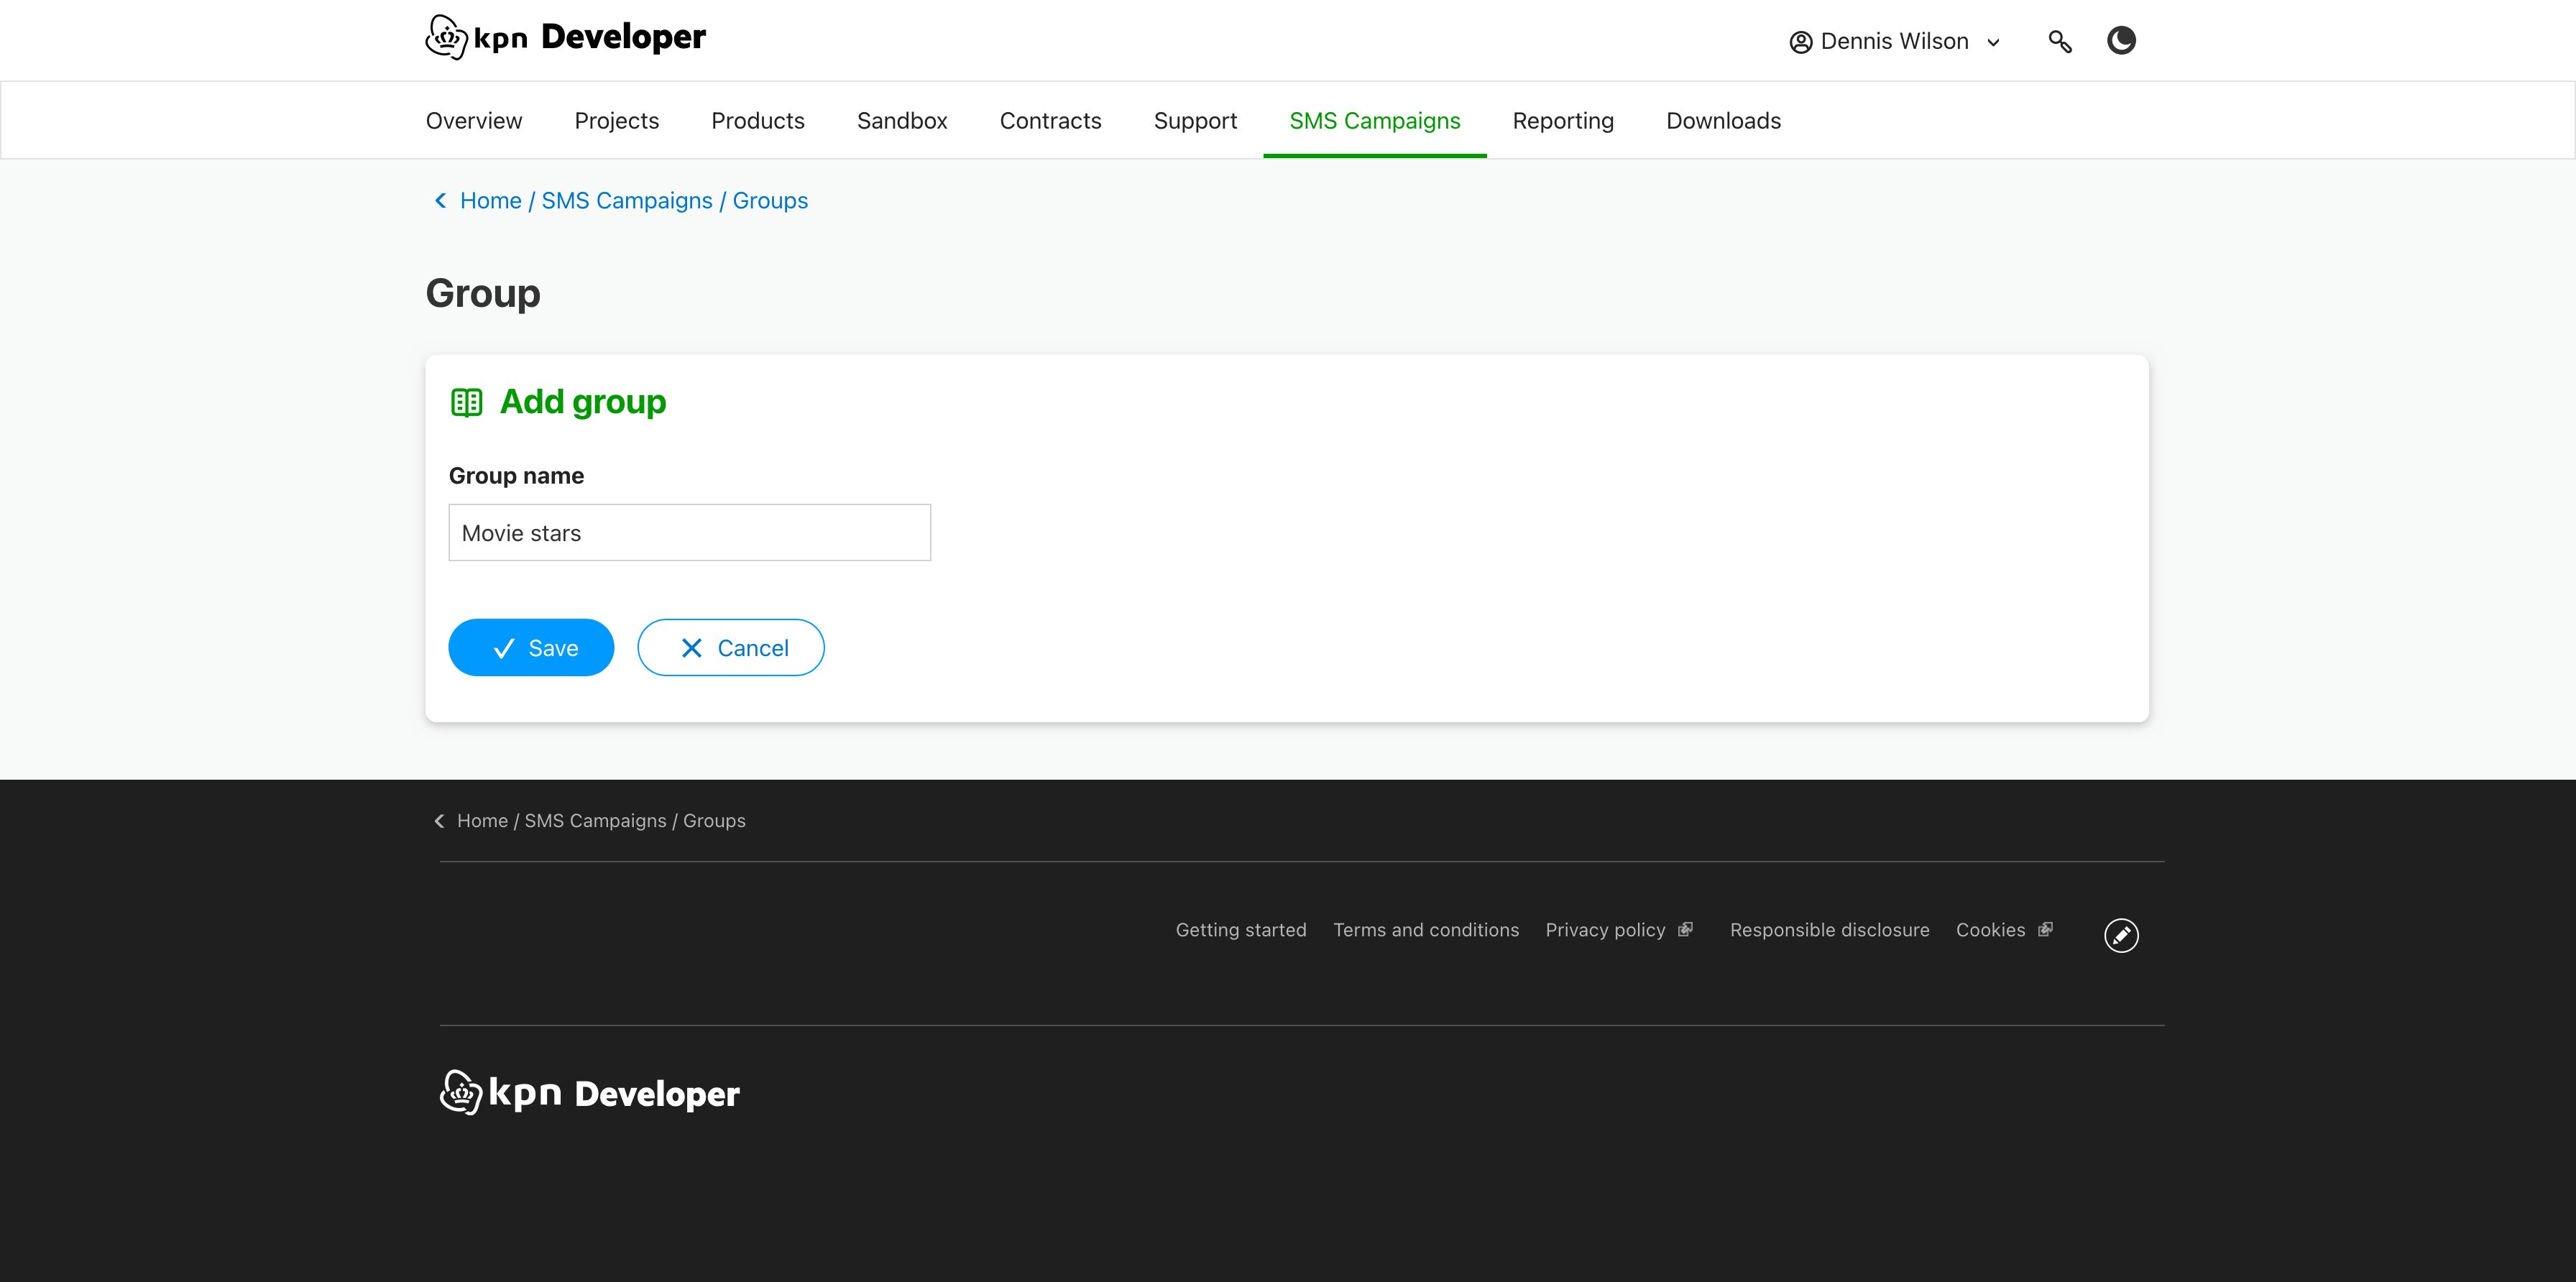
6. Create a contact group
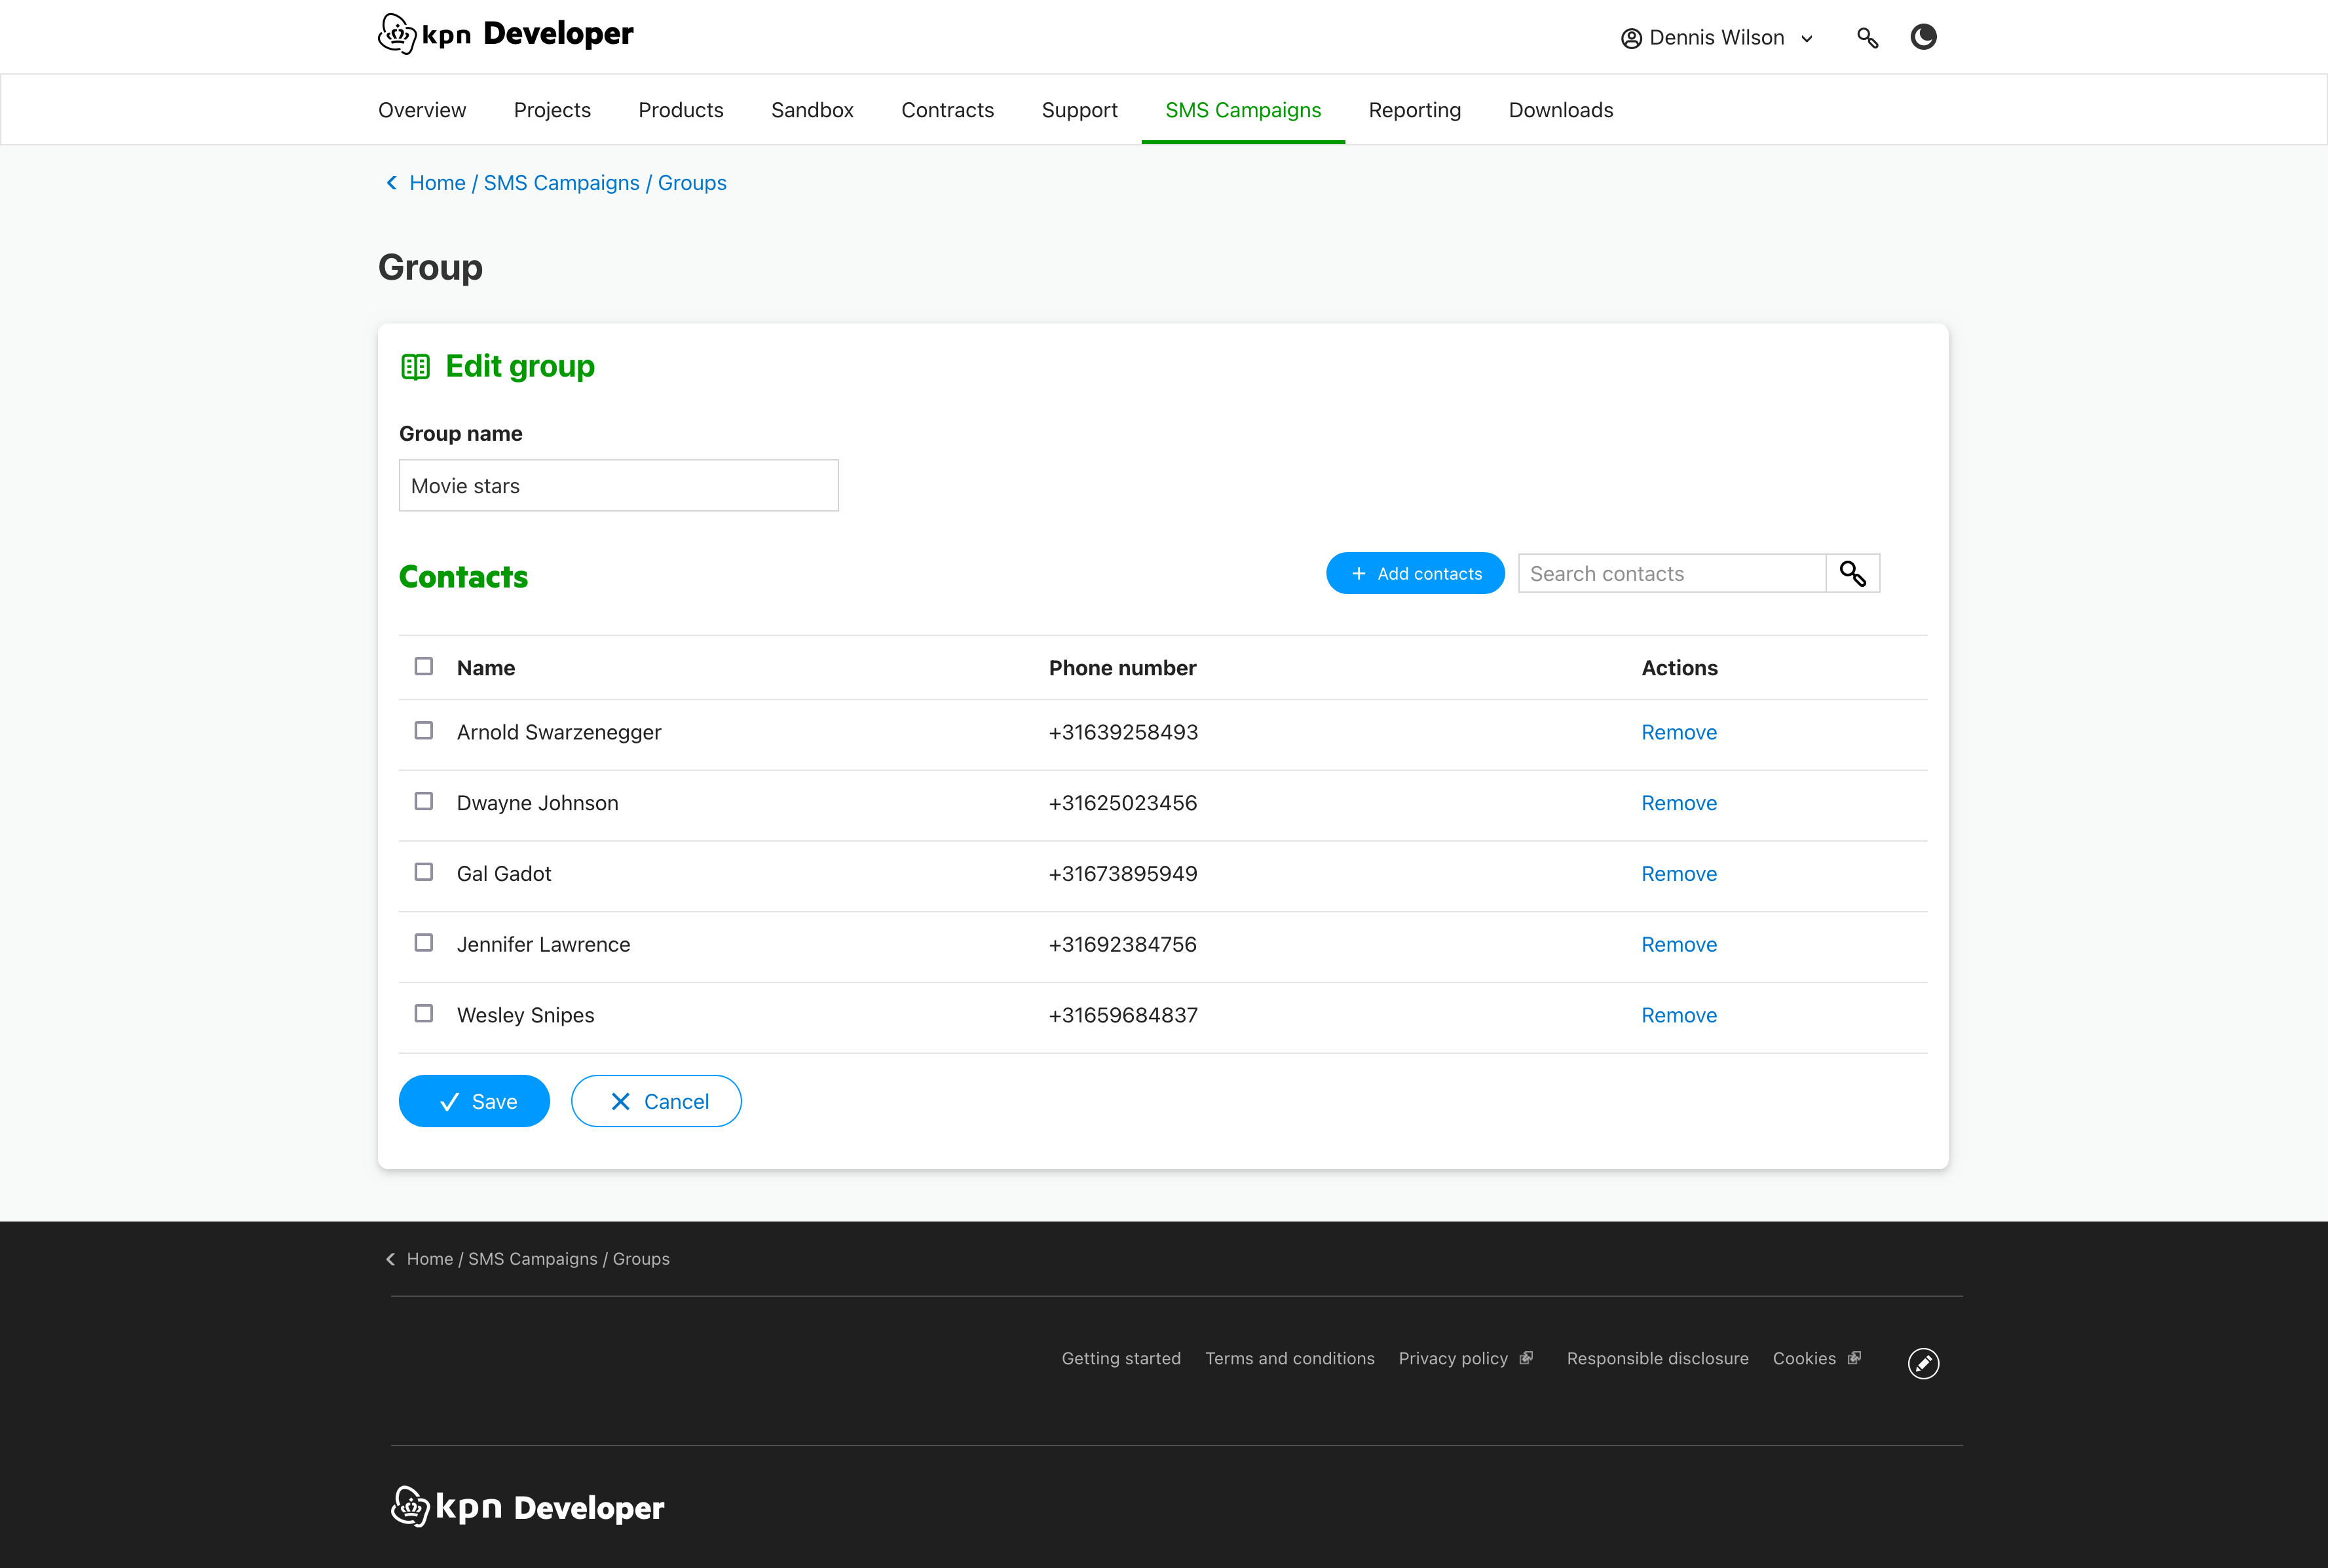
- Click the 'Create a group' button in the groups widget or the 'Add group' button in the groups overview.
- Give the group a name and click 'Save'.
- Click 'Add contacts'.
- Select the contacts you want to add and click 'Add contacts'.
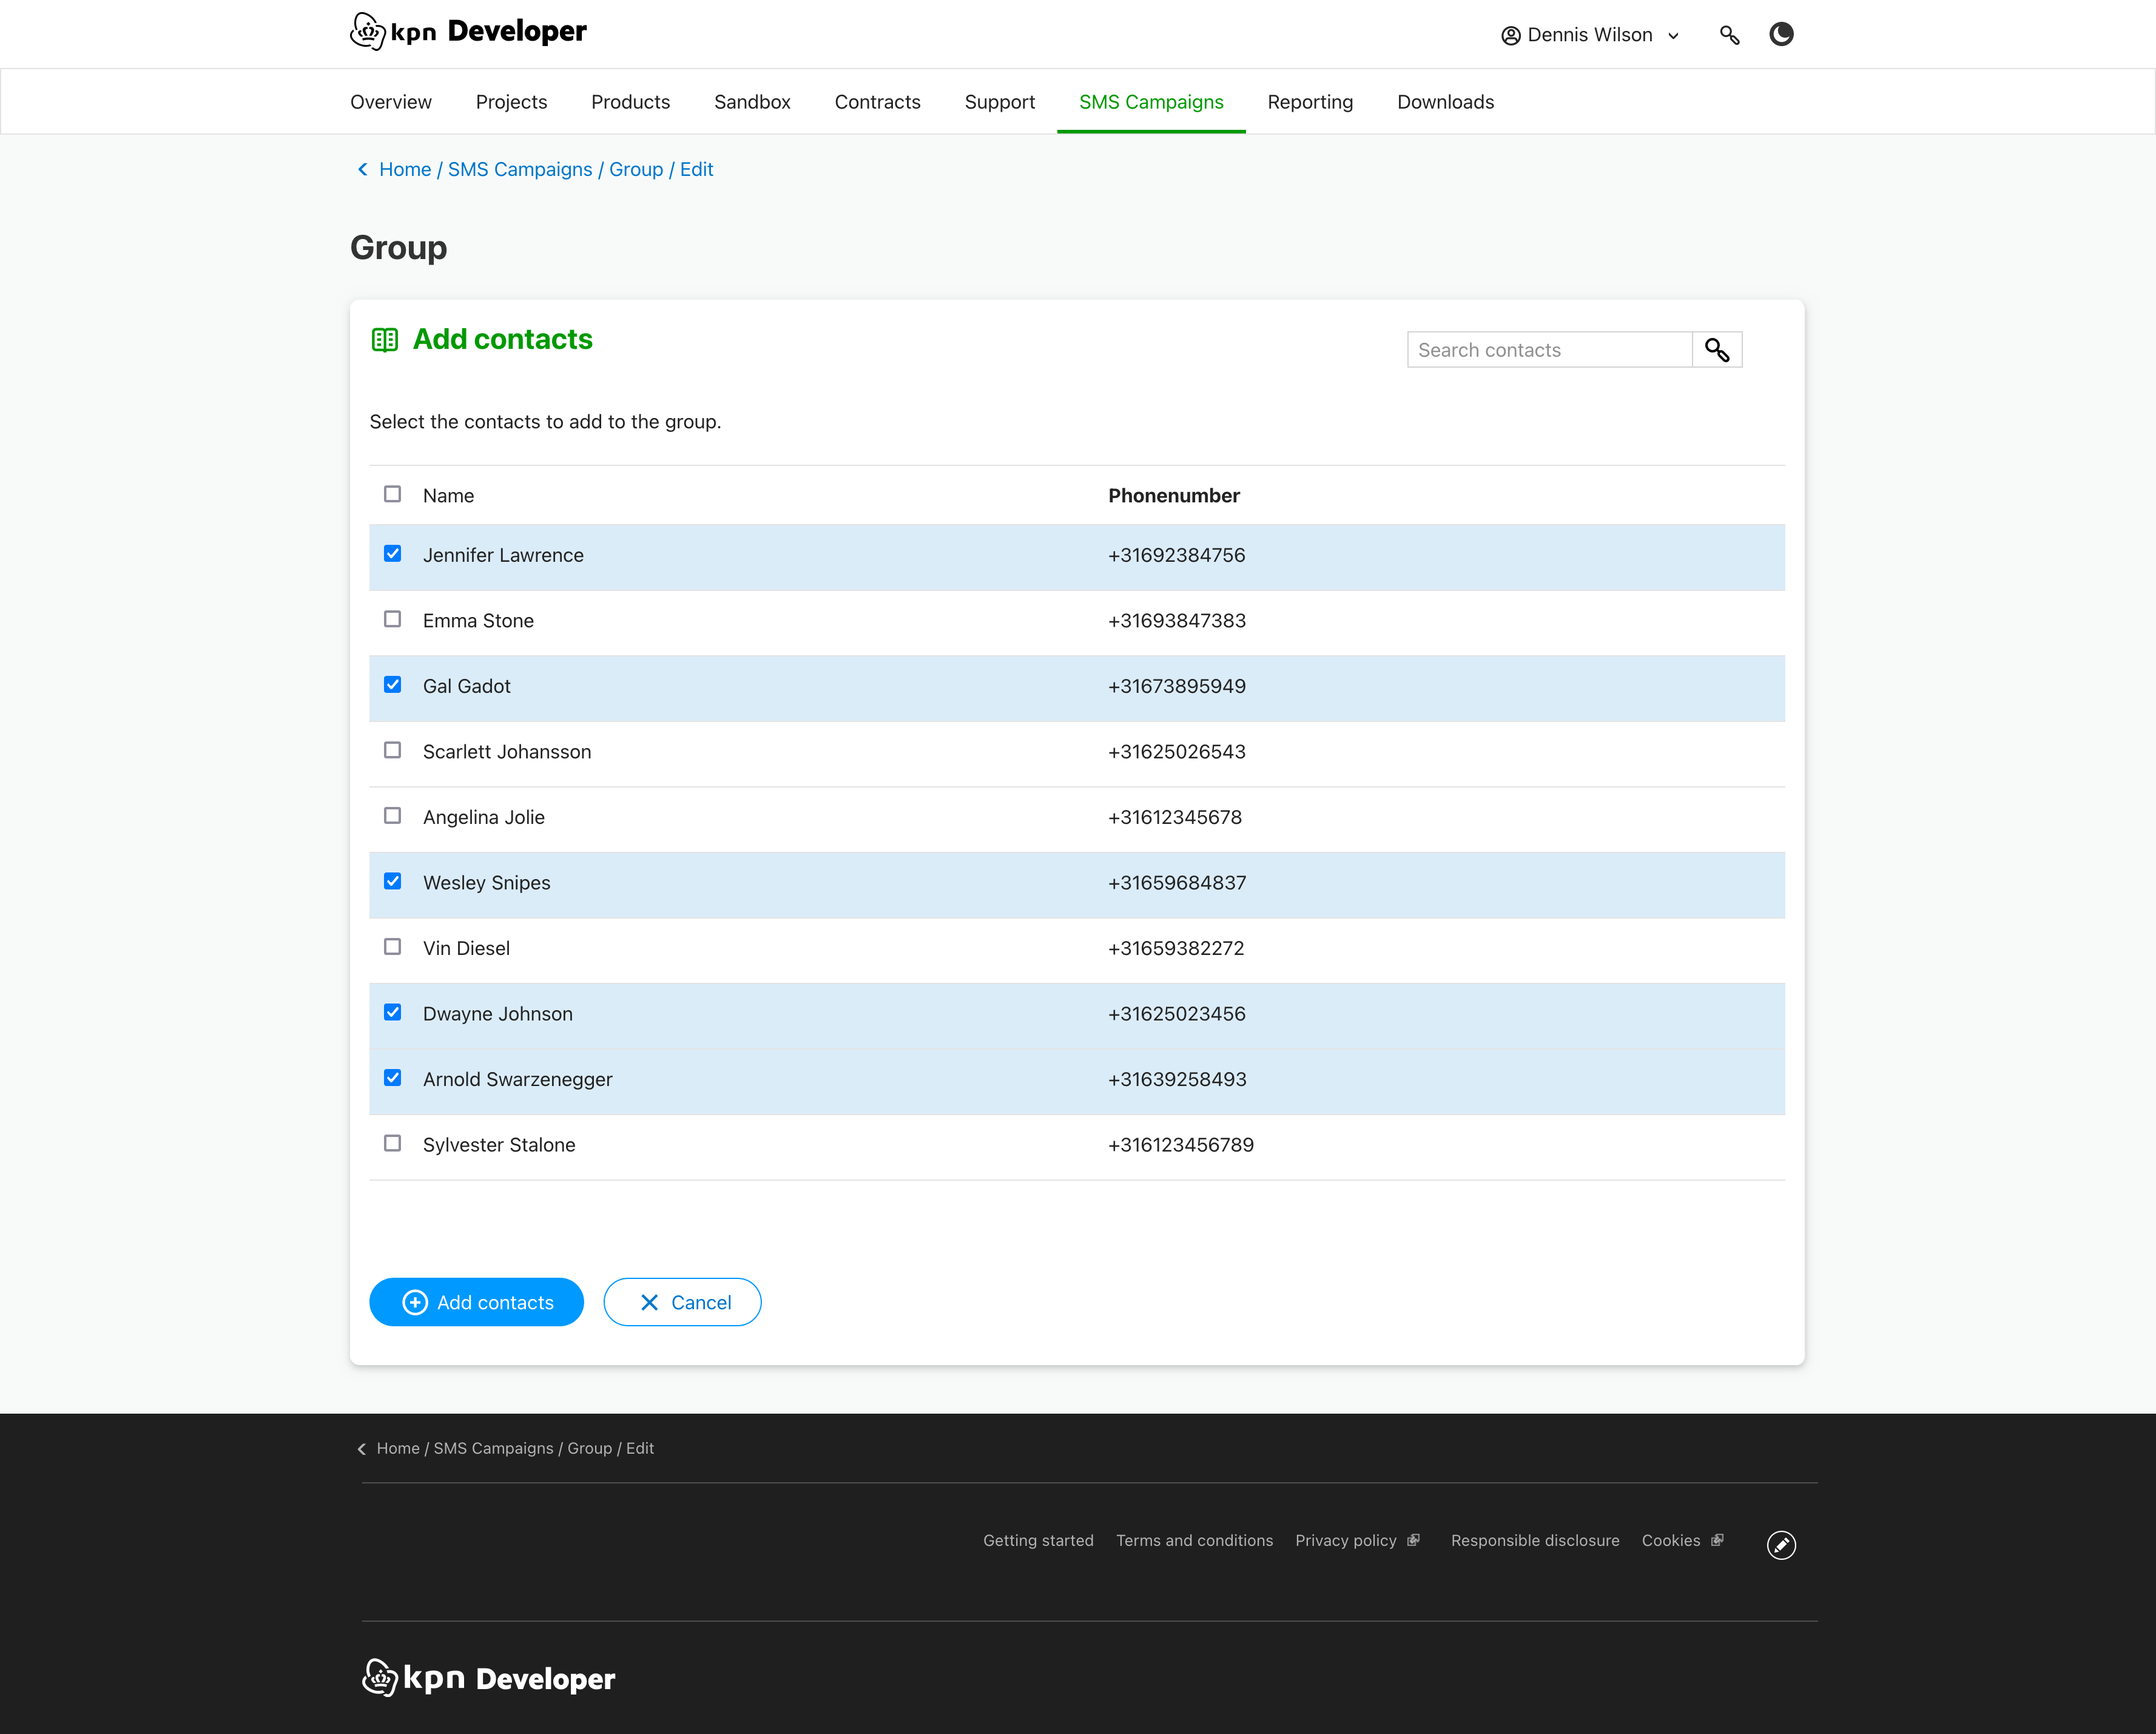
- The group has been created and saved.
7. Create a campaign with contact groups
In order for you to use contact groups in a campaign, you need to have at least one group containing at least one contact.
7.1. Create a campaign
- Click the 'Create a campaign' button in the campaigns widget or in the campaign overview.
- Give the campaign a name.
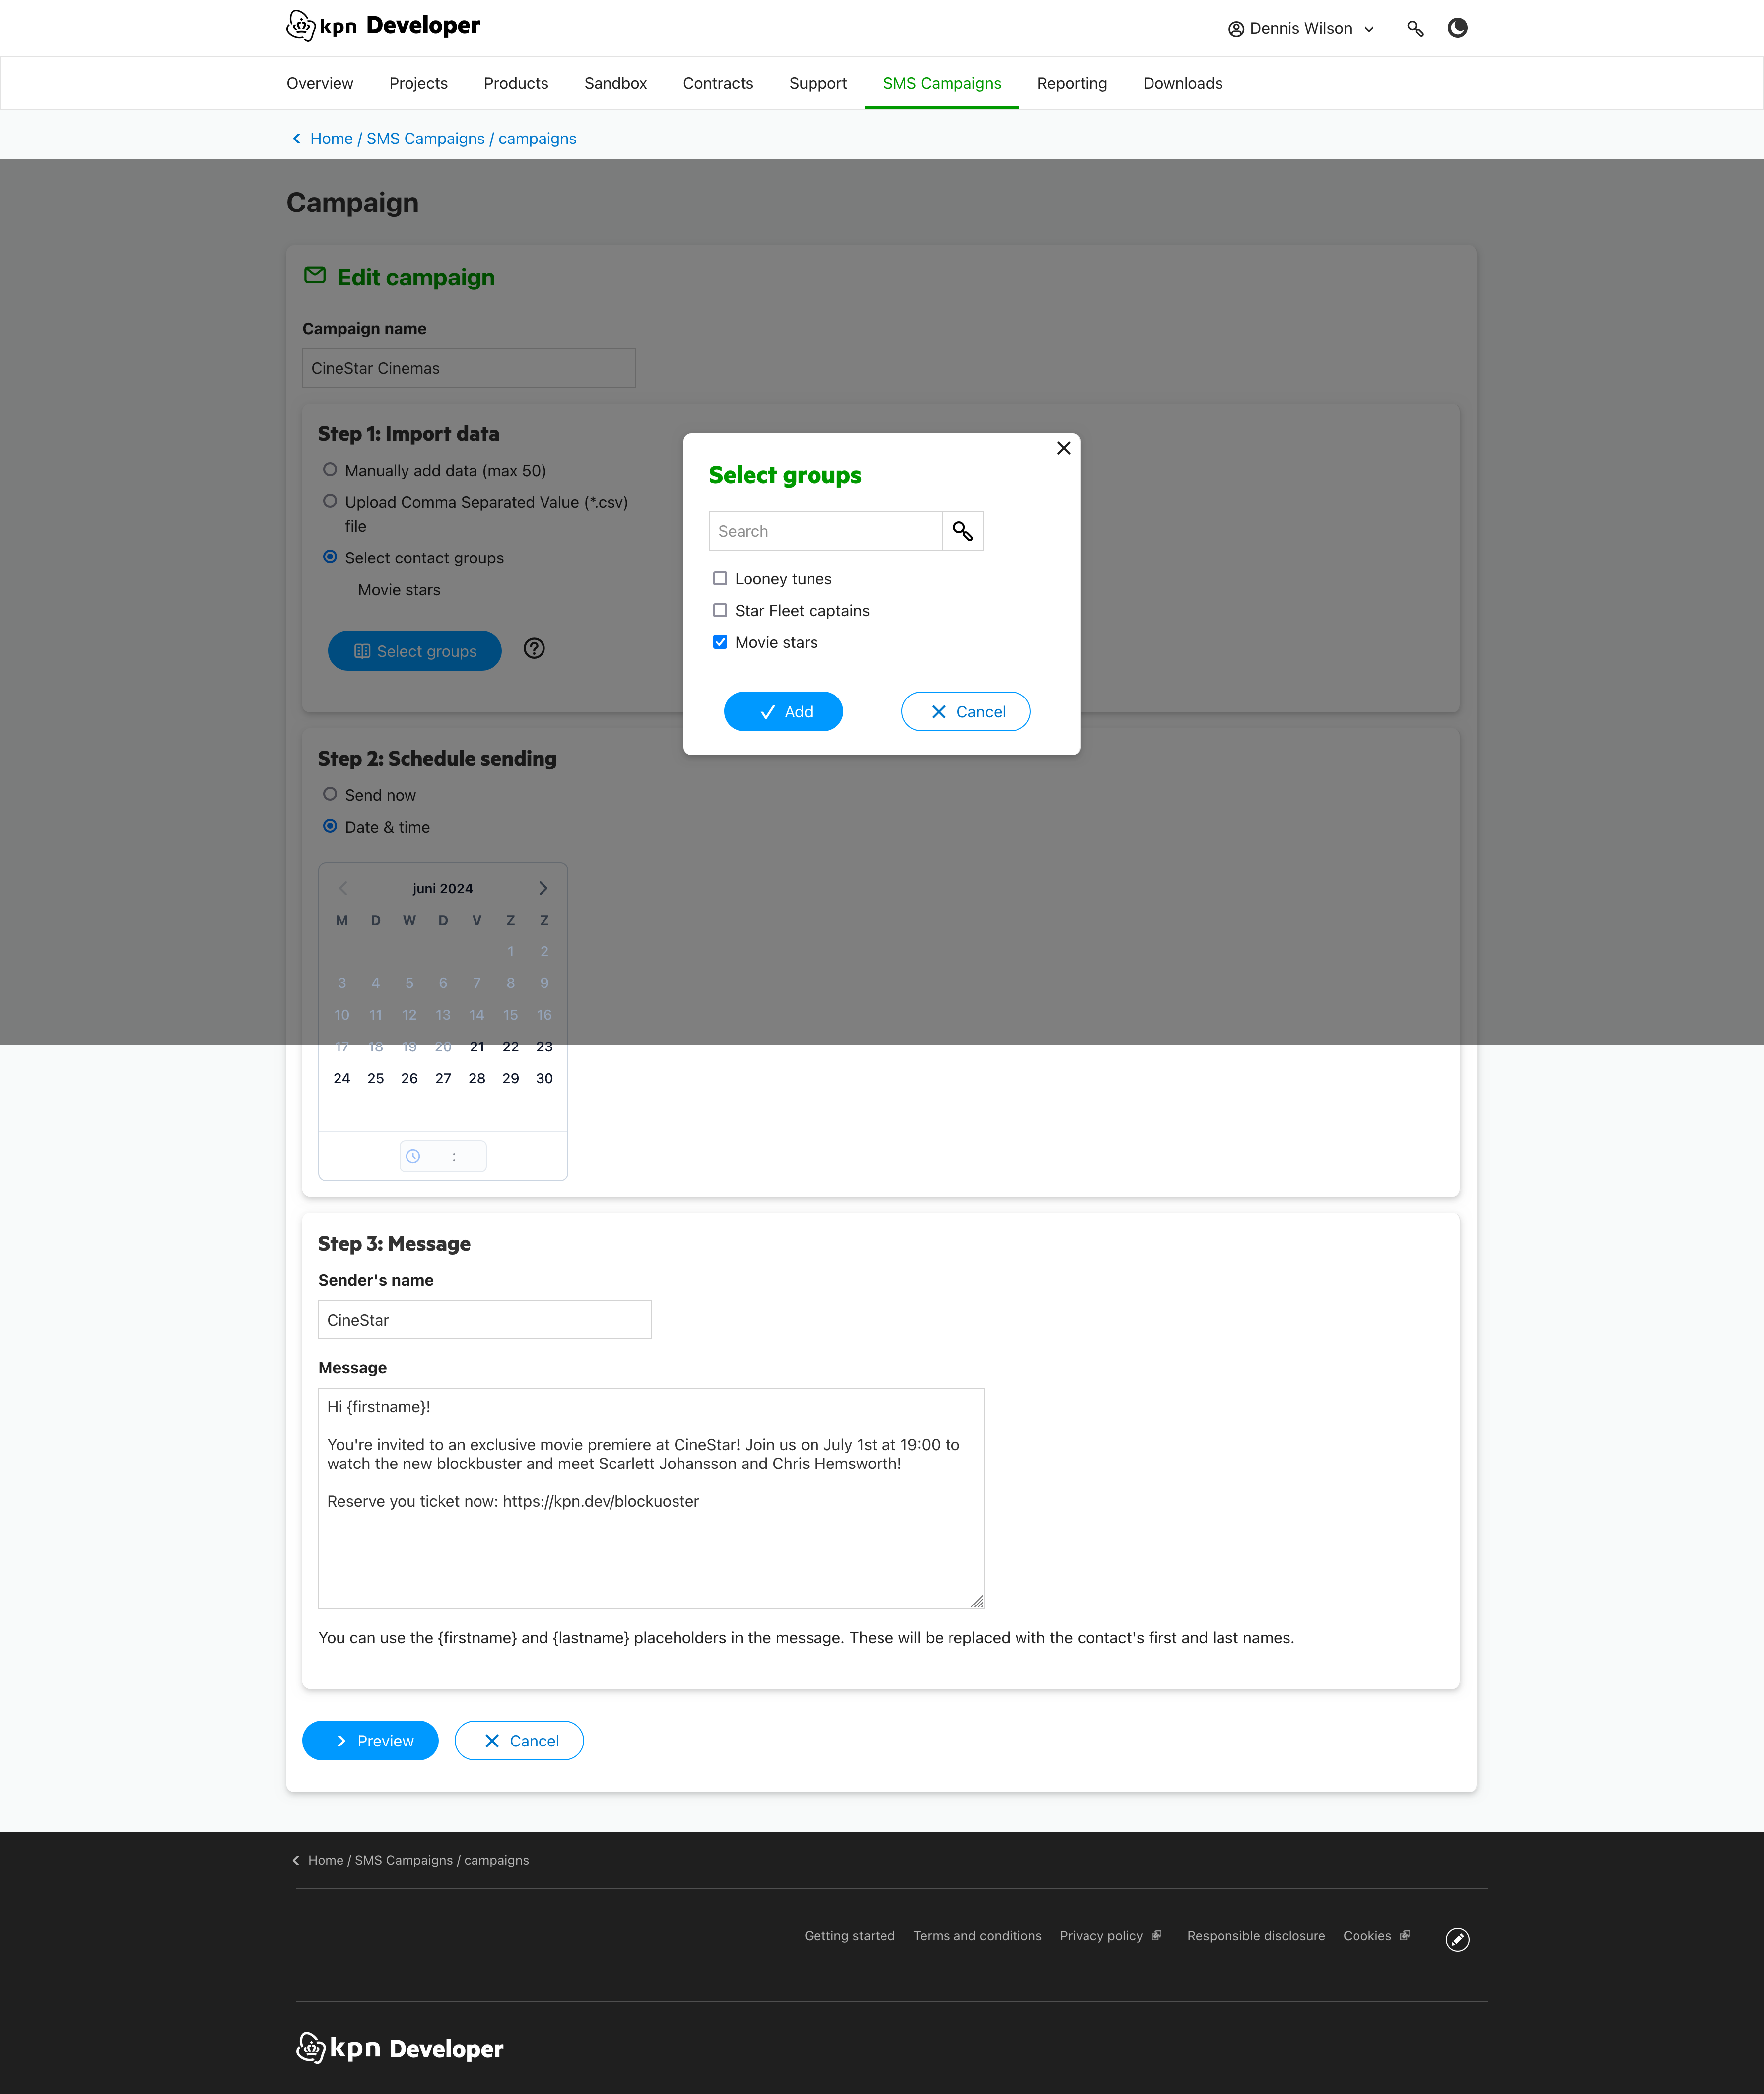
- In 'Step 1: Import data' select 'Select contact groups'.
- Click the 'Select groups' button and select one or more groups.
- Fill in the sender's name and the schedule option.
- Add a message. You can use the {firstname} and {lastname} placeholders in your message. When sending the messages, the placeholders are replaced with first name and last name from the contact.
- Click 'Preview' to preview your campaign.
7.2 Preview
- In the preview you can see the personalized messages that will be send.
- If you want to change some information press the 'Edit' button. If the campaign is ready press the 'Activate' button.
- If you want to change some information press the 'Edit' button. If the campaign is ready press the 'Activate' button.
8. Create campaign templates
To speed up the process of creating a campaign you can create a campaign template. When you want to create a campaign you simply choose a template and all the information from the template is added to your new campaign.
8.1 Create template
- Click the 'Create a template' button in the templates widget or in the 'Add template' button in the template overview.
- Give the template a name.
- In 'Step 1: Import data' select 'Select contact groups'.
- Click the 'Select groups' button and select one or more groups.
- Fill in the sender's name and the schedule option.
- Add a message. You can use the {firstname} and {lastname} placeholders in your message. When sending the messages, the placeholders are replaced with first name and last name from the contact.
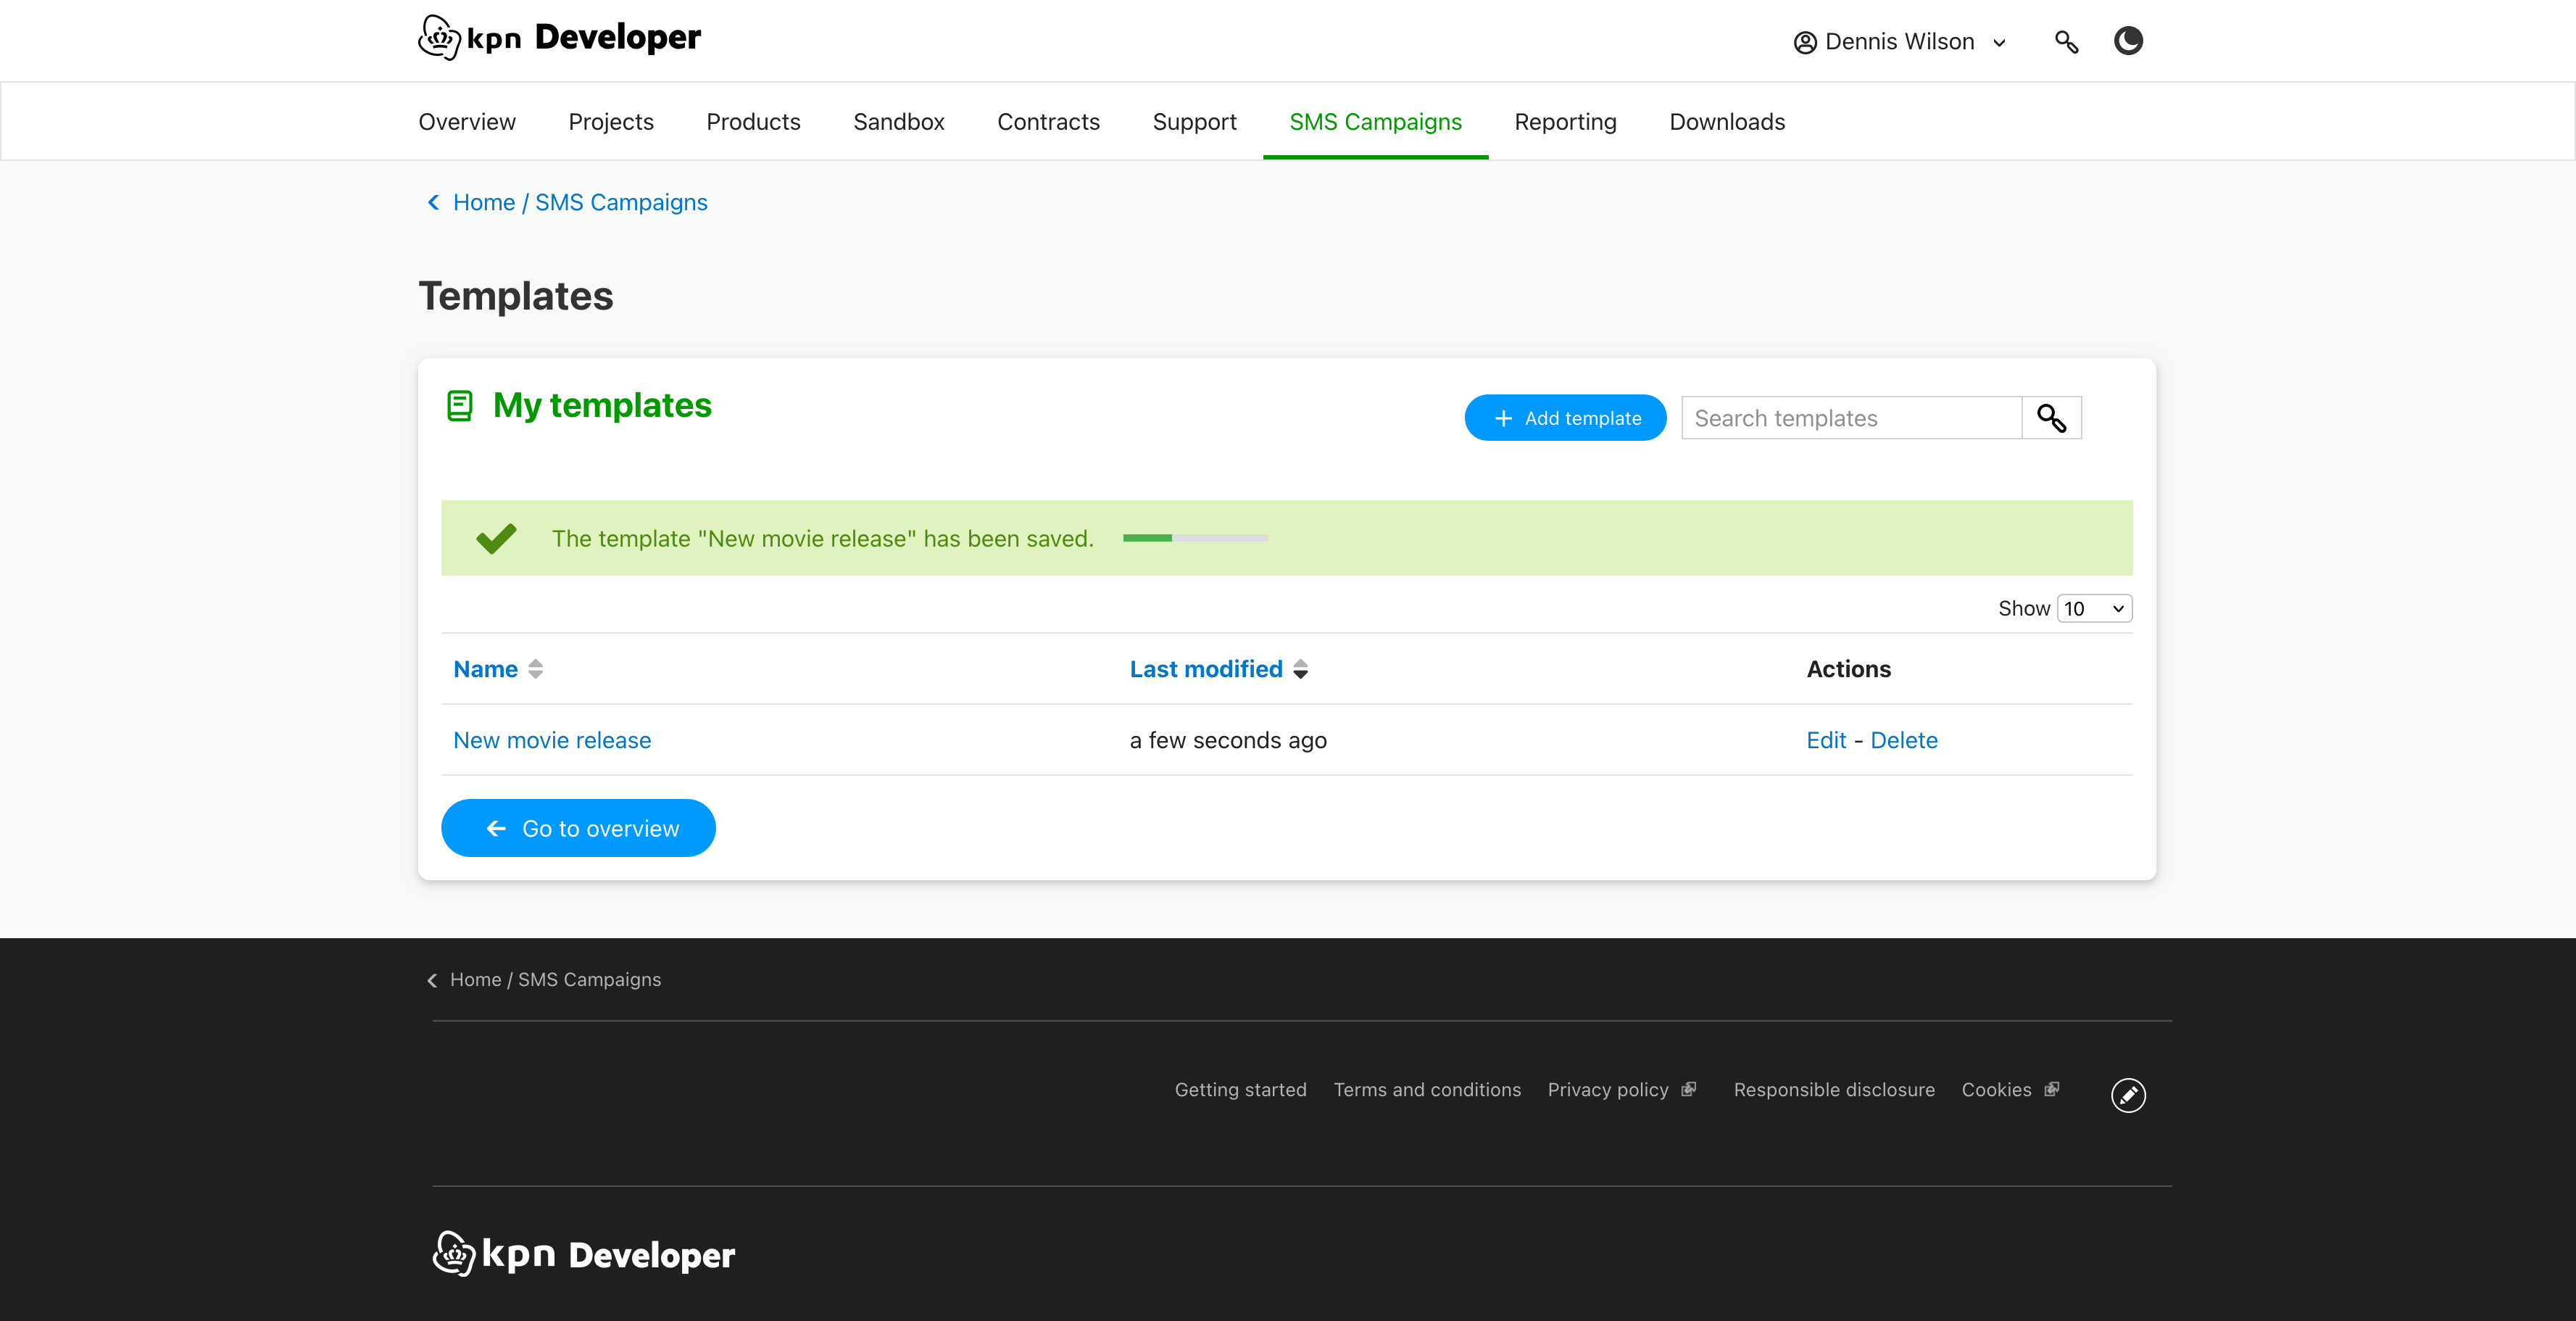
- Click 'Save'.
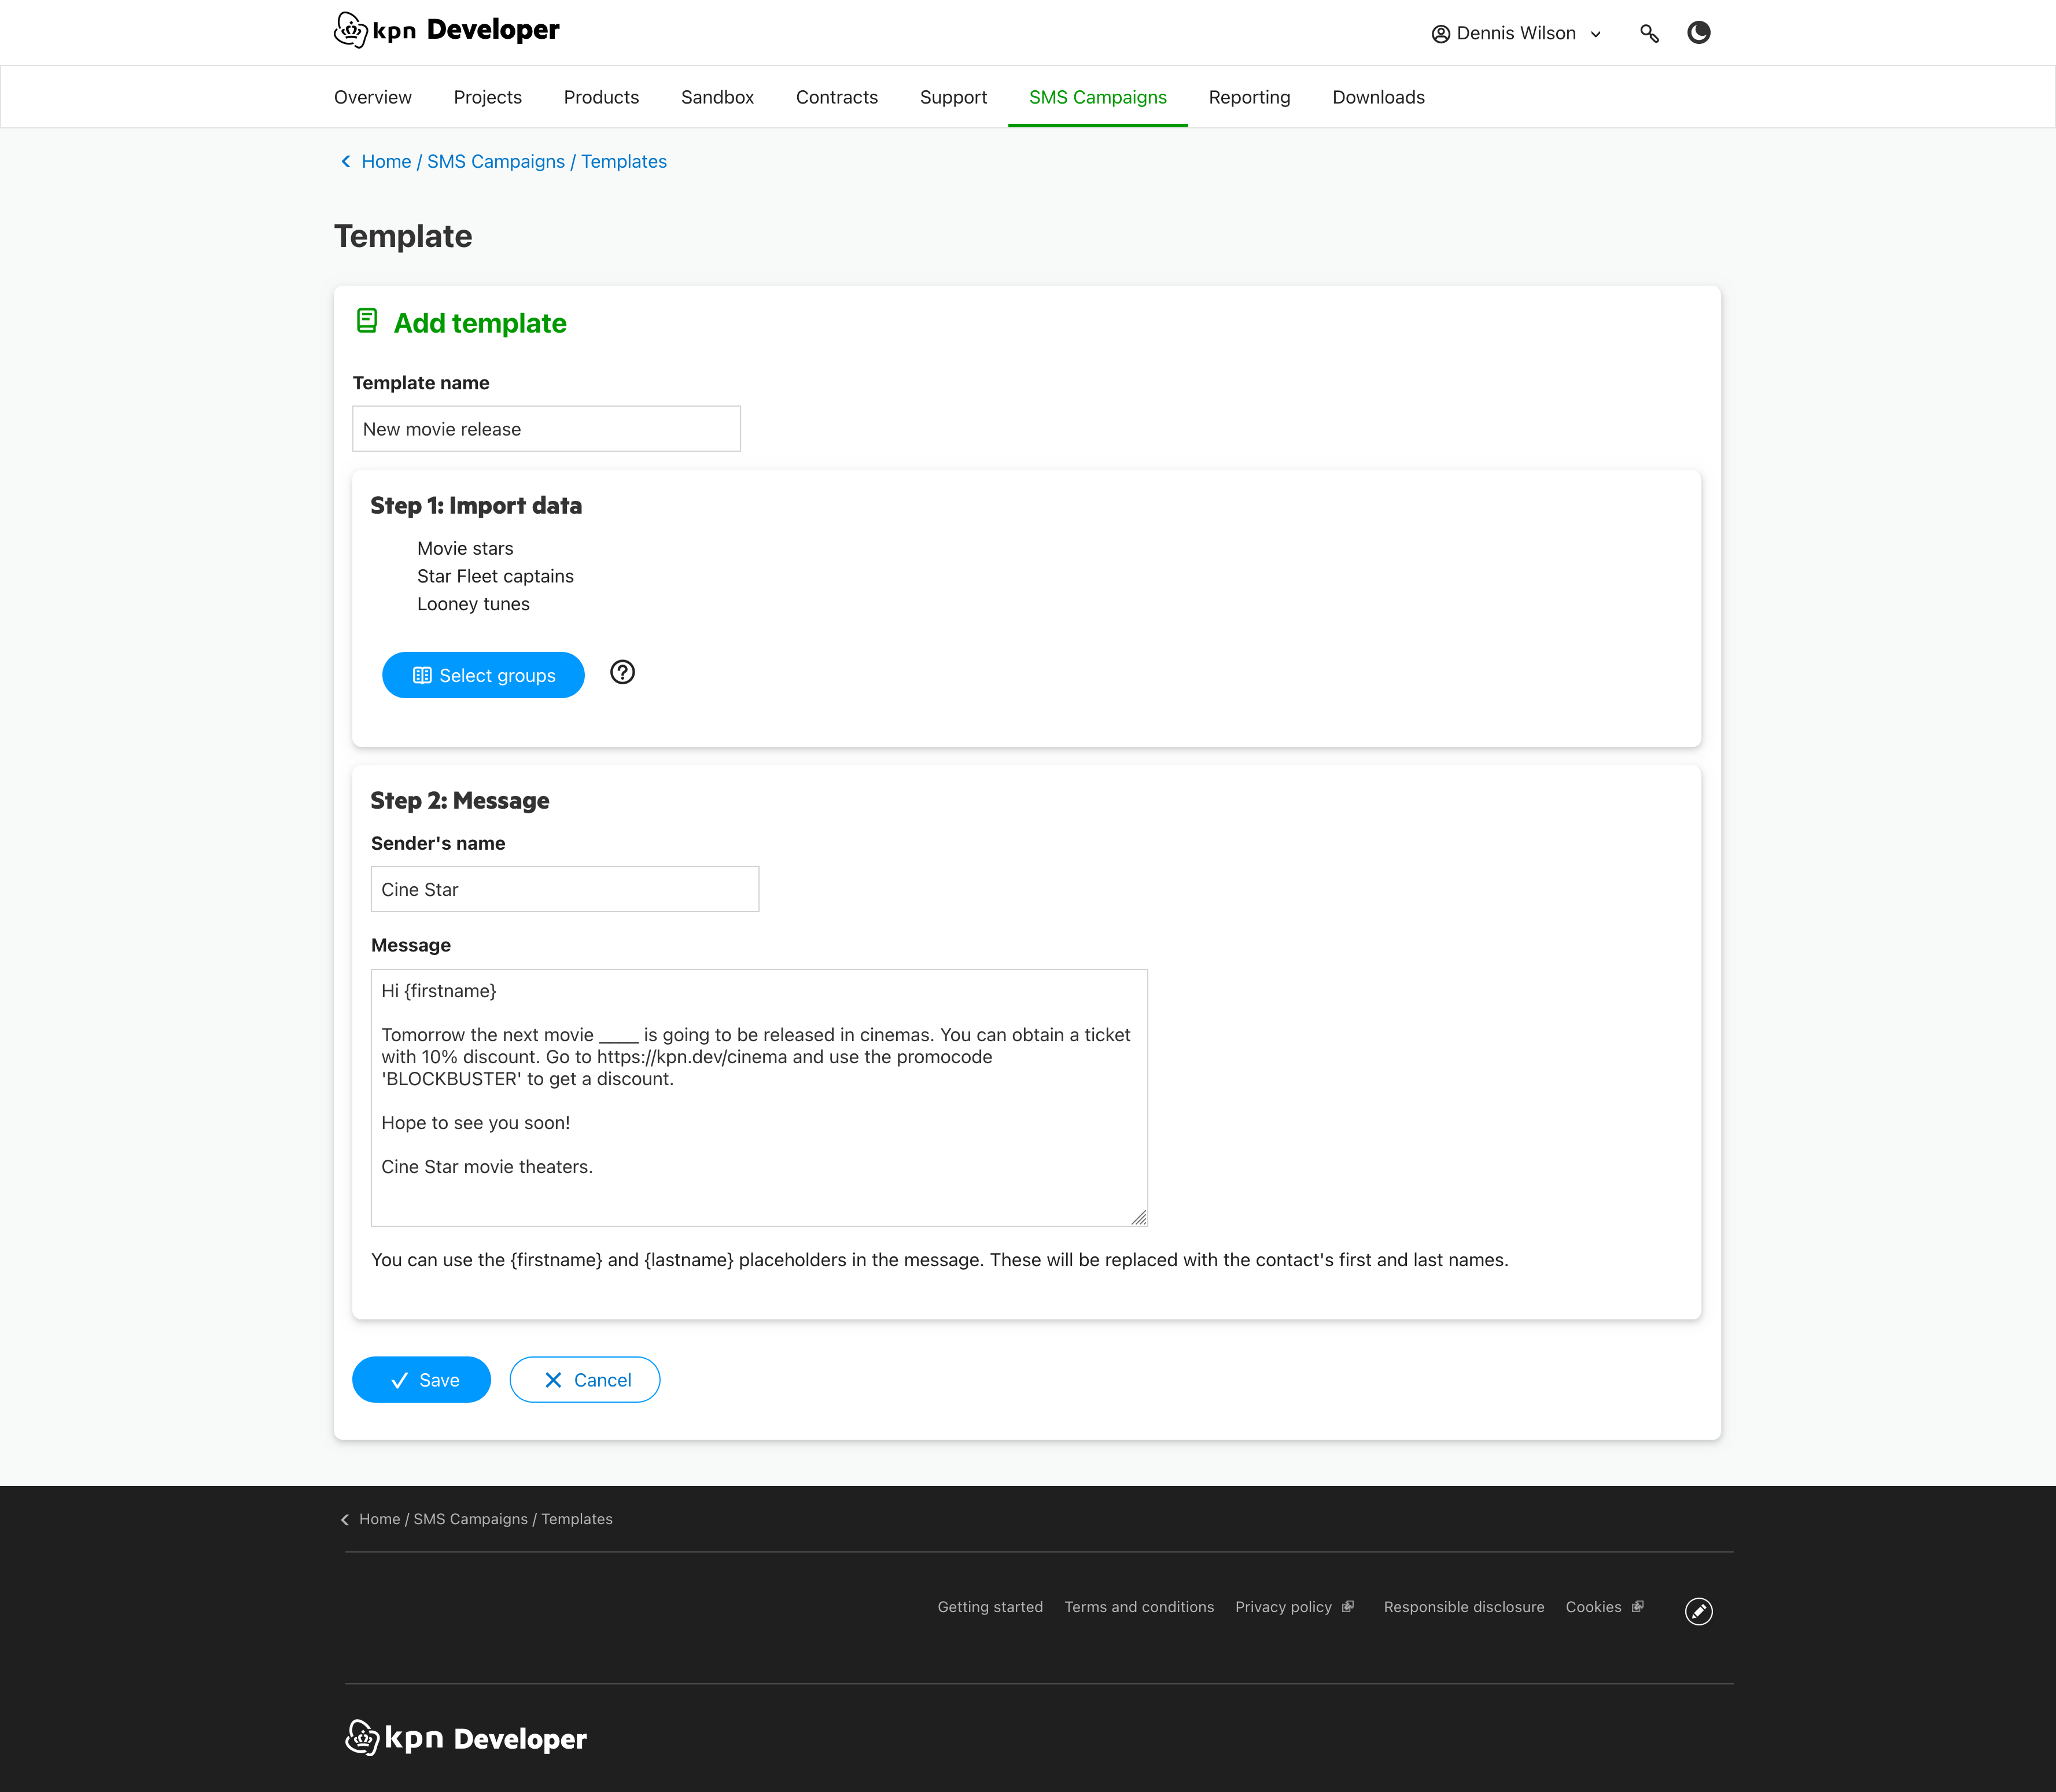
The template is saved and you return to the template overview page.
9. Create a campaign from template
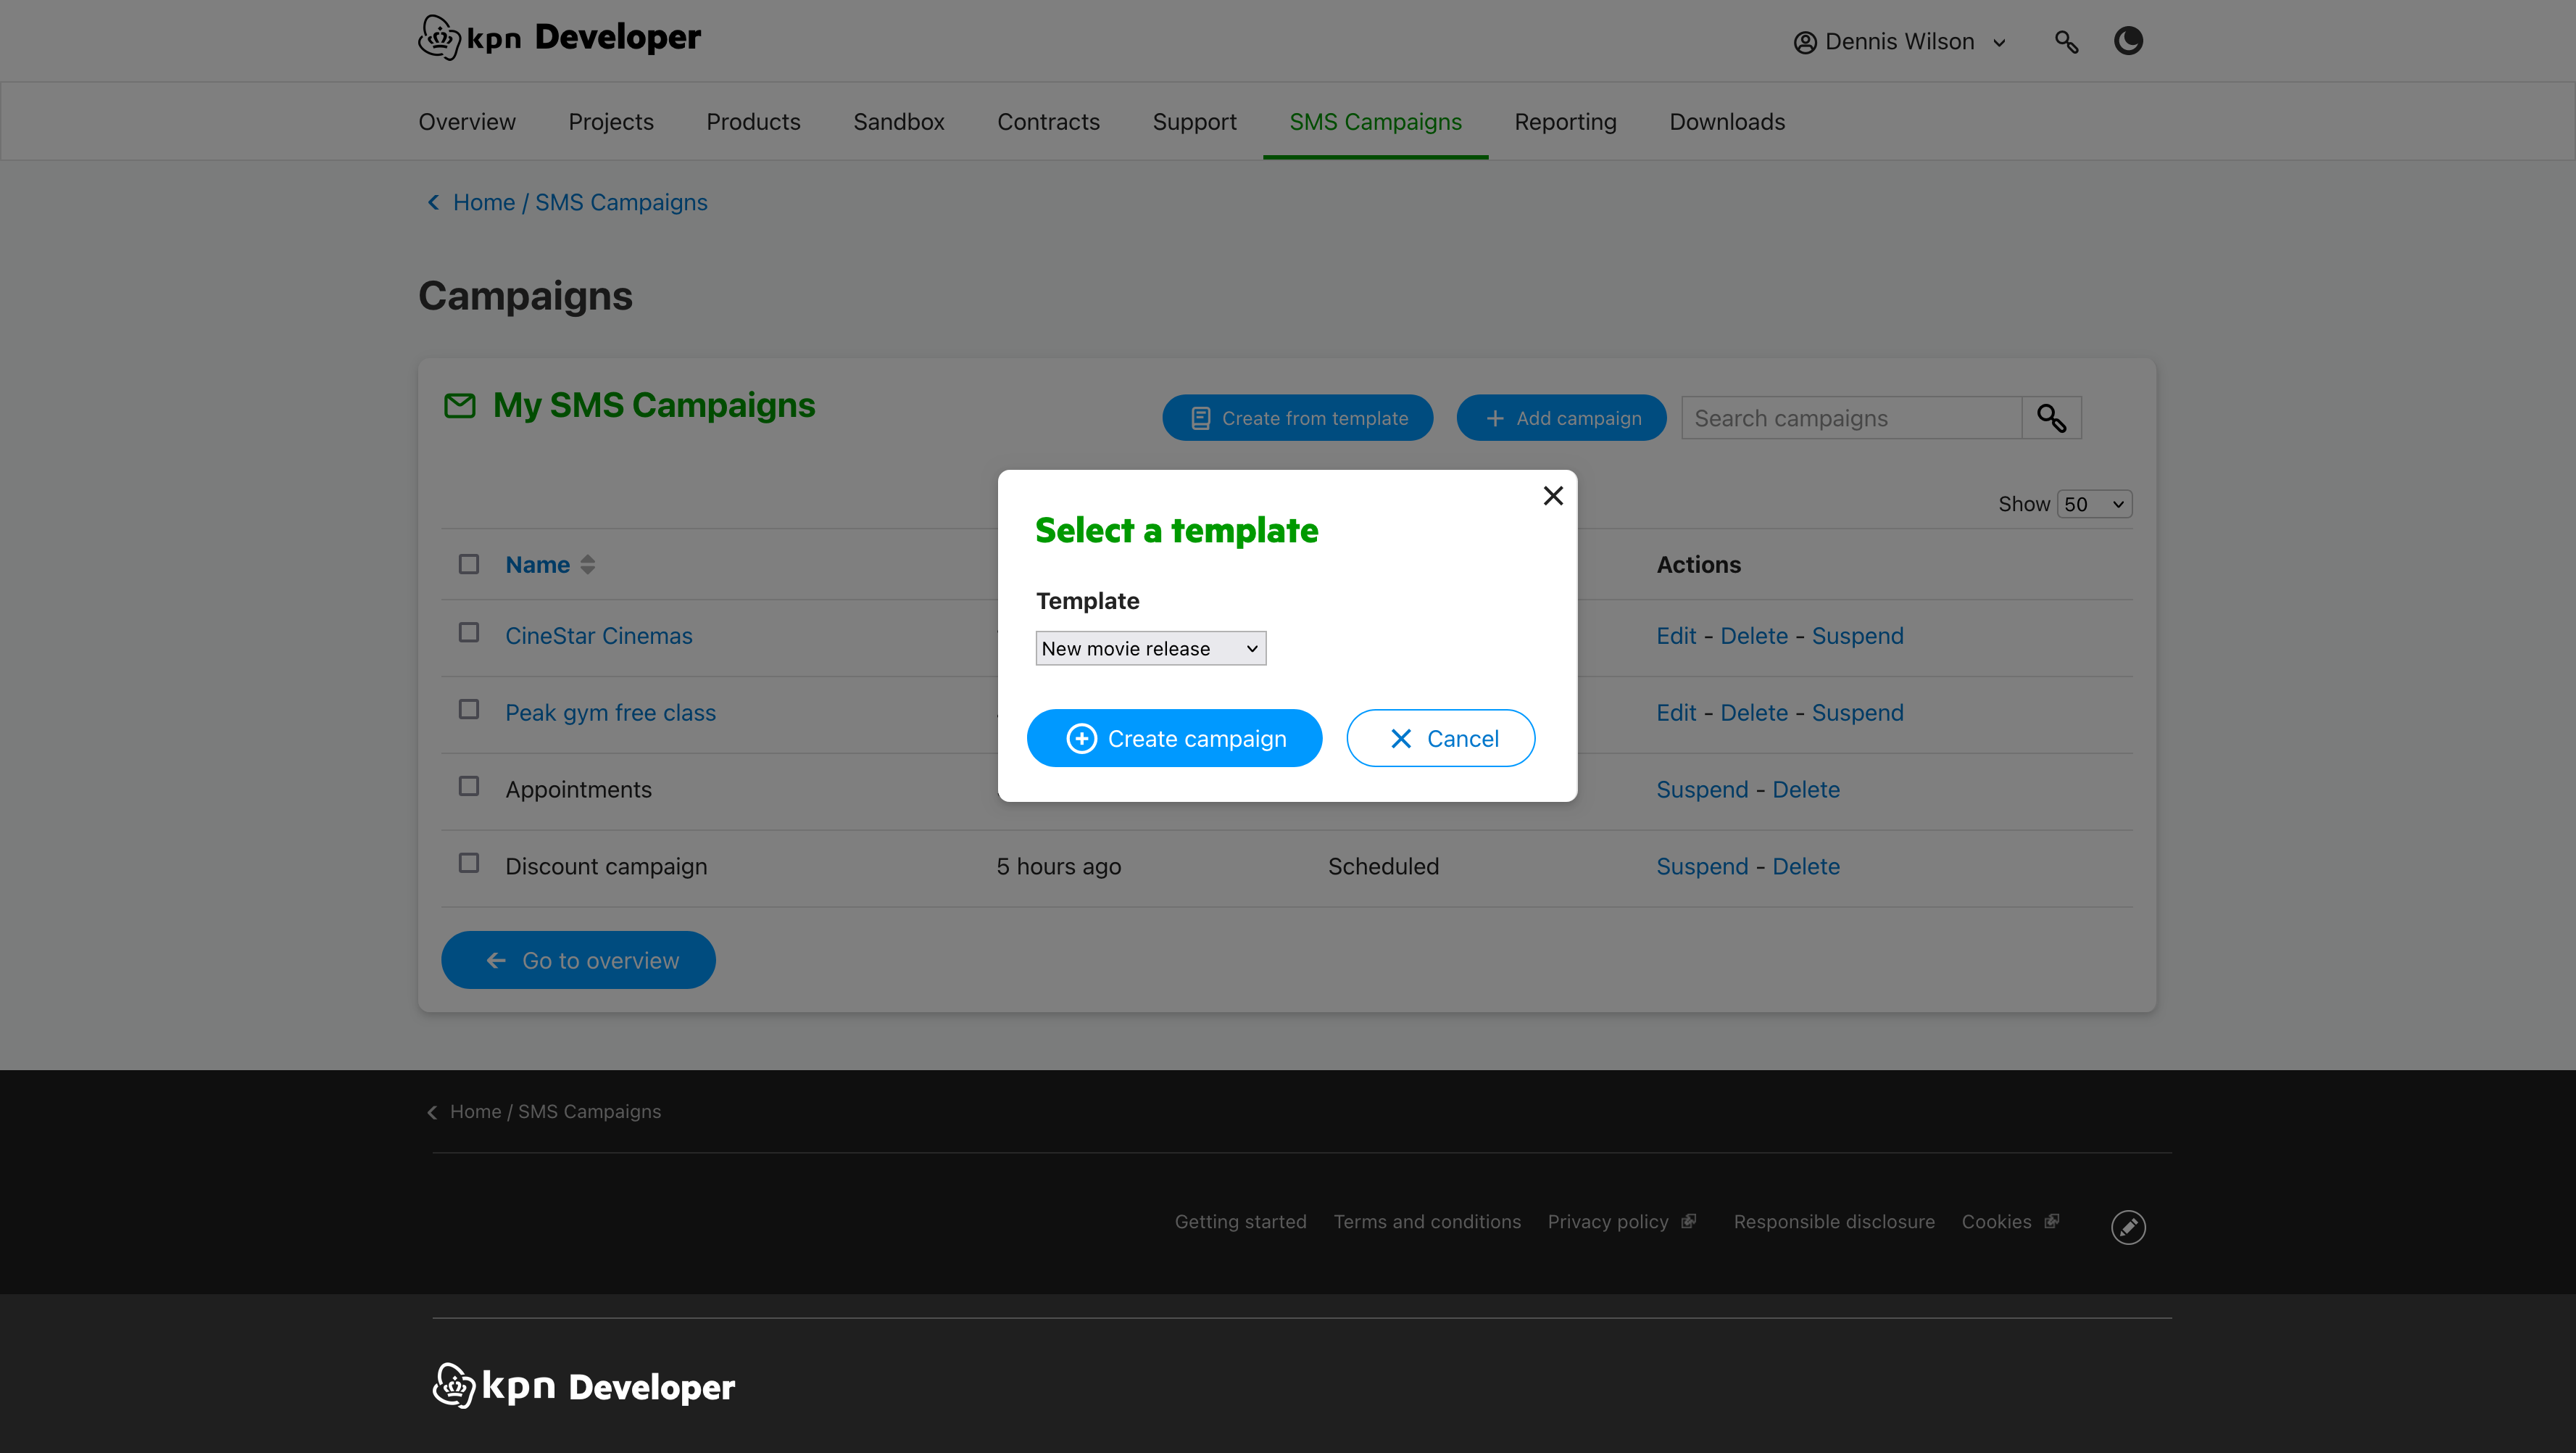
- Click the 'Create from template' button in the campaigns widget or the campaign overview.
- Select the template to use and create 'Create campaign'.
- The campaign edit screen is displayed and all the information from the template is added to the form.
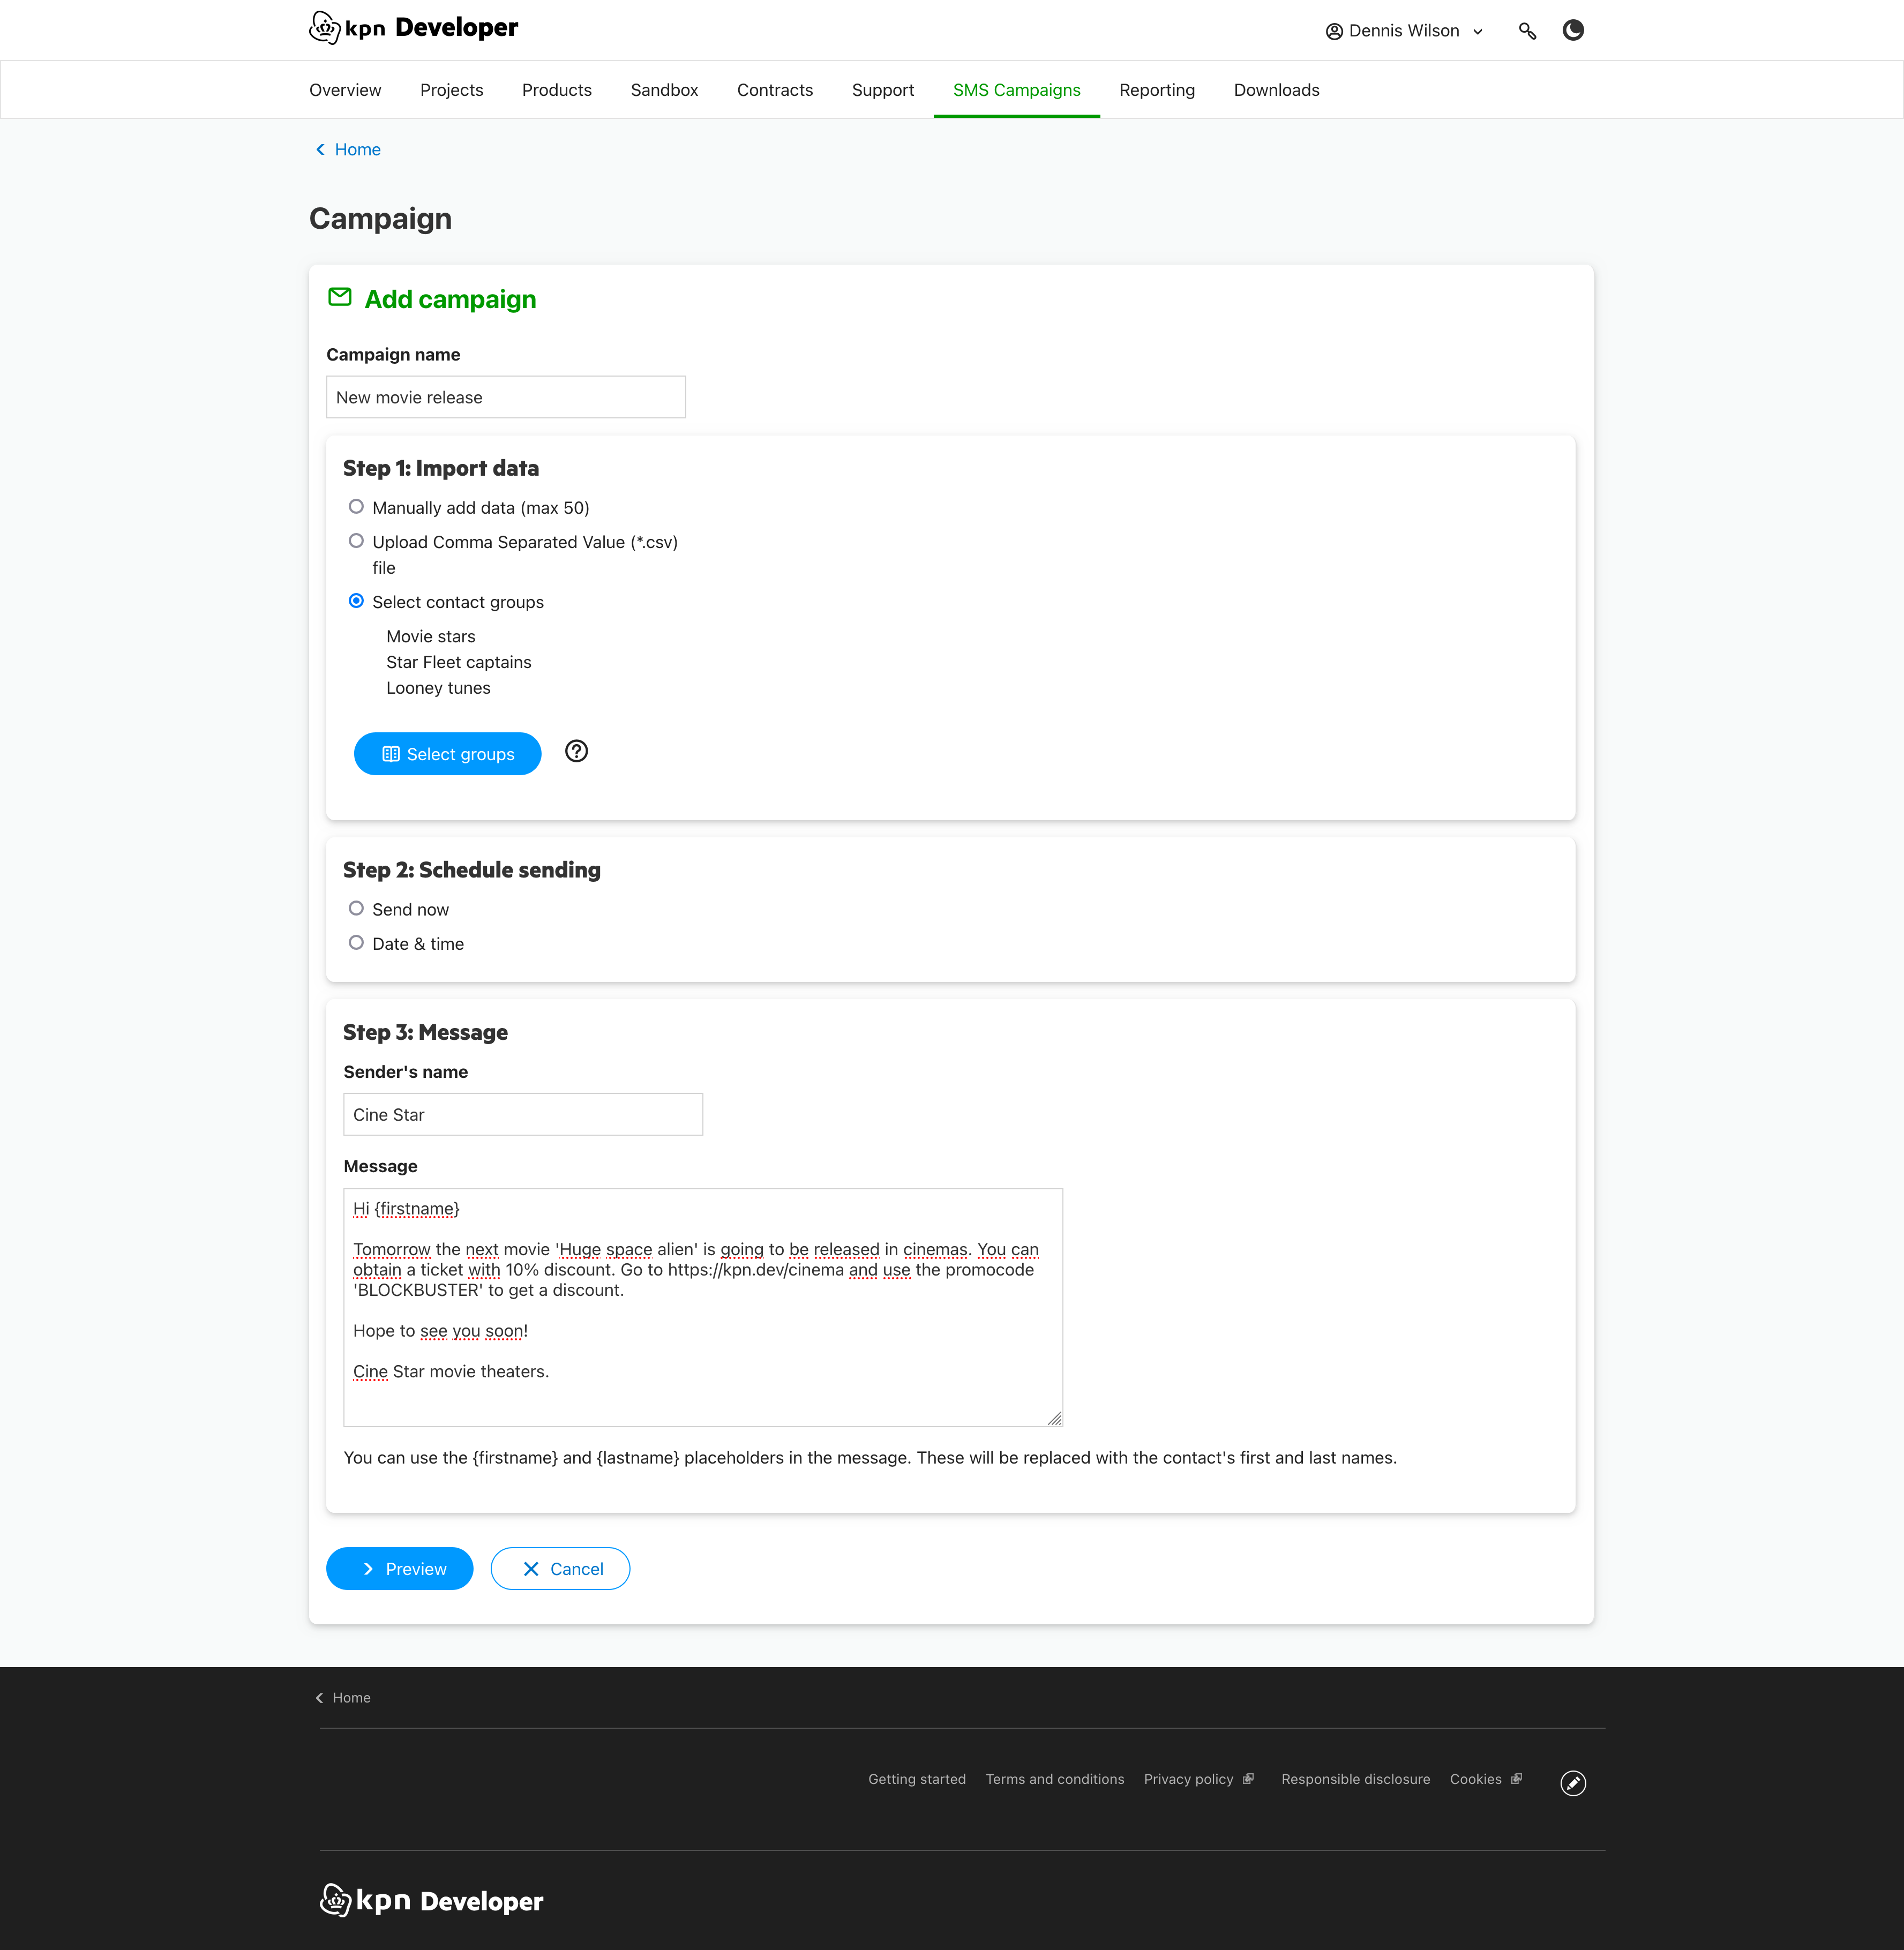
- Choose a scheduling option.
- Change any value in the fields if needed.
- Click 'Preview' to preview your campaign. In the preview you can see the messages that will be send.
- If you want to change some information press the 'Edit' button. If the campaign is ready press the 'Activate' button.